Do you need to juice, and should you be juicing?

With all the hype about green smoothies for fitness, health and detox, you might be wondering: do I need to be drinking green juice or fresh juice too? And, if I only have time for one, which is better: blending or juicing?

All information in this article is for educational purposes only.
It is not for the diagnosis, treatment, prescription or cure of any disease or health condition.

I personally make a green juice for breakfast and a green smoothie for lunch every day and I love them both! But there are some real differences between blending a smoothie in a blender and making a juice in a juicer. Find out how and why below.
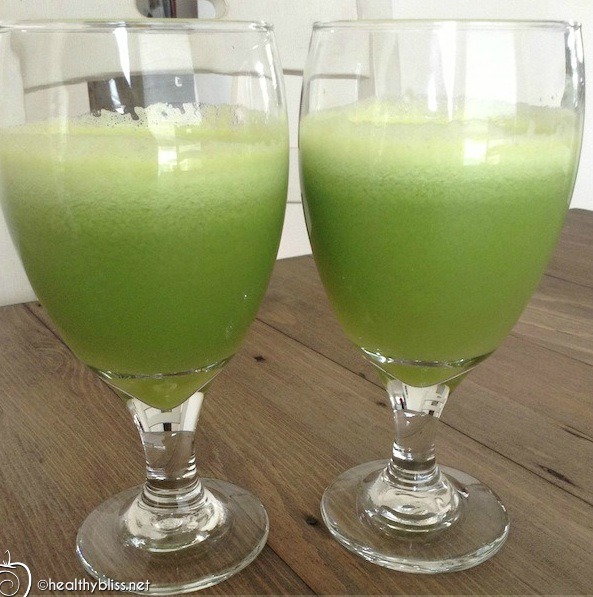
What are the health benefits of drinking fresh juice?

Juicing FAQs

Why is juicing important?

Juicing is important because it gives you the opportunity to high-boost on vitamins and minerals. In one meal, you wouldn’t normally have the capacity to eat ½ bunch celery, 10 carrots, 8 large kale leaves, an entire handful of parsley, 2 apples, a lemon, and a cucumber. Take all of those ingredients, put them in the juicer, and you’ve just ingested all the same nutrients in a few easy sips.

What are the pros/ benefits of juicing? Any cons (to one’s health and otherwise)?

The reality of living a busy lifestyle and not having time to prepare food at home today means that most people are not eating enough fresh fruits and vegetables and are therefore nutritionally deficient. Juicing is a way to combat this, and so that’s definitely a pro. The con is that it takes time to prepare and it’s takes even more time to clean the juicer. Most people don’t own a juicer, so it’s also an added expense to have to buy another appliance. For those reasons, I usually recommend blending smoothies in a blender. In a blender, the fiber remains intact and so you just drink everything. Blending is definitely more practical and easier to continue doing long-term. Any new habit has to be a healthy habit for life.

Who should juice? Why? Who, if anyone, should not?

Just to be clear on terms, juice is made in a juicer. The juicer separates the fiber from the liquid and leaves only a liquid to drink (the juice). If you take those same ingredients and put them in a blender, the fiber will remain intact and you will have a smoothie, which is thicker and more filling than a juice. Traditionally people think of a smoothie having milk or yogurt, but you can easily make a healthy smoothie with fruits, greens and 1 cup of water. You may have heard of ‘Green Smoothies’…well, that’s what it is: fruits and greens blended in a blender. I think everyone should have 1 Green Smoothie per day.

So, who should juice? Anyone who is sick is already nutritionally out of balance and most likely deficient. Ideally they should be high-boosting with nutrient dense foods to try to get the body back into balance, so a daily juice would be great for them. For diabetics, fresh fruit juices are usually too high in sugar and in that case, make only green juices instead, like cucumber, kale, lemon, ginger and parsley.

Take the time to make a green juice – it’s an investment in your health!

Is there a limit to how much juicing one should do? Is there such thing as excessive juicing?

I usually recommend adding fresh leafy greens (like celery greens or boy choy) to any fruit juice just to balance the natural sugars with the greens. People can do 100% juice fasts, ie drinking only freshly made juice, for up to 60 days at a time with no ill effects. For the average person, having 1 fresh juice or smoothie per day is a great addition to their daily diet. Think of getting your vitamins fresh from Mother Earth and not a pill!

Should juicing replace entire meals or be a supplement?

It really depends on the individual, their energy levels and their goals. The average person can have a green smoothie for breakfast as a meal replacement because the fiber in the smoothie keeps them from being hungry and it’s a great way to start the day with fiber, alkalinity and minerals and chlorophyll from the greens. I work one-on-one with my clients to determine the best meal plan for them.

Is juicing the same as detoxing? If so, are the terms interchangeable?

Juicing is not the same as detoxing. One glass of fresh apple, ginger, lemon juice is not going to put you into detox mode (although it will high-boost your mineral and vitamin reserve). The process of detoxification starts when the body has been eating light raw fresh fruits or drinking only fresh juice for at least 36 hours. If you continue drinking only juice at the 36-hour mark, then you are going into ‘detox,’ and that means your body starts using the enzymes it would normally use to digest food and directs the energy inward to internal housekeeping. Think of your organs having extra paperwork and a backlog of work on their desks. Suddenly, no more papers are coming in so everyone has a chance to catch up on their jobs. That’s detox. If you are eating refined sugar, bread, fried foods or drinking coffee and alcohol, you are still adding more work for those organs and no detox will occur.

When and How to Juice

Initially you may enjoy having fresh juice on the weekends when you have more time to prep the ingredients and clean the juicer. You may also find yourself making juice when you’re ill as a natural recovery remedy. On a daily basis, making a green smoothie is faster and easier, and because of that, you’re much more likely to keep doing it every day. This article covers the key points in making juice and what equipment you need. For more information on making fruit smoothies or green smoothies in a blender, go to this link.
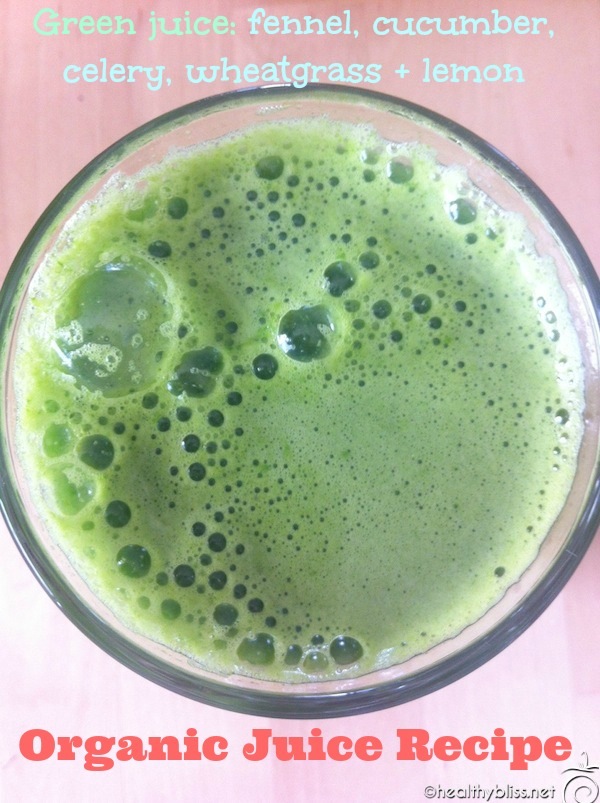
Experiment with different fresh & organic ingredients in your juice

Making juice is more labor intensive and a bigger commitment in terms of time and money for a few reasons:

  • You need a juicer. A juicer is a different appliance than a blender. It’s an added expense if you don’t have one already.
  • You need more ingredients to make one 16-ounce juice than you do for a 16-ounce smoothie.
  • You need to spend more money on the extra ingredients required. It takes time to cut up the extra ingredients too.
  • Cleaning a juicer takes more time than cleaning a blender because a juicer has several parts (unlike a blender that just has a pitcher and a lid).

On average, it may take 6-8 minutes to clean your juicer in addition to 5-6 minutes of prep plus 2-3 minutes of juicing, for a total of at least 17 minutes to make a juice. Compare that to a 5-minute green smoothie and the difference really adds up!

How long does a juice stay fresh?
Without any fiber, juice oxidizes very quickly and that means you need to drink it immediately after making it. If not, the juice will start to go off and in just a few hours, it can go bad. This is a major difference between green smoothies and green juices.

Making a green juice

Besides cutting up some extra ingredients and cleaning a few additional parts of the juicer, it’s really not difficult at all to make a green juice. One thing that is important for green juices is the type of juicer you have. (Note: If you’re interested in juicing your own wheatgrass at home, you need a masticating juicer. The Omega 8004 juicer is a great model for making fresh green juice and wheatgrass juice. Other options include the Champion juicer and the Hurom vertical slow-press juicer.) I explain more on that in my article about Choosing a Juicer.

A green juice is a high-boost of minerals, vitamins and chlorophyll

Green juice recipes are very similar to smoothie recipes with just a few exceptions. The following are ingredients not to use in a juice:

  • Banana, dates, nuts, seeds and avocado – Due to their high density, they don’t really have any liquid to juice.
  • Superfood powders – You can add your favorite superfood powder, ground flaxseed or chia seeds to your glass of juice and stir just before drinking, but you don’t want to add it to the juicer. With powders, there’s nothing to juice!

Fruits and greens with high water content, like cucumber, orange, lemon, apple, pear, pineapple, watermelon and celery are great options for juice ingredients. You can also add carrot, beet, daikon, ginger, fennel or leek. My favorite greens to add to juice are parsley, cilantro, basil, kale, Swiss chard or collard greens. Organic fruits and greens are best, but do the best you can with what you have when starting out. A non-organic juice is still better for you than a frozen dinner or fast-food lunch!

Tip
Save the stems from your large green leaves like kale, spinach, Swiss chard or collard greens after making a green smoothie. Store them wrapped in a plastic bag in the fridge. When you’re ready to make a juice, add the stems to the juicer. That way, the stems don’t go to waste and you’re getting the added nutritional benefit of the minerals, vitamins and antioxidants from them in your juice.

If you're ready for juicing, this is the juicer for you!

If you’re ready for juicing, this is the juicer for you!

For more on how to start a raw food diet, how to do a detox at home or what minerals you may specifically be deficient in, book a private health consult with me via Skype.

How to Book Your Health Coaching Session:

1. Take photos of your eyes with a digital camera.
2. Email the photos to me for approval.
3. We schedule a time to meet via phone or Skype!

More on Colon Cleansing:

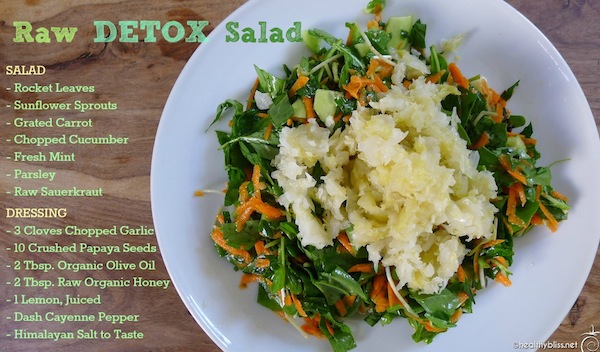
Raw Detox Salad Recipe

Eating raw organic food can be so much fun! Check out this gorgeous salad that took only a few minutes to prepare…and it’s full of detox foods to make it a mini-cleansing meal!

Use the healing power of raw foods to create a fantastic detox salad

For the salad add: Chopped rocket leaves, grated carrot, chopped cucumber, fresh mint, parsley, sunflower seeds and top with homemade raw sauerkraut. If you can’t find rocket leaves, then just use fresh chopped spinach or romaine lettuce.

Make the dressing with: Chopped garlic, crushed papaya seeds, extra virgin olive oil, raw organic honey (optional), fresh lemon, a dash of cayenne pepper and Himalayan salt to taste. The papaya seeds should be fresh, from a ripe papaya. I usually set aside some papaya seeds after eating the papaya. Store the seeds in a small jar in the fridge for up to one week. Use a few seeds each time you make this recipe.

What makes this a DETOX salad?

  • Fresh parsley: Kidney cleanse
  • Cayenne, olive oil & lemon: Liver cleanse
  • Garlic & papaya seeds: Anti-parasitic foods (kills germs)
  • Sauerkraut: Natural probiotic (good bacteria)
  • Rocket & cucumber: Skin cleanse
  • Sunflower seeds: Good for glandular system
  • Raw honey: Immune booster
  • Fiber: Colon cleanse

Let Your Food be Your Medicine…..Wow, it’s really true!

Click here to learn how to make fermented cabbage and raw sauerkraut. In a temperate climate, it takes as little as 4 days!

What is DETOX?

The highly refined foods that you eat every day, including sugar and white flour, make you susceptible to intestinal problems, and possible diseases. The average diet today is heavily loaded with chemical additives, flavorings, coloring agents, toxic pesticides, herbicides, fungicides, and other toxic chemicals which overburden our bodies. Add to that work and family-related stress, indigestion, illnesses, constipation and sedentary lifestyles, and you have a recipe for an unhealthy colon and an overweight and tired body. Many health conditions are caused by the combination of processed foods, low fiber diets and poor evacuation of waste.

Periods of abstinence from solid food – a ritual performed since ancient times – can allow the body to “cleanse and purify” or “detox”, that is, to remove toxins, excess fat and even parasites caused by years of ingesting processed food, excess food, refined sugar and wheat and even fast food that eventually impairs the normal functioning and our body’s elimination.

During fasting, large amounts of these accumulated metabolic wastes and poisons are eliminated through the cleansing ability of all the organs of elimination – the colon, liver, kidneys, lungs and skin.

Eating more detox foods in your regular diet is a way to have a “mini-cleanse” on a regular basis and that helps the elimination organs keep us with their daily housework. Eat a detox salad for lunch instead of pizza or Chinese food and you will have better digestion, less headaches or insomnia, improve your skin and increase energy levels, simply by choosing better fuel for your body. A raw food diet is a detox on its own. You can continue for 1, 3 or 7 days on a 100% low fat raw food diet as a way to really give the body a good natural cleanse from the inside-out.

For more on how to start a raw food diet, how to do a detox at home or what minerals you may specifically be deficient in, book a private health consult with me via Skype.

How to Book Your Health Coaching Session:

1. Take photos of your eyes with a digital camera.
2. Email the photos to me for approval.
3. We schedule a time to meet!

More on Raw Food:

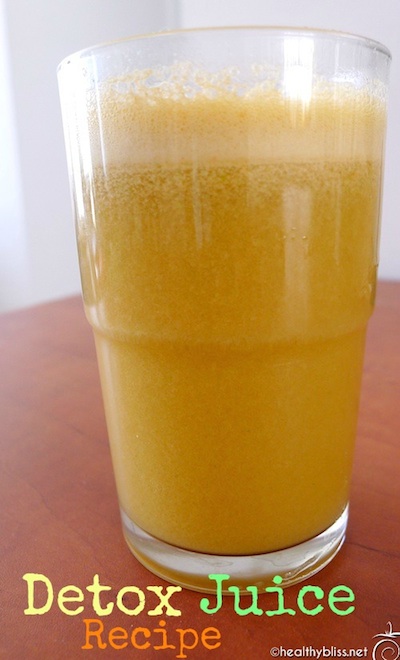
Detox Juice Recipe

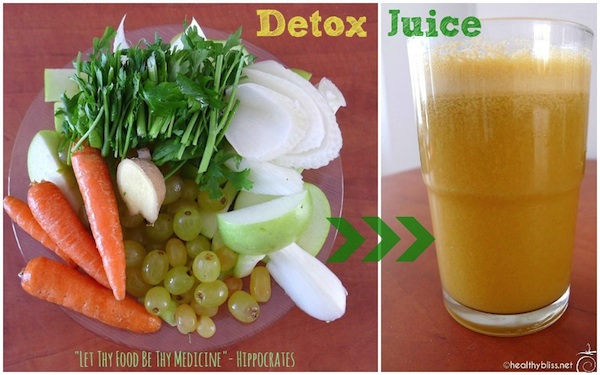
When’s the last time you made a delicious detox juice at home? Yes, it’s time to pull out that juicer and start using it! Each ingredient in this recipe is full of phytonutrients, and that means more health benefits for the body.

All information in this article is for educational purposes only.
It is not for the diagnosis, treatment, prescription or cure of any disease or health condition.

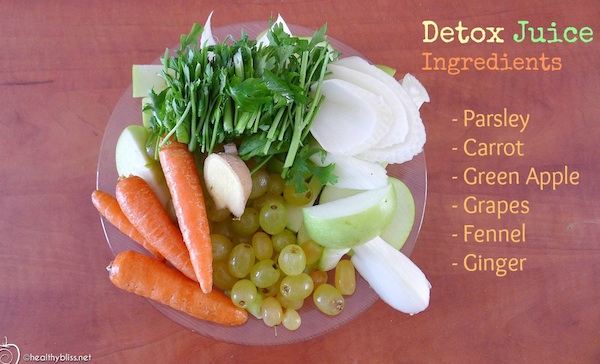
Place All Ingredients in a Juicer for a Healthy Detox Drink!

Apples and carrot help to detox the liver. Carrots are also high in beta-carotene, a powerful antioxidant. Grapes have been found to have strong anti-cancer properties due to the anti-inflammatory effect of resveratrol. Ginger is a natural anti-inflammatory food and helps strengthen digestion. Parsley helps to cleanse the kidneys and contains folic acid and chlorophyll which can help to regulate blood pressure. The most powerful detox ingredient in this juice is fennel, a simply amazing detox food. Fennel helps to cleanse the colon; it relieves constipation; it’s great for the immune system with its natural anti-parasitic, anti-fungal and anti-viral properties and it’s particularly known to be very alkaline-forming and that means excellent for an alkaline diet and as a natural antacid remedy. When the body heals from the inside-out, the skin clears naturally too! If at all possible, choose organic for your juice ingredients.

A Juice has NO fiber and in made in a Juicer.

What’s the difference between a juicer and a blender? A juicer separates the fiber from the liquid, and you drink only the juice. A blender blends all ingredients together and you drink the fiber and the liquid, called a “smoothie.” This recipe is for a juice, but if you don’t have a juicer, you can certainly mix all the ingredients in a blender and make a nice detox Green Smoothie too! Juice is easy to digest and absorb and is particularly good to high-boost your mineral, vitamin and micro-nutrient reserve.

How To Make a Detox Juice

Place all Ingredients in a Juicer and Juice. Makes 1 Serving.
Detox Juice Recipe:

– 2 Green Apples
– 4 Small Carrots OR 1 Large Carrot
– 2 Cups of Grapes
– 1/2 inch slice of Fresh Ginger
– 1 Handful of Fresh Parsley
– 1 Cup of Fresh Chopped Fennel

Drink Immediately. You can also add 1-2 Tbsp. of Raw Apple Cider Vinegar, stir well and drink.

Use Variety in Your Juices. Make Different Variations!

This is a great juice recipe, all vegan, vegetarian and of course a raw food, but it complements any diet. You can make variations of this recipe by using cucumber instead of carrot or celery instead of apple or kale instead of parsley. Don’t be afraid to try different combinations! More fresh juice packed with fruits and vegetables is always a good thing!

Drink once a day or 3-4 times per week for preventative maintenance. Add to your juice fasting routine. Share with any family and friends who are sick to help them recover more quickly. As Hippocrates (the Father of Modern Medicine) said, “Let Your Food be Thy Medicine and Thy Medicine be Thy Food.”

If you're ready for juicing, this is the juicer for you!

If you’re ready for juicing, this is the juicer for you!

More on Juicing and Smoothies:

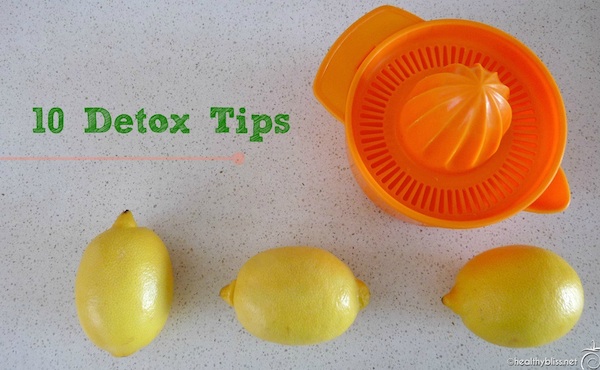
10 Detox Tips

In the same way you spring clean your house and schedule maintenance service on your car, you should also make the time to do regular detox for the promotion of health and prevention of dis-ease. Whether you go away to a tropical paradise for your next detox holiday or simply try an at-home detox program, you should be make a plan to do at least one 7-day detox per year. It’s even better to do a colon cleanse program every 6 months. When you’re clean inside, all of your organs work better. That means more energy, clearer skin, better sleep, improved digestion, balanced weight and a boosted immune system to keep you healthy all year long.

All information in this article is for educational purposes only.
It is not for the diagnosis, treatment, prescription or cure of any disease or health condition.

Clean Your Body, Clean Your Mind, Clean Your Soul!

Imagine giving your body the gift of a cleanse and creating time for a much needed rest, both physically, mentally, and emotionally. As an Iridologist and Nutritionist, I have become increasingly aware that the toxic overload on all of these levels contributes to many health issues. The following detox guidelines will help you get the most out of whatever cleansing program you do, and many of these tips can be done on a regular basis to keep you feeling balanced long after your cleanse.

10 Detox Tips

1. Drink Lemon in Water Upon Rising.

When you wake up in the morning, juice 1 lemon into 2 full 8-oz. glasses of water and drink both glasses immediately. This is a great way to hydrate your body, a natural form of detox, and also creates an alkaline pH in your body. Lemon stimulates digestion, getting the digestive enzymes in the stomach active and ready for proper absorption and assimilation of food. You can switch out the lemon occasionally and drink 2 Tbsp. of raw apple cider vinegar in water upon rising too.

2. Try some Cold Water Therapy!

At the end of your hot shower, turn the water to cold for just 60 seconds. This is a natural way to stimulate circulation and is great for the immune system. It also tightens the skin and gets you feeling energized for the day.

3. Stretch and Move.

Stretching the body helps to strengthen and detox the lymphatic system. Especially if you are used to sitting all day, be sure to take a break every few hours and move! You can also practice dry skin brushing to clean the lymphatic system. Or, better yet, treat yourself to an occasional lymphatic drainage massage.

4. Drink Herbal Teas.

Use the healing power of Mother Nature by drinking more fresh herbal teas (with no sugar or dairy of course!). Try fresh mint tea for digestion; sage tea for clear mental thinking; parsley tea to strengthen the kidneys; red raspberry tea for female fertility; hawthorne berry tea for heart health and blood circulation; and fennel tea as a natural anti-parasitic remedy.

5. Enjoy an Epsom Salt Bath.

Add 3-4 cups of Epsom Salt (Magnesium Sulfate) to a bath. It’s a great way to absorb magnesium directly through the skin, also known as “transdermal magnesium therapy.” This helps the muscles relax and is excellent for improving blood circulation and kidney function and also for reducing stress. You can add a few drops of pure organic lavender or grapefruit essential oil to your bath to get a nice essential oil infusion. If you don’t have a bathtub, simply make a foot bath and soak your feet in the Epsom Salts for about 30 minutes.

6. Take a Media Detox.

Let your brain have a break from the daily negative and toxic information over-load. Avoid any emotionally disturbing information the news, Internet, magazines, television, movies, newspaper or radio. When your mind feels calm and rested, your body can go deeper into the physical process of detoxification.

7. Get in Tune with Nature.

Get outside, breathe fresh air, enjoy a sunrise or sunset, listen to the sound of the ocean waves, take solace in the beauty of the forest and reconnect yourself with nature. Our bodies are organic beings and we have to recalibrate ourselves to natural environments to feel more natural, whole and pure.

8. Detox Your Home.

At the same time you detox your body, make time to also clean and purge old items from your home. Give away things you don’t use, organize your belongings and simplify your living space. Letting go of the old creates a lot of space for new healthy habits and new goals. And that’s a great form of detox!

9. Enjoy a Daily Liver Flush.

You can add a healing boost to your detox routine by drinking 1 Liver Flush Drink per day. You can even do this as a separate detox after your 7-day cleanse by having 1 Liver Flush every day for 30 days. The liver is your “grand filter” in your body; it filters everything you drink, eat and breathe. When you clean the liver, your entire system runs more efficiently.

10. Drink More Water.

One of the biggest mistakes that people make is that they don’t drink enough water, and especially during a detox, the importance of water is not to be under-estimated! Your urine should be clear and copious (by “clear” I mean not cloudy). If your urine is dark or cloudy, you are already dehydrated. Water helps your kidneys flush out excess toxins and acid waste.

Taking the time to detox the body on a regular basis is a great way to invest in your health and well-being. Whether you choose a raw food cleanse, a juice feast, a Green Smoothie detox, a water fast or a colon cleanse, you are giving all of the elimination organs a chance to catch up on internal work and that’s a good thing! The cleaner your are inside, the better you feel…and the better you look too!

For more personalize detox advice, see me for a private consultation via Skype or phone. We will optimize your detox program to get the best results in the shortest period time, truly a “fast-track” to health.

More on Skin Cleansing:
Top 10 Tips for the Best Healthy Sunscreen

For many people, the summer months are a time to be outside, enjoying the beach or nature…and also the sun! But, what do you do to protect yourself from sunburn or sun damage? What can be used as a healthy sunblock? Is there such thing as a chemical-free or organic sunscreen?

All information in this article is for educational purposes only.
It is not for the diagnosis, treatment, prescription or cure of any disease or health condition.

Staying healthy in the sun!

Danger of Homemade Sunscreen Recipes

First of all, it’s important to be clear that homemade sunscreens are NOT a healthy alternative. I’ve seen many “mommy-and-me”-type blogs posting recipes for making sun creams at home, and there is definitely a lack of knowledge regarding the safety of ingredients. Why? Because the main ingredient is titanium dioxide, a known carcinogen! That’s right, a proven cancer-causing ingredient is right in the middle of that “made-with-love” sunscreen recipe!

It is true that there is some debate on the level of carcinogenic risk there is with titanium dioxide, with some people saying that ii is a safe ingredient when 99% pure and can only cause health risks when in a nano particle form. But do you want to take part in the human experiment? I don’t! And I certainly don’t want to make my own recipe where I could potentially use too much or use a version which hasn’t been tested for purity.

Zinc Oxide, another popular ingredient in homemade sunscreen recipes, has been found to have potential evidence of reproductive toxicity according to the Environmental Working Group investigation of sunscreens and other sun-blocking products. So, be sure to avoid any recipes containing this suspect ingredient as well.

How to Protect Yourself from the Sun

As someone who has lived on the beach for the last 12 years, I’ve spent a lot of time in the sun (mainly in Australia, USA, Thailand and Israel).

Here are my top ways to spend time enjoying the sun safely.

What to Use for the Best Healthy Sunscreen:

1.Wear a hat. It’s just that easy. Find one that is comfortable so you actually wear it.

2. Limit your time in direct sun, and avoid the hours between 10am – 2pm. I can usually spend between 60 – 90 minutes in the sun without sunscreen and without burning, but that’s after I have a base tan. Build your time exposer slowly. No need to fry yourself to a crisp!

3. Move to the shade. You can still enjoy many hours on the beach under an umbrella or in the shade of a tree. This is Mother Nature’s natural organic sun protection!

4. Wear a rash guard shirt in the sea. This is especially a good option for kids. Many surfing shirts actually have a high sun protection factor in the material of the shirt.

5. Have a sarong and/or long-sleeve light-weight cotton shirt to cover-up if necessary. When you feel yourself burning, it’s time to cover the skin!

6.Add chlorophyll to your diet. Why don’t plants and trees get sunburn or leaf cancer, especially when there are exposed to sun all day every day? Because the chlorophyll in leaves protects them from getting burned, and it can help protect you too! A daily Green Smoothie is the best way to start your day before you hit the beach!

7. If necessary, buy children’s sunblock  or sunscreens. The child and/or baby formulas will have the least amount of toxic chemicals. When I know I’ll be out for more than 90 minutes, I apply a baby sunscreen to my nose and shoulders. A small amount is going to be much better for you than a full body immersion.

8. Check the labels and choose a brand with the least amount of titanium dioxide. I recently looked at some popular sunscreen brands, and I saw one expensive bottle contained 38% titanium dioxide in nano particles! Another brand contained only 12%. Can you see how you can still make a better choice, even if you still choose to use a traditional chemical formula?

9. Do not  choose anything above Factor 30. When you increase the sunscreen factor, you also
increase the toxic chemicals in the ingredients. By choosing a Factor 30 sunscreen and limiting your time in the sun, you will be making a healthier choice  for you and your family.

10. Be sure to shower after you finish your fun inthe sun. This sounds like common sense, but if you choose to put a chemical on your skin, you need to wash it off, hopefully with a sodium laureth sulfate (SLS)-free soap and only some organic coconut oil to hydrate your skin after.

Stay protected. Your skin will look better & younger, longer!

(Note: Coconut oil is NOT a safe option for sunscreen…I’ve seen many tourists getting fried to a red and blistered crisp in Thailand trying this, and it doesn’t work.)

Limiting your time and moving to the shade is the best alternative. A diet high in antioxidants will minimize any free-radical damage to the skin and will also limit the amount of “burn” to the skin. It’s certainly true that with a high raw food diet, I don’t ever seem to burn anymore, even after spending longer amounts of time in the sun. But I’m still careful not to overdo it.

More on Lymphatic Detox/Cleansing:

Dry Skin Brushing to Detox Lymphatic & Reduce Cellulite Naturally!

The lymphatic system is a cirulatory system in the body. It’s cleaning cells and dumping toxins into the blood all the time to keep the body clean. But, unlike the blood, the lymphatic system has no pump. If you don’t move, the lymph doesn’t move. It waits for movement to ‘surf’ from the contraction of muscles. So, in order to keep the lymph moving and clean, you have to move!

All information in this article is for educational purposes only.
It is not for the diagnosis, treatment, prescription or cure of any disease or health condition.

Practice Daily Dry Skin Brushing to Detox the Lymphatic System

According to David Wolfe in The Sunfood Diet Success System, “The average person has 1.2 gallons (4.5 litres) of blood. But each person has four times as much lymph fluid as blood. Clean and light foods allow the blood to become clean and light, which in turn allows the lymph to become clean and light. Cooked fats are thick, heavy and have a deranged structure. They clog the blood, arteries and lymphatic system.”

The lymphatic fluid rests just below the skin; if it is toxic or sluggish (from processed foods, smoking, chemical body products, lack of exercise), the skin simply won’t look good. A healthy glow comes from the inside out.

If the lymphatic system becomes sluggish, it will try to ‘off-gas’ through the skin. If someone is wearing nylon or polyester clothes or putting chemical creams on their skin, there is nowhere for those toxins to go (imagine wrapping yourself in plastic wrap). So those toxins get re-absorbed. That’s creates a back-log of internal work. This is where a detox can be a good idea to give all the organs a chance to catch up.

How to Clean Lymphatic System

Exercise is the best for lymphatic. Many people who sit all day long develop a sluggish lymphatic system simply because they do not move! Lymph likes gentle exercise, like walking, stretching, swimming or yoga. Go for a walk during lunch, stretch throughout the day and develop a regular exercise routine. Drink plenty of water to keep the lymphatic cells hydrated. Choose a natural deodorant with no added aluminum. Avoid foods with chemical coloring, flavoring, sugar replacements and preseratives which all add more internal housework to the body. Dry skin brushing and wearing natural fiber clothes also allows the skin and lymph to breathe.

Always brush towards to heart to stimulate circulation

How to Practice Daily Dry Skin Brushing To Detox Lymph

Dry skin brushing means to brush the skin when it’s dry. Brushing the skin in the shower is wet skin brushing. Using a loofa in the shower will not give the same effect because once the skin cells are wet, you’re essentially pushing all the dead skin cells around over the surface of your skin. Dry skin brushing adds just the right amount of pressure to move the lymph while at the same time flaking any dead skin cells off of the skin. Many people will say that the skin actually becomes more clean from dry skin brushing than from taking a shower!

You only need 5-7 minutes a day to do your dry skin brushing. The best time is just before you get in the shower in the morning. Brushing the lymph will stimulate circulation and this can also make you feel more awake and alert for the day. You can also do your dry skin brushing later in the day or in the evening too, whatever works best for your schedule. I prefer morning because not only does it get the circulation moving first thing in the morning which is great, but it also gets me into the habit of doing it every day.

Always use a natural bristle brush. Nylon brushes will scratch the skin. A natural bristle brush can be found in any health food store. Most will also come with a handle for brushing the skin on the back.

Brush the skin with a reasonable amount of pressure, but not too strong. Start at the feet using short to medium strokes and always brush towards the heart. You can brush your arms, torso, back and chest but avoid sensitive areas like the breasts and face.

Daily Dry Skin Brushing To Reduce Cellulite

Now, the keyword here is daily! If you practice dry skin brushing on a daily basis, you can start to break up the toxins that have settled into the fat cells creating those unwanted pockets of cellulite. If you practice this daily for a minimum of 3 months, you can start to see results.

Clean Diet for Clean Blood and Clean Lymph

Remember, your body is ‘a community’ of organs. A natural whole and pure diet is always best. Everything you eat affects the entire body, including the lymph. If you choose to eat a lot of animal-based fats, fried foods or processed foods, you will still be creating a daily burden of internal toxicity giving all of the organs more work to do. Combining a healthy diet with healthy practices like dry skin brushing will give you the best results for a beautiful, healthy energetic you!

More on Skin Cleansing:

Healing Power of Onions: Can Onions absorb Bacteria, Viruses and Flu?

The Almighty Onion…is she more powerful than we previously thought? This is an interesting topic that I discovered online several times in various forms, all relating to the theory that if you put an onion in the room of a person who is sick, the onion will ‘absorb’ the illness, and sometimes in just a few hours, the person is better. It seemed unbelievable, but I thought to myself, “Remember that one Jennifer, and if you ever need it, you have nothing to lose by giving the onion theory a try.”

All information in this article is for educational purposes only. 
It is not for the diagnosis, treatment, prescription or cure of any disease or health condition. 

Cut an onion in half to absorb bad smells & even ‘pull’ viruses/sickness from the air

A few points to note on Onion Healing:

This is not a new idea. Onions were used by certain individuals in Europe to successfully fight off the plague in the early 1900’s. Ayurvedic medicine has been using an onion poultice for the chest or feet to cure coughs, fevers and flus for centuries. They also use the onion poultice to reduce pain and inflammation in the joints. Homeopathic doctors also use the healing power of onions to heal from viruses and illness. I even know people in the North American Hutterite community, a pacifist community similar to the Amish whose traditions date back to the 16th century, who tell me it is common practice to place onions in their homes during winter flu season and to use cut onions in the room of an ill person to relieve their symptoms quickly and naturally.

It is said that white onions work better than red onions. Yellow onions would be an acceptable alternative, but white onions, with the latin name Allium Cepa, work best.

The onions need to be peeled if left around the home as a preventive measure against flu and viruses. Many people do this during flu season and find that no one gets sick, whereas in previous years with no onions, they had several members of the family fall ill. If placed around the home for prevention, the onions should be replaced every 3 months.

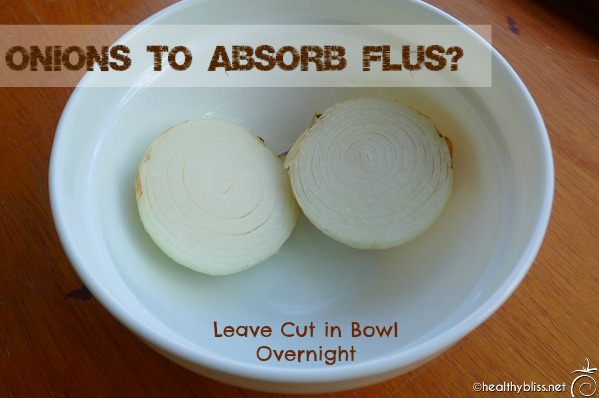
If someone falls ill with a cough, flu, cold or fever, immediately place a peeled white onion cut in half in a bowl in their room. The onion needs to be cut in half in order to expose the most amount of ‘healing power’ from its pungent odor.

Cut onions can also be used to eliminate mold smells in a closet, drawer or room.

It’s best not to leave a cut onion open in the fridge (to eat later) because as soon as an onion is cut, it will start to absorb bacteria, etc. So, if you cut an onion for a salad, either use the whole thing or put the other half in your garage or basement to absorb bad smells! Once the onion is in a salad in a sealed container, it is safe and can be eaten at a later time.

Perhaps the most interesting onion remedy is the Sock Onion. This is a ‘modern-day’ version of the Ayurvedic poultice, and involves cutting the white onion in half and placing one half on the bottom of each foot so that the cut onion is against the skin. Place a sock on top of the onion so it stays secure in place and leave the ‘Onion Sock’ on overnight. This is especially good for flus and fevers. One of my twitter followers recently shared her success with the Sock Onion:

The Mighty Healing Power of Onions!

Health Benefits of Onions

Onions are rich in sulfur-containing compounds that are responsible for their strong odor. Sulfur is a powerful detox element and helps the body to release toxins, especially for the liver. Foods naturally high in sulfur also help the body to detox from heavy metals like lead, arsenic and cadmium.

The onion is the richest dietary source of quercitin, a powerful antioxidant flavonoid that has been shown to thin the blood, lower cholesterol, ward off blood clots, and fight asthma, chronic bronchitis, hay fever, diabetes, atherosclerosis and infections and is even linked to inhibiting certain types of cancer.

Onions are also naturally anti-inflammatory, antibiotic and antiviral. That, of course, is when you eat them!

Onions to Heal: First to Remove Odors

Fast-forward to me being in Vilcabamba, Ecuador where I’m here renting a house for 2 months to do an extended water fast. In the first few days in the house, we noticed a very bad septic smell coming from both toilets which never got better, no matter how many times we flushed or cleaned the toilets. After we started the water fast and became more sensitive to smell, I thought to myself, What can we do which is completely natural and will still take this smell away? Then I remembered everything I read about the Almighty Onion!

That night, we sliced 2 white onions in half, placed 1 onion in each of 2 bowls and put one bowl in each bathroom overnight. The onion smell at first was very strong, but that is actually a great smell when you are water fasting (we dreamed of tomato gazpacho with onions!). The next morning, to our complete amazement, there was no more onion smell, and guess what? There was no more septic smell either!!!

Onions to Heal: Taking the Onion Sock Test

I became so excited with this discovery that I wanted to try to Onion Sock theory. Luckily, we still had 1 onion left in the house, so the very next night, we cut the onion into 4 lateral thick slices (each slice about 1/2″ thick). I use 2 slices on my my feet and gave the remaining 2 to my boyfriend who willing put them on his feet. (Yes, he is a willing participant in all of this stuff including the water fast because, one, he is very open to try new things and he trusts my skills and experience, and two, because he lost his mom to cancer 8 years ago and knows that clean diet, clean body and clean mind are the keys to good health).

Now, the interesting part of this story is that we were on Day 5 of a water fast when we tried the Onion Socks. Mainly, I wanted to see if the onion could be used as a tool to amplify the detox effects. Especially with the body being so clean, the fumes from the onion could theoretically be absorbed through the skin and pass through the body more quickly, and perhaps eliminate internal bad bacteria or even parasites.

With Onion Socks on, we waited anxiously to see what would happen. Note that both of us were feeling good all day and I felt great when we placed the onions on our feet. My boyfriend was feeling pretty tired and weak after his evening enema but had felt really good earlier in the day.

Praise for the Onion!

Praise for the Onion!

Results of the Onion Sock Experiment

After about 30 minutes with the Onion Socks on, I started to feel distinct quivers in my calves and a twitch on my left side at the rib cage. 20 minutes later, I started feeling heartburn! That was amazing. I have not had any acid reflux at all during this water fast (although is was an issue during my last water fast, all of which I explain in my ebook: Water Fasting Guide & 40-Day Journal). Shortly after that, I started to feel hot in the head. In another 10 minutes, my eyes started to tear as if I had just cut an onion, although a much milder sensation but clearly a distinct tearing.

5 minutes after that, my boyfriend told me he had the taste of onion in his mouth!

So clearly, something was happening, even if it was only onion fumes passing through our bodies and nothing else.

The next morning, we compared notes about how we felt. My boyfriend had a terrible night and barely slept and felt that the onion fumes had upset his intestinal worms (which we are sure he has and are hoping the water fast will eliminate). I felt tired and weak, the first day for me to feel that way, but I did feel better. I don’t think it was the placebo effect as I am very open to trying something and saying it doesn’t work.

And the real reason why I think it worked is because 90% of my hay fever and allergy symptoms disappeared overnight!! That is the best part of this story so far. Ever since we arrived to Vilcabama, I have been sneezing like crazy, scratching my nose all the time with excessive mucous coming out of my nose almost constantly. Well, they say that raw foodists don’t have allergies so I could not understand what was going on and I was hoping that the water fast would help. But, we went through Day 1-4 with absolutely no change and no relief, still sneezing up to 50 times a day easily. Well, after the Onion Socks, I did not have any mucous, and I went through the whole day with no itchy eyes and no itchy nose and I think I sneezed only 2 times the entire day!! Now, that is no placebo effect! Anyone who suffers from allergies can appreciate how wonderful the sense of relief is, and to find a natural ‘cure’ and experience allergy relief from 1/2 of an onion?! Wow!!

Today we went out and bought 10 more onions and we are going to continue with the Onion Socks intermittently during our water fast. I’ll update later with more results. Meanwhile, consider trying this yourself at home. I mean, what do you have to lose except for the cost of a few onions? In my opinion, it’s a safe and effective method with nothing to lose and a lot to possibly gain.

UPDATE: I did the Onion Sock again the next night, and that was it. One month later, eating again, and all sign of hayfever are still gone! I recommended this to a Natural Hygiene Raw Foodist in Vilcabamba who was also having hay fever allergies, and he had noticeable reduction of symptoms after 24 hours.

This article is not meant to diagnose any disease. For any serious medical concerns, always consult with your doctor.

Read more information on the liver and liver cleansing here:

Liver Flush Detox Drink – Recipe for a Daily Liver Cleanse

Gallstone Liver Flush – Recipe & Cleanse Info

How to Do a Coffee Enema at Home

How to Do a Castor Oil Pack for Liver Cleansing


How to Eat Clean: Start with Green Smoothies!

Green Smoothie for DummiesCheck out my book Green Smoothies for Dummies – I’ve got loads of recipes using dark leafy greens and many delicious combos without any chemical additives, flavorings or refined sugar. It’s so easy!

Clean your body from the inside out and watch your skin improve, your hair and nails get stronger, your eyes look brighter and your waistline slim down….all naturally and effortlessly! It’s simply amazing and your only regret will be that you didn’t start drinking green smoothies sooner.

When you take care of your whole body, you get whole body health.

When you let your food be your medicine, you are always moving towards better health.

Find the book Green Smoothies for Dummies on iTunes or amazon.com!


For more on how to achieve your health goals and actually start feeling great, book a private health consult with me via Skype.

How to Book Your Health & Nutritional Coaching Session:

1. Take photos of your eyes with a smart phone or digital camera.
2. Email the photos to me for approval for Iridology Analysis.
3. We schedule a time to meet via phone or Skype!


More on pH health:

More on Healing Crisis:

More on anti-Aging:

SaveSave

Top 5 Tips on How to Recover from Jet Lag & Travel

So you’ve booked the ticket, researched hotels, checked out internet options and chosen a few local sites to see, but have you made a conscious plan to stay healthy while on the road? It is possible to stay healthy while traveling. The first obstacle to overcome is jet lag.

Be gentle with the body during travel and you can minimize the effects of Jet Lag naturally.

All information in this article is for educational purposes only.
It is not for the diagnosis, treatment, prescription or cure of any disease or health condition.

Use your raw food/detox knowledge to travel healthier!

Frequent flyers know how hard it can be to adjust to local times after a long flight. The body is sensitive to the earth’s magnetic pull.

As Dr. Gabriel Cousins says, ‘Moving through time zones and magnetic lines causes a cellular confusion that manifests as the body’s homeostasis begins to shift into the new time frame and rhythm.’

That ‘cellular confusion’ is what makes you feel Jet Lag.

Top 5 Tips on How to Recover from Jet Lag

1. Avoid all alcohol the day before and during flights.

Reducing the amount of toxins and free radicals in the body will automatically help. If you have the tendency to feel stressed or fearful while on airplanes, opt for option #4 instead of having an alcoholic drink. Alcohol is a also diarrhetic, which means you will become even more dehydrated after traveling at high altitude on a dry plane. Your skin and kidneys don’t need that!

2. Fast on herbal teas or eat only fresh fruit on your journey.

Bring your own dried herbal teas and ask for hot water during the flight. Carry a few oranges or other fresh fruits to enjoy. Opening an orange mid-flight is a great natural way to freshen up the stale plane air as well! (You are permitted to take fresh fruit on a plane as long as you eat it before your destination. I’ve taken fruit on every flight from nearly every airline to many countries, and I’ve never been refused!) Fasting is the perfect way to recharge and renew on a cellular level, so can you see how it would help with Jet Lag? Makes sense!

3. Avoid all airplane food!

Airplane food is processed food, full of salt, chemical additives and colorings and preserved to still look fresh by the time it gets to your seat. Even if it is a lacto-ovo vegan meal, it is not a healthy meal. Airplane food can make you feel bloated, tired, constipated and sick on it’s own – not a good thing to add to time zone stress! If you have felt puffy or bloated after long flights in the past, it could have been the food. Food additives, salt and hidden sugars in food can create inflammation. These are especially important to avoid while traveling on airplanes through several time zones.

4. Try Kava Kava capsules for sleeping or relaxing on long flights.

Kava is native to the Pacific Islands and has natural relaxing qualities as well as mood-elevating and pain-relieving effects. Take 3-4 capsules when you get on board and sit back for a healthy, relaxing flight! My suggestion to use Kava is for a long-flight to help relieve tension and promote natural relaxation while traveling. Taking 3-4 capsules is perfectly safe and is a natural, non-dedyhrating, non-free-radical forming solution for the body. (With regards to some people’s worry that Kava is harmful to the liver; please note that Kava is not meant to be taken for more than 30 days continually because it can be habit-forming. That said, so can alcohol….but no one seems to worry about that!!)

5. Eat only fresh raw fruits for the first day upon arrival.

Fresh fruit: hydrating and full of vitamins & anti-oxidants

Eat fruits such as apple, pineapple, mango, pear or papaya. Add berries for more anti-oxidants to help reduce free-radical damage from low-oxygen airplane air. Eating raw food for one day is a gentle, easy cleanse and a great way to get your colon re-adjusted to the new time zone as well! (Dried fruits are dehydrated and the body will already be dehydrated after a long flight, so especially for the first day, fresh is best.)

Your travels can actually become a new avenue to discover more about raw food, natural healing and healthy living!

More on Healthy Travel:

How to Clean the Lymphatic System & Detox the Skin in 5 Simple Steps

Clean skin from the inside out

All information in this article is for educational purposes only.
It is not for the diagnosis, treatment, prescription or cure of any disease or health condition.

The skin is an organ, and in fact it is the largest organ in the entire body. It is also an eliminative organ, meaning it assists the body in detoxification by pushing out toxins directly through the cells and membrane of the skin. If you do not have a natural, healthy glow, it means that your body inside is overloaded with toxins. Nothing that you try on the outside will give you long-term positive results as long as you continue to hold on to too much toxicity inside.

How does the lymph system affect healthy, clear skin and sparkling eyes?

The lymphatic fluid rests just below the skin; if it is toxic or sluggish (from processed foods, smoking, chemical body products, lack of exercise), the skin simply won’t look good. A healthy glow comes from the inside out. Even the fluid in the eyes is lymphatic fluid. The cleaner your are inside, the brighter and clearer your eyes will be – truly a window to your health!

What happens to the skin when lymphatic drainage becomes sluggish?

If the lymphatic system becomes sluggish, it will try to ‘off-gas’ through the skin. If someone is wearing nylon or ployester clothes or putting chemical creams on their skin, there is nowhere for those toxins to go (imagine wrapping yourself in plastic wrap). So those toxins get re-absorbed. That’s creates a back-log of internal work. This is where a detox can be a good idea to give all the organs a chance to catch up. From there, living a cleaner lifestyle, with natural foods, natural clothes, regular exercise and only natural chemical-free products on the skin (especially deodorant) keeps the lymph and skin happy.

What foods for improve or stimulate the function of the lymphatic system?

Remember, your body is ‘a community’ of organs. A natural whole and pure diet is always best. A simple rule for the skin is this: if you can’t eat it, it shouldn’t be put on the skin. If you have to use something, go for the baby product line (for sunblock or laundry detergent). They will always have less chemicals. A simple rule for lymph is this: Keep the lymph moving with movement (exercise). Drink plenty of water. Avoid foods with chemical coloring, flavoring, sugar replacements and preseratives which all add more internal housework to the body.

What lifestyle habits improve the function of natural lymphatic drainage?

Stretch, walk or swim to help clean the lymph

The lymphatic system is a cirulatory system in the body. It’s cleaning cells and dumping toxins into the blood all the time to keep the body clean. But, unlike the blood, the lymphatic system has no pump. If you don’t move, the lymph doesn’t move. It waits for movement to ‘surf’ from the contraction of muscles. So, in order to keep the lymph moving and clean, you have to move! Exercise is the best for lymphatic. Many people who sit all day long develop a sluggish lymphatic system simply because they do not move! Lymph like gentle exercise, like walking, stretching, swimming or yoga. Go for a walk during lunch, stretch throughout the day and develop a regular exercise routine. Dry skin brushing and wearing natural fiber clothes also allows the skin and lymph to breathe.

To keep your skin clean, you’ve gotta have a clean lymphatic system. You cannot get clear skin from the outside in; it has to happen from the inside out. Every organ in the body affects every other organ in the body. Treat your body as a whole and you will long-term results that last.

5 Steps to Keep your Lymphatic System & Skin Clean:

1. Avoid nylon and polyester clothes.

Opt for all natural fibers that allow the skin to breathe, such as cotton, hemp, wool, or silk (note that silk and wool are not technically ‘vegan’ fabrics).

2. Avoid skin creams and body lotions with chemicals that suffocate the skin.

Choose natural moisturizers such as virgin organic coconut oil. Coconut oil is non-greasy and very affordable when compared to the cost of multiple skin products. In winter months, try cold-pressed virgin organic olive oil. The olive oil is more moisturizing and works well against dry skin in cold months. Remember, if you can’t eat it, it shouldn’t be put on the skin. Be sure to use an aluminum-free deodorant.

3. If you have to choose a chemical product, always choose the baby version.

Buy organic baby sunblock, baby dish detergent, or baby washing detergent. The baby formulas will always have less chemicals and less sodium lauryl ethyl sulfate (SLS), the chemical agent that creates sudsy bubbles in cleaning products.

4. For face, look for products with natural essential oil combinations and fresh herbs for daytime use.

At night, use virgin organic coconut oil before bed as a wonderful non-greasy moisturizer. Argan Oil is a nice option for the face. Be sure to find 100% organic and only Argan Oil (without any other ingredients). I’ve seen 100% certified organic Argan Oil on iherb.com. If it’s your first time buying on iherb, you can receive $5-$10 off your first purchase by using this link: iherb rewards. I use iherb all the time for my fluoride-free toothpaste, organic soap, virgin organic coconut oil, hemp seed, spirulina powder, organic raw apple cider vinegar and so much more. They always have the lowest price!

Ready to get started? Check out my personal shopping cart with all of my favorite skin & body products, all natural and organic of course!

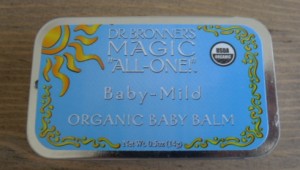
I use Dr. Bronners Balm for the lips

For lips, I recommend an Australian product called Paw Paw ointment – it’s a fermented papaya salve and is wonderful for the lips and also for cuts, scratches, burns and even diaper rash. There is a non-petroleum version available by PhytoCare. If you’re in the USA and looking for something more local, I recommend the Dr. Bronner’s Baby Mild Organic Baby Balm. This stuff works great for lips and is also good for any dry patches of skin.

5. Keep the lymph moving with movement (exercise).

Drink plenty of water. Avoid foods with chemcial coloring, flavoring, sugar replacements and preseratives which all add more internal housework to the body. Practice dry skin brushing. As a treat, book a lymphatic drainage massage every 3 months, and especially at the end of a detox or cleanse to help keep lymph clean.

(Yoga photo from sheknows.)

<strong>More on Skin Cleansing:</strong>

Is it safe to detox while pregnant or breastfeeding?

To detox or not when pregnant?

All information in this article is for educational purposes only.
It is not for the diagnosis, treatment, prescription or cure of any disease or health condition.

This is a question I get asked over and over by new and expecting mothers who are concerned with high-boosting their mineral reserve, detoxifying for a healthy baby and losing weight and getting in shape after giving birth. They think that if they do a detox while pregnant, they may start to feel better and gain energy during their pregnancy and maybe even increase the chance of having a healthier baby. While breastfeeding, many new mothers feel tired and toxic after having gained weight and given birth and hope that a detox will give them a reboot. This an important issue to discuss especially with all the over-the-counter at-home detox programs that people have access to do on their own with no guidance or support. My answer to this question is unequivocally without exception: NO.

It is not safe to detox while pregnant or breastfeeding under any circumstances in any country at any age for any woman.

When a woman is pregnant, her body needs to focus on doing one thing: making a new life. It does not need the distraction of splitting energy between detox (internal housekeeping) and creating new life. Pregnancy is a time for abundance in healthy, clean, vibrant foods and plenty of relaxation and rest. Most detoxes require cleansing supplements, something that should never be done during pregnancy because #1) some supplements are not safe to take while pregnant and #2) detox supplements split the body’s energy between detox and making baby. Additionally, during the process of detox, toxins are temporarily stirred up into the blood before they are broken down and carried out through the kidneys, colon, lungs and skin. Having toxins in the blood is the last thing a pregnant mother would want or need. Some detoxes include taking high amounts of Vitamin C. Vitamin C, when consumed in high doses, can stop the body from making progesterone, a vital hormone in pregnancy. (This is why doctors advise against eating too much pineapple while pregnant. Pineapple is particularly high in Vitamin C.) Please do not consider doing any type of detox while pregnant.

The same goes for breastfeeding for all the reasons listed above. Furthermore, if a woman does a detox while breastfeeding, she can actually still up toxins (including heavy metals) into her breast milk, and unknowingly feed those toxins directly to her newborn. While breastfeeding, the focus should not be on losing weight.

Eat foods rich in nutrients and high in vegan plant-based protein so your body has the power to make the healthiest milk ever for your baby.

When you are finished breastfeeding, you may consider doing a detox. Actually, the best time to do a detox is one year before you get pregnant. Yes – one year! That way, you have plenty of time to do multiple cleanses including kidney, colon, gallstone/liver and heavy metal detoxification and then have ample time to rebuild with a nutrient dense diet to best prepare your body for a safe, clean and healthy pregnancy. If you are thinking of having another baby, the time to start your detox is after you are finished breastfeeding and before you start trying to get pregnant again. Even if you only have 1-3 months, it’s worth it.

If you’re suffering from constipation during your pregnancy, please do not consider doing an enema. The main reasons why I do not recommend enemas during pregnancy are because #1) you can temporarily stir up toxins into the blood while disrupting the fecal matter before it is released, and #2) the inflow of water into the colon can put pressure on the uterus and fetus.

Rather, I suggest you increase high-fiber foods and reduce wheat and white breads as much as possible to relieve constipation due to pregnancy. Think of wheat as concrete in the colon and avoid it especially if you are feeling backed up. Try adding 2 Tbsp of ground flax seed to every meal (either a smoothie, fruit salad, veggie salad or even mix in with cooked veggies). This will significantly increase your fiber intake and should get things moving. If it is ‘too much’ movement, reduce to 2 Tbsp. of ground flax seed at 2 meals daily or even 2 Tbsp. at 1 meal per day (Note that the flax seed must be ground and not whole).

I’ve advised many female clients on preparing their body for pregnancy and also eating the right foods while pregnant and breastfeeding, all with great success. I’ve even seen cases of infertility and IVF with no success until they followed my specialized preparing for pregnancy detox plan. After 3 months, I had one client get pregnant after being on IVF for 8 years. I’ve also helped women to start menstruation again, even after years of not having any cycle. All of these things are possible with the right detox and follow-up diet, but timing is key to make sure it’s safe for baby, mother or mother-to-be.

More on Pregnancy:

How to Do a Coffee Enema at Home

And a Normal Water Enema too!

All information in this article is for educational purposes only.
It is not for the diagnosis, treatment, prescription or cure of any disease or health condition.

I’ve had a lot of requests from people asking how to do an enema at home and especially how to do a coffee enema. Even if you never do an enema at home, it’s always good to know how it’s done! Personally I always travel with an enema bag just in case…it’s a great thing to have for any unexpected constipation or even food poisoning while on the road. You can set it up in minutes as long as you have a towel rack to hang the bag from and a toilet of course!

An enema is done while laying on the floor, as opposed to a colema which is done on a colema board. Both use gravity-fed water, but with the colema board, when you feel the urge to release, you can simply ‘let go.’ With an enema, you have to first clamp the line shut, remove the tip, stand up to sit on the toilet, and then release. So there are a few extra steps involved. It seems complicated but it’s actually very easy! The key is to use the clamp and always be ready to stop the flow of water when you feel full.

How to Do a Plain Water Enema

Before doing a coffee enema, you should always do a plain water enema and wash everything out until the water runs clear. Then you are ready for the coffee. If doing a cleanse at home, you should also do at least one water enema per day during the fasting or juicing phase of your cleanse.

1. Prepare the Water.

Buy distilled water in advance and have it ready for your enema. You can heat up some of the water to body temperature. If the water seems too hot to touch, then it is too hot for the enema! In that case, add room temperature water to bring down the temperature of the water.

2. Set up Enema Bag.

There are a few different types of enema bags out there. My favorite is the type that looks like a hot water bottle – it has a wide top to add the water easily and clean afterwards. This type of enema bag comes with 2 different tips – one is smaller and is for rectal insertion. The other is larger with several holes and it is for vaginal insertion. For an enema, you only need the smaller tip. You can screw the tip onto the end of the water line. Then, be sure the clamp is shutting the line so no water can pass through the hose. Next, hang you enema bag on a towel rack. You want to be sure that the tip can still be inserted comfortably. If the bag is hanging too high, you won’t have any extra hose line to be able to insert the tip. The towel rack is usually more stable than trying to hang on a door knob. When you have the bag clipped and hanging, you are ready to add the water. Fill up the bag with distilled water warmed to body temperature. (If the water is cold, the colon will contract and things will not flow out so easily. If the water is too warm, the colon can relax too much and may become a bit ‘floppy’ after the enema. Body temperature keeps things just right.)

3. Prepare towels for Comfort.

Enema at Home Set-Up

Lay one towel flat on the floor and use another for a pillow so you are comfortable during the enema.

4. Place plastic colander in toilet (optional).

This is an option for the hard-core cleansers who like to check out their mucoid plaque or look for worms during their enema. You can have a pair of plastic gloves on hand as well as a pair of chopsticks to thoroughly investigate all. It’s best to buy the colander and chopsticks at a Dollar Store, and clean with hot water and vinegar every day during your cleanse.

5. Use olive oil or coconut oil for lubricant.

Have this ready in the bathroom so when you lie down, you have everything you need.

6. Play some music, turn the phone off and take a final pee.

Before you lie down to start your enema, empty your bladder by having a pee. Having any extra pressure in the bladder can make it harder to retain the water.

7. Fill the hose with water to remove air pocket.

Before you begin, it’s a good idea to clear the enema line from air. If you forget this step, the worst thing that will happen is you will get a big air pocket in your colon and have a nice release of gas with your exit water. When the bag is full of water, take the tip and aim it over the toilet. Release the clamp, allowing the water to flow. As soon as you see the water come out, clamp the line again. Now the line is full of water instead or air and you are ready to begin!

8. Relax!

Yes, your colon is now ready to be a 2-way street.. so don’t think about it being 1-way only! The water helps rinse out old, undigested, fermented, rotting fecal matter. Once that gunk it out of your system, your whole body works better. This is a great thing, so rejoice and be grateful for all the good you are about to do for your body! Take a deep breath and relax…it’s going to be ok!

9. Ready for Insertion!

Enema Clamp

Lie down on the floor, either on your right side or your back, whatever feels more comfortable (I prefer lying on my right side). Gently add some lubricant to the plastic tip and also to the rectal area. Take a breath, and on the exhale, insert the tip just enough (about 1 inch) so it rests comfortably inside the rectum. When you feel comfortable, release the clamp on the water line and let the water start to enter. Keep one hand on the clip so you can stop the flow at any time. As soon as you feel any pressure, stop the flow by clamping the line. Take a few deeps breaths and as you feel the water move deeper inside, release the line again to let more water flow inside. Repeat this as many times as you can. As soon as you feel the urge to release, clamp the line and remove the tip. Then stand up and sit on the toilet, releasing the water into the toilet.

10. Repeat until the Water Runs Clear.

Initially you may find it very difficult to retain any water. This is completely normal. As you become more comfortable with the process and as you go further into your cleanse, you will naturally find that you are able to retain more water before releasing. It is very normal to have to repeat this process a few times before you even go through one full enema bag (between 1 and 2 liters). It is recommended to repeat the process until the water runs clear. This may take 2 or 3 times of filling the enema bag, for a total of 2 to 6 liters of water.

How to Do a Coffee Enema

Before doing a coffee enema, you should always do a plain water enema and wash everything out until the water runs clear. Then you are ready for the coffee. It is absolute imperative that you use 100% certified organic coffee. Do not use anything less! Commercial grade coffee can damage the liver.

A coffee enema is an excellent way to clean the liver, but should only be done when the colon is clear. During a normal cleanse or at the end of a cleanse is a good time to do a coffee enema. Just doing one in the middle of eating a Standard American Diet (SAD) will not have a positive effect on the body. Please do not use this as a “magic pill” to try to clean your liver quickly. You can actually draw toxins into the liver if the colon is toxic, and then you will be doing more harm than good!

1. Prepare the Coffee.

Add 3 Tablespoons of ground organic coffee to 1 quart of distilled water. Let it boil for 3 minutes, then simmer for 20 minutes. Strain and cool until the water is at body temperature.

2. Retain for 12-15 minutes.

Use the same set-up as above, insert the 1 quart (strained) coffee and retain for 12-15 minutes. Lay on the right side during this time. Breathe deeply. Dr. Max Gerson found that all of the caffeine is absorbed from the fluid within 12 minutes.

3. Release.

That’s it! The coffee enema is an easy way to get the liver to dump bile and toxins quickly. It should be done only about 2 times per week during a cleanse, and definitely not any more than that if feeling unwell after the enema. Replenish your electrolytes after a coffee enema by drinking a fresh juice. Carrot, beet and celery juice is especially good after a coffee enema.

Read more information on the liver and liver cleansing here:

Liver Flush Detox Drink – Recipe for a Daily Liver Cleanse

Gallstone Liver Flush – Recipe & Cleanse Info

How to Do a Castor Oil Pack for Liver Cleansing

How to Do Onion Socks for Healing


More on Healing Crisis:

More on pH health:

More on Health Food:

Aloe Vera: Nature’s Alternative to Botox!

There are countless new products and procedures out there promoting healthy, age-defying, clear and beautiful skin. You can spend anywhere from $10 to $1,000 or even more for that ‘youthful’ glow. Even women in their 20’s are spending money on Botox, fillers and dermal abrasion procedures to avoid getting wrinkles later in life. It all seems a bit crazy to me, especially when Mother Nature provides an inexpensive, nutrient-filled natural alternative – right in front of our very eyes – Aloe Vera!

All information in this article is for educational purposes only.
It is not for the diagnosis, treatment, prescription or cure of any disease or health condition.

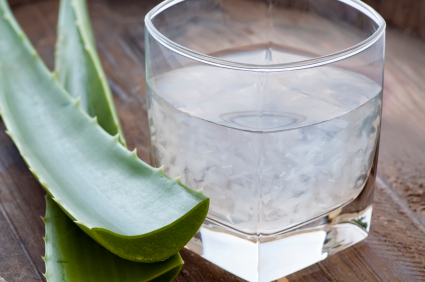
Look for Fresh Aloe Leaf in your local supermarket or organic veggie store

It’s true. Aloe Vera really is Mother Nature’s alternative to Botox. Did you know that ingesting the natural, clear interior gel of the Aloe Vera Leaf can increase the body’s natural collagen production? Rubbing pure Aloe Vera gel on the skin at night provides a natural tightening agent for the skin to keep it fresh and give a ‘natural face lift’ look. Use what nature has provided, and over time you will see and feel the difference for yourself!

Aloe Vera – Cleans from the Inside Out

Aloe contains many minerals, amino acids and vitamins and is a natural anti-inflammatory food. It’s known to help with absorption, digestion and elimination for anyone suffering from bowel conditions, especially inflammation of the colon. It can help with constipation and provide a mini daily detox effect when taken on a regular basis. You can easily add the fresh inner gel to a morning smoothie or stir into a juice for a real superfood boost.

Aloe is best eaten and applied when fresh. Try to buy a large Aloe Vera Leaf from your local health food store or gourmet supermarket and store it in the fridge. Every day, cut out a piece of fresh gel about 1 inch x 1 inch. Do not ingest the green skin – you can throw that part away or add it to your compost bin. Take the fresh gel and add it to a fruit smoothie for a delicious and healthy breakfast blend.

Try apple, banana, fresh Aloe Vera, 1 cup water, 2 Tbsp. ground flax seed blended into a fantastic healing drink. Sweet fruits combine well with the Aloe Vera to hide it’s naturally bitter taste.

If you can’t find the fresh Aloe Leaf, look for 100% organic Aloe Vera Juice sold at your local health food store and add 1-2 capfuls to your smoothie. Do not use any normal store-bought aloe vera gel in a tube as there may be added chemicals or other ingredients that are not edible. Fresh is always best. A fresh Aloe Vera Leaf should remain fresh when stored in the fridge for about 2-3 weeks.

Fresh aloe in a smoothie is great for digestion too!

You can also apply the fresh cut inner gel of Aloe Vera directly to your skin for a 100% natural skin cleanser, toner and beautifying treatment. Place on the skin at night before bed or apply for 10 minutes in the morning prior to showering. Combine the Aloe Vera skin treatment with an Aloe Vera smoothie or juice every day and you’ll be investing in good health and great skin from the inside out, naturally!

Where to Buy

If you can’t get fresh aloe vera, then go for the 100% certified organic aloe vera juice, available for sale online.

More on Liver Cleansing: