When is the BEST time (and WORST time) to START a detox

Finding the time to slow down and disconnect these days is getting harder than ever. You want to do a detox, reboot and recharge so you can feel better, right? But when you look at your calendar, you’ve got work commitments, social evenings planned, and holidays, birthdays, anniversaries coming up all the time. There is always a reason why it’s not a good time to start a cleanse. How is it even possible to fit it in? I’ve been doing juice fasting, water fasting and various types of cleanses successfully for over 20 years. In this article, I share my top tips for knowing and planning the best time to start your detox…and even better, how you can stay committed to actually following through and doing it!

Plan your detox right at the right time and you will succeed!

When is the WORST time to start a detox

If you start your detox at the wrong time, chances are you will not succeed with it. Don’t make the mistake of convincing or forcing yourself to make a radical all-or-nothing approach in this. If you don’t have a plan going into your fast then you will not have a plan in breaking your fast and you will end up exactly where you started – feeling bloated, miserable, with bad food cravings and possibly bingeing – on food, alcohol, refined sugar, carbs or even recreational drugs. Trust me, I’ve seen and heard every version of these stories having worked with fasters for over 20 years. Learn from the mistakes of others and YOU can be a REAL success story!

Do NOT start a detox or juice fast if you are:

  • Working on your master’s dissertation and/or working on a huge school or work project. You may think that fasting will clear your mind and help your creativity, but you are just putting more pressure on an already high pressure situation. Focus on eating a healthy clean food diet, avoid refined sugar (that alone can help to clear brain fog) and boost your mineral reserve instead.
  • In the middle of selling your house, planning a wedding, getting ready to move to a new country or starting a new job. I get it – you’re human and want to look your very best for a new chapter in life. You want to lose weight and have clear skin for that new job. No one wants rashes or pimples on their face for their wedding! It’s totally normal. However, all of these situations are already high stress moments in life. Give yourself some room to breathe by not adding more stress. Limit your food intake, go on a gluten-free and sugar-free diet but do not start fasting.
  • Going through a break-up, divorce, death of a loved one or other emotional trauma. Positively this is not the time to add more to your emotional plate. Fasting can be intensely emotional as you stir up old molecules of emotion when toxins are being released. Have a good cry, seek support from friends and loved ones, and heck, allow yourself to do some emotional eating if you want….but do not start a detox now. Be your own best friend, not your worst enemy. Give yourself time and space to heal. After you are feeling better, you can think about doing a cleanse as part of a spiritual and emotional reboot.

When is the BEST time to start a detox

Starting a detox when you are energetically grounded ensures a much higher chance of success and allows you to focus on your long-term goals in making positive changes to your diet and lifestyle. Ultimately, good health is a journey… not a sprint to the finish line. Fasting is a wonderful element to add to an already healthful lifestyle. A detox can be an opportunity to raise your spiritual awareness, to center your energy on a particular creative goal, to allow the body extra energy for healing and to engage in preventative maintenance, ie give your body an “oil change.” When you see and feel the results – better digestion, higher energy levels, more emotionally centered and that amazing feeling of being “healthy” – you will know it was worth it to wait for the right time.

Long-term, you achieve good health in the day-to-day healthy habits that you commit to over the course of years. That can include meditation, yoga, exercise, making fresh food at home, eating more raw organic fruits and vegetables, having regular steams or far infrared saunas to promote detoxification through the skin, supporting your body nutritionally with variety and a rainbow of colors in your diet, having an Iridology analysis to determine the supplements your body needs (a-hem), getting alkaline, taking nutritional supplements to get all the minerals your body needs, doing other forms of detox such as parasite cleansing, heavy metal chelation or a liver/gallstone flush, getting regular and restful sleep and engaging in positive and loving relationships. It takes time to implement a lifestyle of healthy habits… you can’t do all of that in just one fast!

Be realistic about your goals for what your detox may bring and also be ready and prepared to step back in the “real world” with a good solid plan. Breaking a fast correctly is just as important (if not more important) than the fast itself. Having a health coach can definitely help you transition at the right pace and continue from strength to strength.

DO start a detox if you:

  • Are feeling emotionally, mentally and/or spiritually grounded, stable and ready to make a positive change in your life. Walking barefoot on the earth and wearing the color red helps to ground your base chakra more quickly. Good crystals for grounding energy include hematite, tiger eye, garnet, obsidian, and black tourmaline – so if you need help in getting grounded, these crystals can help.
  • Have time, space and energy to work on your healing. Especially in the first few days or week, you’ll most likely need more time to slow down (I know it seems strange but it’s true!) . It’s best to schedule less and have no commitments to any major projects, deadlines, decisions, travel, or other activities that require a lot of emotional or physical energy. I once had someone email me saying she planned to start a 40-day water fast while selling and moving her house and also planning her daughter’s wedding. Oh, and she was going to start a blog to document the whole experience too. Talk about pressure! Needless to say, she didn’t last more than 2 days before quitting her fast. Put an autoresponder on your email, create a comfortable space for yourself and prepare to go within. Amethyst is a wonderful crystal for slowing down the “monkey mind.” If you feel your mind spinning while trying to slow down, try putting an amethyst cluster near your bed or in the bedroom to promote more relaxation and a restful sleep.
  • Seeking positive emotional support and are able to avoid negativity. Some people are actually addicted to negativity and that in itself is a problem that should be addressed before starting a detox. External negativity can also be a real problem. You’d be surprised how quickly a little spat in the parking lot or someone making a snide remark on your social media can completely throw you off-track emotionally and actually be a trigger to breaking your fast. As much as possible, avoid stressful encounters or situations before you start your detox and have a support system in place for you to seek help if you need it during your cleanse. Here is another case where you can really benefit from having a health coach to be a non-biased emotional support guide. If you’re feeling the need for some unconditional love to help boost your heart chakra, try using kunzite or pink tourmaline crystals during meditation. Kunzite helps to release anger, resentment and hurt while boosting the heart with love, acceptance and pure joy. You can also lay a kunzite crystal on your heart chakra (center of chest) when lying down to go to sleep.

Remember: Any detox is better than no detox!

As you start to navigate the world of cleansing, you may make the mistake of starting a fast at the wrong time in life. And that is OK! Having the courage to start a fast is a big thing and not to be underestimated. Even ONE day of fasting is better than none. Don’t beat yourself up if you quit early or if you didn’t realize how hard the detox would be and picked the wrong time to start. You can always try again at another time, a better time. The most important thing is to NEVER GIVE UP.

Eventually you will get there, but not if you stop trying. In another post, I discuss how to know when to break your fast since that’s another essential element to success. Meanwhile mark your calendar for your next cleanse, start clearing your schedule and remember: ENJOY THE HEALING JOURNEY!

How to Eat Clean: Start with Green Smoothies!

Green Smoothie for Dummies
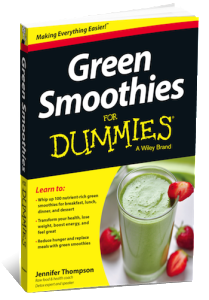
Check out my book Green Smoothies for Dummies – I’ve got loads of recipes using dark leafy greens and many delicious combos without any chemical additives, flavorings or refined sugar. It’s so easy!

Clean your body from the inside out and watch your skin improve, your hair and nails get stronger, your eyes look brighter and your waistline slim down….all naturally and effortlessly! It’s simply amazing and your only regret will be that you didn’t start drinking green smoothies sooner.

When you take care of your whole body, you get whole body health.

When you let your food be your medicine, you are always moving towards better health.

Find the book Green Smoothies for Dummies on iTunes or amazon.com!


For more on how to achieve your health goals and actually start feeling great, book a private health consult with me via Skype.

How to Book Your Health & Nutritional Coaching Session:

1. Take photos of your eyes with a digital camera.
2. Email the photos to me for approval.
3. We schedule a time to meet via phone or Skype!


More on Immune System:

More on Spiritual Health:

Gut-Brain Axis: Probiotics are the Missing Link to Depression

Science has finally caught up to what many of us have been trying to say for years: How you feel comes from your GUT. Restoring gut health must be part of your mental wellness program. If you or someone who know is suffering from depression, there is HOPE. And it could be a lot easier to overcome than you think.

All information in this article is for educational purposes only.
It is not for the diagnosis, treatment, prescription or cure of any disease or health condition.

The information below is from the book This is your Brain on Parasites by Kathleen McAuliffe:

“In the gut, resident microbes take a share of every meal you eat, but in return they aid in digestion, synthesizing vitamins and disarming dangerous bacteria that you ingest. They also churn out virtually every major neurotransmitter that tunes our emotions – notably GAMA, dopamine, serotonin, acetylcholine, and noradrenaline – as well as hormones with psychoactive properties.

“To varying degrees, scientists now suspect, intestinal microbes influence whether you’re happy or sad, anxious or calm, energetic or sluggish, and, by signaling the brain when you’ve had enough to eat, perhaps even whether you’re fat or thin.

The Gut-Brain Axis is real

“Scientists are still trying to figure out exactly how gut bacteria get messages delivered to the distant output of the head, but they have a few ideas.

“Some psychoactive compounds made by gut bacteria, they believe, are detected by the enteric nervous system – a think skein of neurons that runs the entire length of the gut. This network has more neurons than the spinal cord – hence its nickname, “the second brain’ – and it connects to the big brain upstairs via the vagus nerve, a major route by which gut bacteria make their voices heard. Indeed, 90 percent of information transmitted by this cable goes from the viscera to the brain, not the other way around, as science for many years had assumed.

It’s not “in your head”…it’s in your GUT

“Intestinal bacteria may engage the immune system, which can lower our mood and energy level, yet another pathway by which our microbiota might change our behavior. Perhaps related to that observation, depressed people tend to have abnormally high amounts of certain gut bacteria, and they are more likely to have elevated biomarkers for inflammation – an immune-mediated response.

“Intriguingly, certain gastro-intestinal (GI) disturbances – notable ulcerative colitis and Crohn’s disease – are marked by disruptions of the gut microbiome, and these illnesses are associated with an unusually high incidence of mental disturbance in comparison to serious diseases that afflict other parts of the body. Indeed, 50 to 80 percent of those who suffer from these conditions are clinically depressed.

“More surprising, specific abnormalities in the composition of the human microbiota have been linked to autism spectrum disorder (ASD) – a condition characterized by increased anxiety, depression, and impaired social ability.

Could probiotics help millions of people who are debilitated by serious mood disorders?

“Clinical trials are now underway to test probiotics on people whose primary problem is anxiety, depression or bipolar disorder. The results are not in yet, but studies of groups whose mental woes may originate in GI troubles offer encouragement. In one study of thirty-seven patients with functional gastrointestinal disorders (an umbrella term for irritable bowel syndrome and other common gastric complaints that can’t be tied to an underlying abnormality), for example, probiotic treatment not only improved their symptoms but also brought about a significant reduction in their depression and anxiety based on both self-reporting and measurements of stress markers in their saliva and urine. The outcome was impressive given that all of the subjects had previously been treated – without success – at multiple medical centers.

“A sprinkling of clinical investigations also suggest that probiotic remedies can soothe colicky babies, a condition that torments 20% of newborns along with their frazzled, sleep-deprived parents. In one trial, the approach reduced crying and fussing by 70 percent.

“Gathering evidence hints that supplements of healthy bacteria may help to buffer already high-functioning people against everyday stress and strains. For example, a randomized, double-blind trial in France on fifty-five people with no history of psychological disturbances found that regular consumption of a probiotic reduced blood levels of stress hormones and subjects’ ratings of their depression, anxiety, and ability to cope – improvements not seen in the control group.”

Probiotics can’t hurt and may help, so why NOT try?

With no harmful side effects, no damage to the hormonal system, metabolism or liver, no additive properties and no need for other supporting prescription medications, I cannot see any logical reason why NOT to take a daily probiotic. At the very least, you can add a probiotic to your daily regimen, even if you and your doctor decide to keep you on anti-depressants. With nothing to lose and so much to potentially gain, it’s a no-brainer (or an all-gutter!).

Even if you don’t suffer from clinical anxiety or depression, studies are showing that you can feel better too. Everyday stress can actually be reduced, just from taking good gut bacteria!

What type of probiotic to take

I recommend several types of probiotic. Taken together, they increase the chance of rebalancing the microbiome in the gut. Remember, it’s not just one type of good bacteria that you need. There are as many as a thousand different strains of good bacteria in a healthy gut.

Recommended probiotic daily schedule:

  • Morning – Take 1 Jarrow brand acidophilus capsule with or after breakfast
  • Lunch – Take 1 Garden of Life HSO probiotic tablet with or after lunch
  • At night before bed – Take 1 Udo bifidus capsule at night before bed

(Note: while traveling, it’s best to take only the Jarrow brand 3x daily because it’s easy to travel with, can be transported without refrigeration and it’s more convenient to have only one brand to carry. At home, increase your variety of bacterial strains in the gut by rotating between 3 different brands each day.)


For more on how to achieve your health goals and actually start feeling great, book a private health consult with me via Skype.

How to Book Your Health & Nutritional Coaching Session:

1. Take photos of your eyes with a smart phone or digital camera.
2. Email the photos to me for approval for Iridology Analysis.
3. We schedule a time to meet via phone or Skype!


More on Gut Health:

More on Motivation:

Does the Squatty Potty Really work?

If you’ve never heard of a Squatty Potty, then you are definitely not up-to-date with the latest trend in bathroom accessories (and yes, there are bathroom trends!). This simple yet practical toilet stool has taken the digestively-challenged world by storm, literally! Times have certainly changed since I started working in the field of detox nearly 20 years ago. Back then, I couldn’t talk about poo without everyone running as fast and as far away as they could. Now, I can write and share a full article about something that is helping people have better bowel movements! In this blog post, I’m going to share my results in using the Squatty Potty at home. Does it really work, or it is just hype?

Disclaimer: I was provided with a free product in return for my honest review and experience with the product.
All thoughts and opinion expressed herein are my own and not influenced by the developing company and/or its affiliates, in any way.

The Squatty Potty 2.0 model fully extended to the 9 inch position

Why I wanted to try the Squatty Potty

Admittedly, my husband wasn’t so thrilled to be part of this experiment, but in reality he was the one who needed help in the a-hem..toilet department. Having suffered with constipation his entire life, he understands more than anyone how frustrating it is when you don’t “go” every day. When I first met him, he was literally amazed that I could be in and out of the bathroom in less than 3 minutes, for a Number 2! Often, he would sit on that porcelain throne for 30 minutes or more, praying to the heavens above for any miracle cure. Many times, we would have to wait all morning before going out because he still “had to go.” In some cases, he wouldn’t have any bowel movement for 3 or 4 days at a time. I was in shock! When he first told me this, I immediately scheduled a colonic for him. And can you believe – he actually went through with it? His first colonic ever (but not his last!) Now… that’s true love!

Fast forward several years and many detoxes later, and things has vastly improved for my husband’s gut health. If he eats well with green smoothies, fresh fruit, a daily probiotic and plenty of water throughout the day, he generally does exceptionally well and is actually quite regular these days. But, if any of that gets off track, his colon will be the first to let him know. It’s awful to see someone you care about not be able to go to the toilet and really feel miserable as a result. Naturally, I kept thinking – what else can I do to help him improve this situation? Having heard of Squatty Potty and having used many squat toilets myself over the years while living in SE Asia, I thought that using a stool and changing the position of his sitting could help. The only way to know for sure was to give it a try!

We received our new Squatty Potties by mail in an unmarked box with no exterior labels, which was reassuring since I can imagine that some people would prefer complete privacy with this type of purchase. My first impression was that the company has done really well to put a fun and cute spin on a topic that was formerly more on the taboo side and for many still is not so easy to discuss. Even I was accused of giving #TMI when I texted a good friend to tell her we just received our Squatty Potty! Anyway, the packaging and branding of Squatty Potty is great. The stools were wrapped in turquoise blue tissue paper, with a paper unicorn crown (for the new King of Poop) and a button that proudly states “I Pooped Today.” Classic! All of this made me even more excited to give the Squatty Potty a try.

Squatty Potty: What is it and who needs one?

A Squatty Potty is a modern-day version of the squat toilet, brought to you with all the comfort of your Western-style porcelain throne.  The Squatty Potty is a step stool designed to fit easily around the base of your toilet seat. It works like this: Sit on your toilet as you normally would, gently lift your legs, rest your feet on the stool and let the bowel movement begin. By lifting your legs slightly, the transverse colon gently rises thus preventing any “kinks” in the colon and allowing the pipes to flow, so to speak.

All information in this article is for educational purposes only. 
It is not for the diagnosis, treatment, prescription or cure of any disease or health condition. 

Squatty Potty Slim Driftwood Teak Model in 7 inch height

If you have a history of constipation, inflammation in the colon, or a feeling of not fully evacuating then the Squatty Potty is worth a try. In terms of how many people could actually benefit from something like this, just look at the statistics. Approximately 70 MILLION Americans have digestive disorders, prompting in nearly 60 MILLION visits to doctors’ offices and hospitals each year.

Clearly, what goes in doesn’t always come out.

Low stomach enzymes, an unhealthy “microbiome” or bacterial balance in the gut, an over acid environment, toxicity, and/or inflammation are warning signs that the body is not eliminating well. (Remember, any bowel disease ending with the word “itis” is a disease on inflammation, like ulcerative colitis, gastritis and diverticulitis.) What’s worse is that more health problems can arise from all this internal stress. As Hippocrates said, “All disease begins in the gut.” I agree!

Our results: Using a Squatty Potty

In theory, I knew that the Squatty Potty should work. But still, I wondered – could a toilet stool really mimic the true Asian squat and offer improved evacuation? The answer is: YES! I am actually impressed at how well it works!

On the day the Squatty Potty arrived, my husband tried the 2.0 model set at the standard 7″ height. Within 10 minutes, he was out of the bathroom (that alone is amazing!). Without getting too graphic, he said, “More just kept coming out! Every time I thought I was done, there was more!” Well, that never happens. Usually it’s the opposite and more in lines of, “I kept pushing and nothing came out” OR “I pushed and pushed and only got a rabbit turd.” If you’ve been in that situation, I am sure you can relate.

I can only guess that my husband has some prolapse of the colon, which can definitely keep the large intestine in a more kinked position. Changing the position of the colon created an immediate positive effect. Every time he uses the Squatty Potty, he has a release and it’s always more than he thought he was going to have. That’s simply amazing!

For me, the results were also good. In my case, I am very regular and have a large bowel movement every morning. Could the Squatty Potty help someone like me, who doesn’t have any digestive problems and goes to the loo every day? Yes! When I’ve used the Squatty Potty, I have my normal release, and then I have another almost full poo immediately after. Almost like two poo’s at once. Definitely I feel improved evacuation and I feel flatter in my stomach after. I can only surmise that more is getting through even my clean and healthy pipes, just from the change in position of the colon.

Asian Squat Toilet vs. Western Sit Toilet – What’s the poop?

An Asian squat toilet is a simple style of toilet design that consists of a hole in the floor and 2 porcelain treads for your feet on either side. You stand in position, squat and then go. This design is used in many parts of the world but is mostly found in Asia, hence the name “Asian-style” toilet.

Who would want to squat like a dog to go to the toilet?! Well, imagine the days before real toilets existed. What would have been the easiest and most natural position to a-hem..fertilize a tree? There’s no way you would stand and bend at the knees (muscles shaking) as if sitting on the loo. Naturally, you would squat in a low position, close to the ground. Squatting is easier on the joints and less tiring on the muscles, but more importantly it puts the transverse colon in the correct position and lifts any prolapse in the colon. Kinks in the colon are lifted naturally, especially where the ascending and descending colon turn. All of this allows you to “go” quickly and easily, standing up after to check for any predators and be on your way.

The first man-made toilets copied the style of squatting and in many parts of the world, squat toilets were the norm. This made perfect sense until more modern day folks decided that sitting was the preferred position of defecating.  That’s when the Western toilet arrived, and along with the Western diet (refined sugar, wheat and dairy), came many new digestive ailments.

I used many squat toilets over the course of several years while living in SE Asia. In my experience, public squat toilets are way cleaner than public Western toilets. It’s a relief to not have to sit on a dirty seat splashed with who-knows-what. Using a squat toilet also helps strengthen your leg muscles and gives the body a good stretch. It just feels more natural. I also think that I had more volume evacuated whenever using a squat toilet.

Is it better to squat on the toilet? That’s kind-of a trick question because believe it or not, a lot of Asians who have never used a Western toilet will actually stand on the seat of a Western toilet and squat!

Is a squat toilet better? In my opinion, yes. I wish we had the option to build an Asian style toilet in our home here in the United States – I would definitely do that!

What Squatty Potty model is best?

I had a hard time deciding which Squatty Potty model to try. I didn’t really like the medical look of the traditional Squatty potty. I just recently painted one of our bathrooms and I wanted to maintain a sleek, modern style there.

Also, my husband is 6’8″ tall and weighs 220 pounds. I was worried that the slim teak style might actually break from his weight.  At the same time, I didn’t know which height would work best for him. I read a few reviews from tall people who said that the 9″ was too high for them, and their knees were in their face. I was leaning towards the new 2.0 model which allows for 2 positions and adjusts between 7″ and 9″ heights.  But, I didn’t like the medical-looking style. So, what to do?!

In the end, I chose the Squatty Potty 2.0 for one bathroom and the slim teak model for the other one. We’ve been very happy with both. Initially, my husband was happy using the 2.0 at the 7″ height. After 2 weeks, he decided that he wanted to adjust it up to 9 inches. Starting at 9″ probably would have been too uncomfortable for him, and may have discouraged him from trying. Definitely, having the flexibility to change the height is really nice. The driftwood teak slim design in the other bathroom satisfies my desire to have a nicer look. I tend to use that bathroom more than my husband, and the 7″ height of that stool feels more comfortable for me. The slim stool is sturdy in design, even with the weight of a 220-pound man.

I also LOVE the idea of the Porta-Squatty, which folds up easily for travel. Since traveling is always more challenging for my hubby in terms of staying regular, I could see where this could really come in handy.

In the case of optimizing one’s poo, position does matter!

How to Improve Gut Health

In addition to getting the squat position right, there are other natural remedies that also help to keep things “moving”.

To improve gut health, you can:

  1. Increase fiber. Add 2 Tbsp. ground flaxseed to a green smoothie daily
  2. Take a daily probiotic, one at night before bed.
  3. Don’t overeat. Set regular mealtimes.
  4. Add fermented foods to your diet.
  5. Detox and/or colon cleanse once a year (at a minimum).

Finally…don’t forget to Listen to your Gut! Your body is giving you signals when things aren’t right. Stay in tune with how you feel. Heartburn, acid reflux, indigestion, gas, pain, bloating, constipation, diarrhea, and/or abdominal pain are all signs of imbalance. Pay attention when things aren’t working. The faster you make changes, the sooner you can feel better.

Read more on natural health and healing here:

What your Poop and Pee can tell you about Your Health

How to Do a Castor Oil Pack for Liver Cleansing

How to Do Onion Socks for Healing


For more on how to do a detox at home or how to navigate through your detox symptoms and start feeling great, book a personalized health consult with me via Skype.

How to Book Your Health & Nutritional Consultation:

1. Take photos of your eyes with a smart phone or digital camera.
2. Email the photos to me for approval.
3. We schedule a time to meet via phone or Skype!


More on Skin Cleansing:

More on Liver Cleansing:

Easy Recipe: Make organic pickles at home!

Are you ready to make your own fermented foods at home? (Answer: Yes!) Pickling cucumbers is a great start to build up your confidence with fermentation. And who doesn’t love a crisp tasty pickle on a hot summer day? You can have your pickles ready to eat in as little as 7 days with the easy recipe below.

Use this fast and easy recipe to make delicious pickles at home

Health benefits of Fermented Foods

For optimal digestive health, we need to get good bacteria in the gut on a regular basis. Antibiotics destroy all the bacteria in our system, both good and bad. Over time, this can lead to more imbalance in digestion function, absorption and elimination. Some experts even say that food allergies, autism and ADHD may be related to an imbalance of bacteria in the colon. Certainly many digestive diseases like colitis, diverticulitis and Crohn’s disease are caused in part by lack of good bacteria in the gut. Having the right balance of good bacteria helps to strengthen immune system, improve digestive health and long-term, can even prevent dis-ease. Probiotic, or good bacteria, literally means “for life.”

You may think that fermented foods are only made with yeast (like beer or wine), but there are other cultures used for fermentation. Other types of natural bacteria are used as well as SCOBY’s (Symbiotic Culture of Bacteria and Yeast). With pickles, the natural bacteria on the skin of the cucumber itself is what’s used to start the “lacto fermentation” process.

Pickles are perfect to try if you’ve never done any type of fermentation before. You get relatively fast results (in 7 days), unlike kombucha, for example, that can take a few weeks. And there isn’t a lot of hard work involved or checking required, like in making raw sauerkraut. You should see bubbles rising in the pickle jars when you flip them every day, and when you eventually open the jar to eat them, the jar should make a “pop.” Then you know you’ve done everything correctly and can enjoy the fruits of your fermentation labor. Scroll down to get the recipe below.

Homemade pickles have no food additives!

There are other great reasons to eat homemade pickles instead of store-bought, besides the obvious better taste. Commercially sold pickles are pasteurized, which means all those beneficial natural probiotics are destroyed. Homemade pickles keep all the good bacteria intact, making for good gut health when eaten. A healthy microbiome is the basis for a strong and healthy immune system.

Store-bought pickles can also contain nasty food additives, the worst offender being Yellow #5. Banned in many countries (including all of Europe) since it was shown to be a carcinogen, Yellow #5, or tartrazine, is a coal-tar derivative. It is currently still allowed in foods in the USA. Yellow #5 is frequently used in your favorite brands of pickles for added color to make the pickles look brighter and fresher. Most store-bought pickles also contain preservatives, the most common one being sodium benzoate (not good).

Examples of Yellow #5 in pickles:

Vlasic: Hamburger Dill Chips Pickles – Cucumbers, Water, Distilled Vinegar, Salt, Sodium Benzoate (Preservatives), Calcium Chloride, Natural Flavor, Polysorbate 80, Yellow 5. “Great taste & crunch. Classic dill taste.” (No thanks!)

Vlasic Bread & Butter Spears No Sugar Added Pickles – Cucumbers, Water, Distilled Vinegar, Salt, Spice, Calcium Chloride, Sucralose, Yellow 5. “No sugar added!” (But you kept the carcinogens, great work.)

Mt. Olive Sweet Gherkins No Sugar Added Pickles – Cucumbers, Water, Vinegar, Salt, Calcium Chloride, 0.1% Sodium Benzoate (Preservative), Alum, Sucralose (Splenda Brand), Natural Flavors, Xanthan Gum, Polysorbate 80, & Yellow 5. “Mt. Olive Pickles are Picklicious!” (Don’t think so…)

Heinz Dill Spear Pickles – Fresh cucumbers, water, distilled white vinegar, salt, sodium benzoate, garlic extract, gum acacia, calcium chloride, natural flavoring, polysorbate 80, fd&c yellow 5. “Classic dill taste and crunch Heinz pickles are 100% fat free, Gluten free.” (But they contain chemical crap, hmmm…)

Organic brands of pickles are often no better. I’ve seen xantham gum, natural flavors, spices and agave syrup…all of which are suspect ingredients that I avoid as much as possible.

The bottom line is this: YOU deserve the very best in life and you are worth having only the very best ingredients in your food. Taking the time to make your own food is one of the best investments in yourself, your health and your family’s health.

High-five some hashtags to health!! #homemade #homegrown #farmtotable #organic #cleanfood #cleaneating

Choosing organic ingredients

The best part about making cucumbers at home is that you can use all 100% certified organic and whole food ingredients. Look for smaller sized pickling cucumbers at your local farmer’s market. You can also grow your own pickling cucumbers in your backyard garden at home – they’re actually very easy to grow! Choose fresh organic dill. And definitely use organic garlic. (Non-organic garlic is mostly all grown in China, so the quality is a big unknown. But I find that non-organic garlic has a too strong and overpowering taste; whereas organic garlic has a soft yet flavorful and more delicate taste. Organic garlic also doesn’t leave a bad taste in your mouth or a bad smell on your skin.)

The water you add to your pickle jars should not contain any chlorine, because chlorine can stop the natural fermentation process. The best option is to use natural spring water or clean well water. If you are using tap water, then be sure to pour your water into a big pot or glass bowl and let it sit out on the counter overnight before using. This should off-gas the chlorine so it’s no longer in the water by the next morning. (If you’ve ever had pet fish, then you’re familiar with doing this when changing their tank water.)

Remember to cut off the blossom ends!

When you’re pickling cucumbers yourself, you must cut off the blossom ends. There’s an enzyme in the blossom that can make the pickle soft and unsafe to eat. The blossom end also tastes bitter when you eat a raw cucumber. That bitter taste can make an entire juice or smoothie taste bitter too, so it’s generally just a good practice to always cut off about 1/16-inch on the blossom end of all your cucumbers. In fermentation, cutting the blossom ends will help your pickles get more crisp and crunchy.

Every cucumber has 2 ends: A Blossom end and a Stem end

The blossom end of the cucumber is the end that grew the flower. The opposite side is where you will find the stem that connected the cucumber to the vine. Sometimes it’s easier to identify the stem end first. Then, you know that the other side is the blossom end.

Which end is the blossom end of the cucumber? To identify the blossom end, check both sides of your cucumber.

The picture below shows the stem end of the cucumbers. Do you see the smooth, indented dot? That’s where the cucumber was picked off the stem.

The stem end has a smooth, indented dot

The next picture shows the blossom end of the cucumbers. Even though the flower is gone, you can see that there is no indentation. This is the side that you want to cut about 1/16-inch off.

Note there is no indentation in the Blossom end of the cucumber

Don’t forget to cut those blossom ends for a crunchy, crispy pickle

Recipe for Organic Pickles

With this recipe, the pickles take 7 days to ferment and then you’ve got the best tastiest pickles ever! No sugar, no honey, no preservatives and no cancer-causing Yellow #5. Oh yeah, and these are 100% organic farm-to-table and made with love!

Pickling Ingredients

  • Pickling cucumbers (approx. 6-8 small cucumbers needed for each jar)
  • 1 1/2 cups (or 360ml) filtered water
  • 1/2 cup (or 120ml) organic raw apple cider vinegar
  • 1 tsp. – 1 Tbsp. fine Himalayan salt (as desired)
  • 1/2 tsp. organic crushed red pepper flakes
  • 1/4 tsp. organic mustard seeds
  • 1/2 tsp. organic back peppercorns
  • 1 sprig fresh organic dill
  • 2 organic garlic cloves (peeled)
  • 2 organic fresh grape leaves* (optional)
    You can buy the organic dried ingredients listed above on iherb.comAlso will need:- Wide mouth clean Mason jars with canning lids
    – 1 permanent marker
    You can buy Mason jars plus organic raw apple cider vinegar on amazon.com

Pickling Instructions

1. In a glass bowl, mix 1/2 cup organic raw apple cider vinegar + 1.5 cups water.
Add peppercorns, red pepper flakes, mustard seed, and up to 1T Himalayan salt.

2. Rinse your cucumbers but don’t scrub them. You want them to ferment from natural bacteria in the skins. Make sure you cut 1/16-inch from the blossom ends of each cucumber, then slice the cucumbers in spears. You want to keep the skins intact (do NOT peel the cucumbers), so the good bacteria in the skins can kick off the lacto-fermentation process.

3. Add 2 organic garlic cloves, fresh dill, and 1 grape leaf to the bottom of the Mason jar. Stack in chopped cucs and pack tightly. Add liquid and spices. Add another grape leaf to the top before closing. Secure the lid tight by hand. Write the date on the lid with a permanent marker.

4. Place the jar on a tray or plate on a shelf or counter-top. Flip the jar once daily for 7 days. Sometimes liquid may seep out of the jar, which is why having a tray or plate underneath is a good idea. You should see small bubbles rising in the pickle juice when you flip the jar. And that’s the fermentation happening right there!

5. After one week, put the jar in the fridge. Now, you can open, eat and enjoy!

Store pickles in a tray or glass container to prevent spillage during 7 days of flipping once daily

*Fresh grapes leaves are recommended because they’re supposed to help keep the pickles more crisp and crunchy. I don’t know if they are totally necessary or not, but because we have plenty of wild organic muscadine grape vines growing all over our land, it’s no problem for me to pick a few leaves and add them to each jar. Sometimes in summer, you can find fresh grapes leaves for sale at local farmer markets. If you don’t have access to fresh grape leaves, don’t be discouraged. You can still make this recipe without them!

Homemade Pickle Eat-by Date

Using the above recipe, there is no canning or heating required. That’s nice because it keeps the cucs as a raw food, with all the enzymes intact. But, because they are not totally sealed the way canning or heating will do, these pickles should be eaten with 3 months of making them. Just keep that in mind if you give them to family or friends. After 3 months the pickles may turn soft or watery. If you see that, then it’s best to toss them in the compost bin. Writing the date on the lid of each jar helps to know how long to keep them.

My Pickle Detox/Cleanse

Last summer, we had so many cucumbers from our organic veggie garden that I was making 2 jars of pickles per day! By mid-August, we were up to our ears in pickles and the fridge was almost full. I had been planning to do a 7-10 day green juice fast as a nice transition from the end of summer into fall. But when I looked at all the pickles, I said to my husband, “Why don’t we just do a pickle detox and eat only organic pickles for 10 days?” So we did!

On average, we each ate about 1.5 jars of pickles per day and we drank all the pickle juice too. We also drank plenty of water in between. It was totally unplanned and un-researched. But it turned out great. We both felt energized. Our guts got a major boost of probiotics from the lacto fermentation and the organic raw apple cider vinegar. We had a mini-parasite cleanse from eating so many fermented garlic cloves. The pickles were cold and refreshing during the hot summer days. We had high energy and slept great. The was no juicer to clean! And we used organic clean food fresh from our garden. This year, we may do a 3-day pickle cleanse and go into green juices after that. I’ve got plenty of organic dandelion, celery and parsley that I’d love to use in juices or smoothies so we’ll see….!


For more on how to do a detox at home or how to navigate through your detox symptoms and start feeling great, book a personalized health consult with me via Skype.

How to Book Your Health & Nutritional Consultation:

1. Take photos of your eyes with a smart phone or digital camera.
2. Email the photos to me for approval.
3. We schedule a time to meet via phone or Skype!

What your Poop and Pee can tell you about Your Health

With all this talk about detox and fasting, it’s inevitable that I would eventually cross onto the topic of eh-em, bodily excrements. Actually, your poop and pee can tell A LOT about your health and should always be the first thing to check when you’re not feeling your best. If you notice any sudden changes in your bowel movements, it’s also a good idea to ask yourself – has my diet changed recently or have I added a new supplement or something different? Often times the answer is yes.

All information in this article is for educational purposes only. 
It is not for the diagnosis, treatment, prescription or cure of any disease or health condition. 

Your poop: What is a healthy Poop?

On a daily basis, your bowel movements or poops should be easy to pass, formed and should sink in the toilet (not float). The color should be a normal healthy brown color.

Many people say that you should go to the toilet as many times as you eat in a day. That means someone eating 3 meals a day should have 3 movements per day. Anything less than that would be considered constipation.

Types 1 and 2 on the Bristol Stool Chart (see below) are indicative of constipation and types 5, 6 or 7 can indicate loose stool or diarrhea.  Types 3 and 4 are considered the ideal, healthy stools (especially type 4), as they are easy to pass while not containing excess liquid.

What does a different color poo mean?

Red stool can be an indicator of blood, inflammation, diverticulitis or blockage in the colon. Just remember to note what you’ve eaten before, because in some cases red stool is just a normal passage of coloring in the food, like after you eat red or purple beets.

Sometimes if taking an iron supplement, your stool can turn a very dark red, almost black color. Eating a lot of meat in the diet can always make your poop look black. Taking charcoal capsules will most definitely turn your stool black. Don’t worry if you see black poo after taking charcoal; it’s the normal passage of the charcoal through your intestinal tract.

Green or yellow stool can be a sign of liver or gallbladder problems. If you’ve just done the liver/gallstone flush though, that doesn’t count! A liver flush is a temporary detox reaction and should not be used to compare your stool color on a daily basis.

What do different sizes or shapes of poop mean?

If you are pushing hard to pass your stool, or if it’s small pellets and very dry, then you’re most likely dehydrated and not drinking enough water on a daily basis. You may also need more fiber in your diet. A first good step would be to drink more water and see if anything changes for the better.

Long and thin poo can be a sign of bowel constriction, inflammation or other conditions in the colon. With that, you can try to eat more fiber, adding 2 Tbsp. ground organic flaxseed to a Green Smoothie daily. You can also try taking 1 tsp. black seed oil daily and see if the condition improves.

Runny or liquid poo can be an indicator of parasites, infection, food allergy or food intolerance. There can also be a lack of fiber in the diet. In some cases, doing a colon cleanse can really help.

If your poo floats, it may be a sign that your body is not digesting fats properly. Always look at the diet and see what the person is eating (or not eating). Sometimes doing a small intestine cleanse can help, especially if this is a recurring problem.

Your urine: What does normal urine look like?

Remember, the goal for healthy urine is: Clear and Copious!

Normal, healthy urine should be clear, not cloudy or turbid. There may be more of a yellow color if taking certain supplements like B Vitamins; however the liquid itself should not be cloudy. Turbid urine can be a sign of bacteria in the urinary tract or kidneys, or crystallization of the urine or even kidney stones.

By copious, I mean that the amount of urine flow should be steady and have decent volume. Want you don’t want is a small, leaky trickle. If you don’t have a good flow of urine, it’s a sign that you may be dehydrated.

If your urine is clear and copious on a daily basis, then most likely you’re doing ok!

Keep in mind that thirst is not a good indicator of whether or not you’re dehydrated. Many times, you will pass the thirst marker and remain dehydrated for hours without any additional feeling of thirst. Always look at your urine as a more accurate indicator.

How much water should you drink?

This is something I get asked all the time, and really there is no simple one-size-fits-all answer.

If someone speaks a lot in their job, they will lose more water through respiration. Living in a warm climate or doing more exercise will create more loss of water from perspiration. People who eat more high-water content fresh fruits and veggies usually need less water than people who eat more dried foods like bread, cereal or dried snacks.

At the end of the day, your best bet is to just check your urine. Is it clear and copious? If yes, then you’re ok. If not, then drink more water!

What kind of water is best to drink?

Having fresh, clean spring-fed mountain water would be great, although not many people have that luxury. At home, you want to at least avoid chlorine, fluoride and heavy metals in your drinking water. Probably your best bet in catching the worst of those is to get a reverse osmosis filter on your drinking water tap in the kitchen. You can buy a reverse osmosis filter online and have a plumber install it for you.

During a detox, depending on the case, distilled water is usually best.

When doing a detox: How your poop and pee can change

Bodily functions can change when you’re doing a cleanse. It’s actually a good sign when your body is eliminating more toxins and taking advantage of the opportunity to catch up on internal housework. You gut health and overall microbiome can finally rebuild, recharge, rebalance and renew.

Many people will poo much more often during a detox, and they can also feel like they need to pee all the time. Often times, a person will get up several times through the night to pee during their cleanse. This is all considered normal, as long as the urine is clear and copious and there is no pain with urination. In fact, most fasters will comment on how clear their urine is after just a few days on a cleanse. That’s always a good indicator that the body is more clean than before.

In some cases, I’ve had fasters comment that they smelled ammonia in their urine when doing a detox. Perhaps this is from old, built-up toxins that were released from the tissue, liver or fat during the cleanse and then eliminated through the urine. Usually it will happen 1-2 times and then stop. Just an extraordinary example of how amazing and active the body can be in its own healing!

During a cleanse, ALL of your elimination organs – the colon, kidneys, lungs, skin and liver – get an opportunity to catch up on their backlog of work. After a cleanse, the most common thing I hear is, “Wow, my bowel movements are so much better now….and my eyes are brighter, skin is clearer and overall I FEEL younger!”

If all that didn’t clear things up for you (literally!), then check out this infographic below from The Daily Infographic which explains the various things your poo and pee are telling you.

Current global poop situation: Not Good

Approximately 70 MILLION Americans have digestive disorders, prompting nearly 60 MILLION visits to the doctor’s offices and hospitals each YEAR. With the rise in digestive problems and even colon cancer all over the world, I have to wonder….why aren’t more people talking about their poop? If it wasn’t such a taboo topic, then someone having poo problems might feel more comfortable to seek out help and get the answers they need.

If you know anyone having digestive problems, please share this article!


For more on how to do a detox at home or how to navigate through your detox symptoms and start feeling great, book a personalized health consult with me via Skype.

How to Book Your Health & Nutritional Consultation:

1. Take photos of your eyes with a smart phone or digital camera.
2. Email the photos to me for approval.
3. We schedule a time to meet via phone or Skype!


More on Gut Health:

More on Motivation:

How to make a Castor Oil Pack for Healing, Pain Relief or Detox

Castor oil has been making a huge comeback recently with the rise of young Instagrammers applying it to their hair (and even eyelashes) for shinier, thicker and longer locks. But did you know there are many other ways to use castor oil for natural healing? Once you start using castor oil, you will seriously be amazed and wonder, “How did I not know about this before?”!

All information in this article is for educational purposes only. 
It is not for the diagnosis, treatment, prescription or cure of any disease or health condition. 

Discover the ancient medicinal properties of Castor Oil

What is Castor Oil

Castor oil comes from the castor plant that grows castor beans. The castor bean plant originated in Egypt and was used for medicinal purposes in the Middle East as much as 5,000 years ago! In the old days, many people used castor oil to help promote a bowel movement and prevent constipation. You may remember your grandmother having 1 spoonful of castor oil a day for good gut health. But way before that, castor oil was commonly applied topically for healing cuts, wounds, injuries, muscle pain, body pain, menstrual pain, and in many cases even healing internal infections, disease and imbalance. So much so that in the Middle Ages, castor oil was actually known as “Palma Christi,” perhaps because people believed that anywhere you applied the oil was like having the “Palm of Christ” applied to that area, often offering instant and miraculous healing.

What can Castor Oil do

Edgar Cayce was a medical intuitive who used castor oil for healing hundreds of patients. Dr. William McGarey, MD eventually picked up where Casey left off, helping thousands of patients using castor oil for various ailments over the course of 20 years. In his book, The Oil that Heals: A Physician’s Success with Castor Oil Treatments , he lists many cases of castor oil working very well for healing. Open festering wounds that would not heal started to miraculously dry and close after applying castor oil daily. Ringworm and other fungal infections on the skin were healed after applying castor oil to the affected area. And amazingly, people who complained of gallbladder pain often had zero reoccurrence after several rounds of applying castor oil directly to the skin on the right side of the abdomen with a heating pad, otherwise known as a “castor oil pack.” Knee pain, shoulder pain, joint pain, muscle pain, sports injuries, sprained ankles, wrist pain, hernias, bowel obstructions, pain after surgery, arthritic pain, even skin cancers – all seemed to improve after applying a castor oil pack topically to the affected area. Some people say that castor oil can also be taken to help induce labor ( but remember: always check with your doctor first).

In his book, Dr. McGarey wrote, “The most obvious effect I found in treating the body using a castor oil pack was the enhancement of the immune system. As a portion of their duties, the lymphatics – part of the immune system – drain all parts of the body. When the tissues in any area of the body are cleansed by the eliminatory process, the cells are in much better condition to work normally – and the activity of the immune bodies and substances are able better to do their job in defending the body or rebuilding it.”

Wow! With nothing to lose and possibly so much to gain, why not give the old school castor oil pack a try?!

How to Apply a Castor Oil Pack

To make your own Castor Oil Pack at home, you need these 4 items:

  • Castor Oil (preferably organic castor oil)
  • Wool Cloth
  • Heating Pad
  • Old towel (either hand towel or bath towel size)

To make things as easy as possible, look for the Heritage brand “Castor Oil Kit” for sale on amazon or iherb. The kit contains both a wool cloth and castor oil, so it’s a great starter for making castor oil packs at home. The only thing is that the kit has regular castor oil and not organic castor oil. If you want to start with organic castor oil from the get-go, you can buy the wool cloth and the organic castor oil separately. What I did was I bought the kit first, and then upgraded to organic castor oil when I ran out of the oil in the kit. Either way will work! (Each person should have their own flannel so if you’re planning to do castor oil packs with your partner, friend or family member, then every person ideally has their own wool cloth. Best not to share your wool cloth with other people.)

With castor oil, you always want to choose a high quality cold-pressed oil. Don’t go for cheap, low-quality alternatives that may have been heated to a high temperature in processing.

Next item you will need is a heating pad. I bought my heating pad on amazon. (Note: If you live in a 220V country, you will need a heating pad for 220V voltage outlets.) Alternatively, if you don’t like or don’t have a heating pad, you can use a good old-fashioned hot water bottle.

I also use an old towel to keep the oil away from sheets or clothing. Castor oil is sometimes known to stain material, so having a towel to catch any oil can help to keep things white and bright.

Apply the Castor Oil Pack

  1. Lay down and get comfortable with whatever you may need for 40-60 minutes (book, water, phone, TV remote (to watch a health DVD of course), iPad (to read my book on Green Smoothies – hint, hint!).  I will usually do a castor oil pack before bed so I can just fall asleep with the heating pad on (I use a heating pad with a 2-hour timer).
  2. Plug the heating pad in and have it ready to apply.
  3. Apply a generous amount of castor oil topically to the affected area. I will usually add a palm-sized area of oil. The goal is to cover the skin area you are working on with a layer of castor oil.
  4. Immediately put the wool cloth on top of the oil.
  5. On top of the wool cloth, add your old towel.
  6. On top of the towel, place the heating pad. Turn the heating pad on. Heat helps the skin (and body) absorb the castor oil more quickly and efficiently.
  7. You’ve now made a Castor Oil Pack! It’s a “sandwich” of 4 layers directly on the skin: castor oil, wool cloth, old towel and heating pad on top.
  8. Now, relax and think of all the good you are doing for your body!
  9. Keep the heating pad on for at least 40 minutes, up to 60 minutes.
  10. Then, remove the heating pad and turn it off. Wipe the skin dry with a clean towel. You can store the wool cloth in a clean ziplock bag for future use (I simply wrap my wool flannel cloth in the old towel and store them together).

Congratulations! You can now use castor oil to help heal the body or promote detoxification.

If you’re interested in knowing more about healing power of castor oil, I highly recommend the book called The Oil that Heals: A Physician’s Success with Castor Oil Treatments by William McGarey.

My experience with Castor Oil

I’ve personally seen some pretty amazing results with castor oil. I’ve done many castor oil packs on my liver (abdomen right side area) during colon cleanses, after a liver/gallstone flush or even if I’m just feeling tired or sluggish, after a long-haul flight for example if I’ve got a bit of jet lag. I’ve also personally had menstrual pain go away completely in 30 minutes or less after applying a castor oil pack to my lower abdomen (I’ve never experienced heavier bleeding as a result). I always feel better after a castor oil pack.  I’ve used castor oil to eradicate ringworm, both on myself and on our dogs and cats, with outstanding success. (For more info on fungal infections, check out my article – What is Ringworm and How to Treat it Naturally.) Castor oil is definitely a staple item in our house and I seem to continue to find more uses for it all the time.

Often I recommend Castor Oil to my Iridology and Health Coaching clients, for anything from liver/gallstone pain to skin rashes to arthritis to Fibromyalgia, in addition to what their medical doctor recommended and after seeking approval from their doctor first, of course.

My husband was sold on castor oil after he healed a neck and shoulder injury in less than 24 hours. Several months ago, he fell while going up the stairs at home. At the time, he was holding things in both arms (and going up the stars too fast, in a hurry) so when he tripped on a stair, he didn’t have a free hand to catch the fall. He wound up stumbling hard into the stair with his shoulder/neck. Yes, ouch! Poor fella was in a lot of pain and could barely move his head from side to side. I immediately applied castor oil directly on his neck, with a wool cloth and heating pad and had him lie down for 45 minutes. Afterwards, he was feeling better but the neck was still stiff. That night, we applied another castor oil pack on his neck and he went to sleep with it on. The next morning, he was 100% back to normal with no pain, no stiffness and full range of motion in the neck. He was totally amazed! He commented that had it happened a few years ago, he would’ve been feeling bad for a week!

Read more information on the liver and liver cleansing here:

Liver Flush Detox Drink – Recipe for a Daily Liver Cleanse

Gallstone Liver Flush – Recipe & Cleanse Info

How to Do a Coffee Enema at Home

How to Do Onion Socks for Healing


What’s your success story with Castor Oil? Having natural tools for healing is truly a blessing. I love to hear new ways to use castor oil, so please share your experience in the comments below!


More on Detox:

More on Skin Cleansing:

More on Liver Cleansing:

Why the “Detox Myth” is a Myth!

The latest trend in the detox world seems to be debunking the whole idea of detox. You may have seen articles written by nutritionists or health coaches that say the body is designed to take care of itself and that it detoxes on its own when you go to the toilet every day, naturally. They may also say that your body is already designed to take care of environmental toxins thanks to your skin, liver, kidneys and lungs. Some “experts” are saying juicing doesn’t do any good at all (Read more on my take of these things below).

All information in this article is for educational purposes only. 
It is not for the diagnosis, treatment, prescription or cure of any disease or health condition. 

Fresh juices and smoothies cleanse the body, mind and spirit!

Fresh juices and smoothies cleanse the body, mind and spirit!

Why people are saying that detox or juice fasting doesn’t work

With so many opinions out there, it can really start to feel confusing. Why would natural health professionals try to persuade you or anyone against drinking a few juices or green smoothies to better your health?  If you look a little deeper, it seems quite clear that: 1) most people who are against detox are actually too scared to have ever even tried it and 2) fear-mongering articles generate a lot of google hits, a sad but true reality.

I can’t tell you how many times someone has challenged me to a detox duel, trying to argue that there is no need to ever clean the body out and demanding peer reviewed scientific studies for my claims that it does work. Do you need a scientific study to prove that the cut on your arm will heal or that your broken ankle will mend itself?

“The most popular criticisms of fasting are written by people who have never missed a meal in their lives.”
– A. Rabogliati, M.D.

Controversy makes for great publicity. If you tap into someone’s fear (i.e. doing this is wrong and goes against your body) then you can also manipulate them very easily to buy your special magic supplement, protein powder, pill or special other “detox” which just happens to be the perfect alternative to doing a juice fast, cleanse or detox, according to them.

What goes in doesn’t always come out

It’s true that your body is designed to eliminate wastes through your elimination organs; that’s your skin, colon, lungs, kidneys and liver. On a daily basis, your body is performing “natural detox” tasks as you release acid waste through your urine, solid wastes through your poo and other wastes through respiration, or breathing. But, what goes in doesn’t always come out.

Constipation, shallow breathing, dehydration, deficiency of minerals, acidosis, breathing toxic air, chemicals on the skin, too many chemical food additives, pesticides, prescription drugs, heavy metal contamination and imbalance of gut bacteria can all disrupt that perfect system. There are now are 3,000 chemical additives in food alone, and the numbers keep going up every year. Your organic body can only handle so much and after a few years or more, the body that was designed to take care of itself is overworked, toxic and exhausted. The result: bad skin, aches and pains, headaches, dark circles under the eyes, bad breath or body odor, poor circulation, low energy, digestive problems, polyps, hemorrhoids, trouble sleeping, chronic cough, mucous, kidney stones and even infertility.

Symptoms of imbalance are the reality of most people’s lives today. Just look at the rates of dis-ease and more importantly, how fast those rates are increasing. The most common diseases in the world today – heart disease, diabetes and obesity – are all diseases of excess. Do you personally know anyone who died from a lack of protein? But what about cancer….do you know anyone who had or has that? Speaking of which, do you know anyone who got cancer from drinking wheatgrass shots, green juices or green smoothies? It’s clear where the real danger lies. Too much fat, cholesterol, refined sugar, fried foods, processed foods and sugar drinks are wreaking havoc on people’s organic bodies. Anyone who gives their organs an occasional break from the onslaught of constant toxicity is giving their body the greatest gift ever imaginable – a chance to catch up on internal housework!

Does doing a Detox work, and if so, how?

Think of the oil filter in your car. When your car needs an oil change, do you put the new oil in with the old filter? Of course not…because the old filter is full of gunk and will not work well, even with the new clean oil. Changing the filter with a new one and then adding clean oil is the way to keep your car running longer and better.

The same runs true with your body. A “detox” is a natural tune-up for your body. If you’ve ever done a colon cleanse and seen (or smelled) what actually comes out, you KNOW that it’s nothing you ate recently. A detox works like this: you clean out the sludge, impacted old fecal matter and excess mucous with fresh cold-pressed juices, green smoothies, colonics or enemas and then bring in natural, whole and pure food (i.e. new fuel).

Once your body is back in tune aka “cleansed,” your eyes shine brighter, skin is clearer, body odor is less, urine is clear, poo is easy to pass and you have more energy, naturally. There is no need to convince anyone who feels that much improvement in just 7 days that detox really works!

In fact, the only scientifically proven way to achieve anti-aging is through caloric restriction, i.e. fasting.

The real myth is calling Detox a myth!

The idea of fasting for physical, emotional and spiritual purification is not some kind of diet trend; in fact, people have been doing it for thousands of years. Calling detox a myth is the only fad I can see, and I’m sure it will pass as more and more people experience the miracles of fasting themselves.

Detox is not recommended for pregnant or breast-feeding women, young children or in certain medical conditions. You need to be ready for the process of detox, both physically and emotionally. In the years that I’ve worked with detox clients, I personally witnessed medical miracles in the realm of detoxification: a woman with MS arriving in a wheelchair and walking out 3 weeks later, multiple cases of psoriasis and other rashes healed within just 7-10 days, worms released, migraine headaches gone, arthritis gone, acne healed, vision improved, constipation/digestive disorders healed, kidneys healed, fibroids/cysts healed and of course weight loss, clear skin and increased energy levels.

In short, don’t let the naysayers fool you. Your body will thank you for any chance to detoxify itself.

A fresh juice is a welcomed hit of energy & nutrients for your body

A fresh juice is a welcomed hit of energy & nutrients for your body

More on Detox:

More on Skin Cleansing:

More on Liver Cleansing:

Detox Soup to Make You Feel Awesome Recipe

This yummy Detox Soup is the perfect way to get through the holidays and start the New Year healthy. If you treat your body well with natural foods, you can immediately start to feel better – more energy, improved digestion, clearer skin, better sleep and yes, even weight loss. You can enjoy this recipe whether or not you are doing an actual “detox program.” But, if you are doing a detox, juice fast or cleanse…you can drink juices and smoothies until 5pm and have 2 bowls of Detox Soup at night for dinner. In the dead of winter, you may not feel so inspired to go 100% cold pressed juices or smoothies (key word: cold!). And that’s totally ok! Check out all the super detox ingredients and instructions below.

Detox Soup Ingredients

Detox Soup Ingredients

Detox Soup to Make You Feel Awesome Recipe

Ingredients:

  • 5 organic carrots, chopped
  • 1 head organic cabbage, grated
  • 2 white onions, chopped
  • 2 celery stalks, chopped
  • 2 Tbsp. celery greens, chopped
  • 1 leek, chopped
  • 2 lemons, squeezed
  • 4 Tbsp. extra virgin olive oil
  • 6-8 small garlic cloves
  • 2-3 inches of fresh ginger, juiced
  • 1 Tbsp. organic turmeric powder
  • Cayenne and/or organic black pepper to taste
  • Himalayan salt to taste (optional)
  • 2-3 liters of water

Prepare your soup ingredients in advance

Prepare your soup ingredients in advance


Directions:

1. Put olive oil in a large soup pot at high heat. Add garlic, onion, leek, salt and turmeric powder and let cook until the onions are soft. Note: If you are on a “no salt” detox, then omit the salt.

2. Add chopped carrots and celery; stirring occasionally. Add lemon juice and ginger juice. Note: If you don’t have a juicer, then grate the fresh ginger and squeeze the juice out by hand. Only add the juice; discard the pulp. (Ginger juice adds a mild flavor while adding the whole ginger can be over-powering in taste.)

3. Add grated cabbage. Fill the remainder of the pot with water; bring to a boil and let simmer for a minimum of 1 hour (up to 2 hours).

4. Pour serving into the blender and PULSE 3 TIMES at low speed, for 5 seconds each time. This keeps some of the texture in the soup but makes it soft and easy to digest.

5. Pour into serving bowl and add cayenne pepper or black pepper to taste.


First add onion, leek, garlic and turmeric.

First add onion, leek, garlic and turmeric.


Leek, onion and garlic are very anti-parasitic.
Turmeric is a natural anti-inflammatory and liver cleanser.


Cooked onion. leek, garlic and turmeric.

Cooked onion. leek, garlic and turmeric.


1. Put olive oil in a large soup pot at high heat. Add garlic, onion, leek, salt and turmeric powder and let cook until the onions are soft. Note: If you are on a “no salt” detox, then omit the salt.

Once the onion, leek, garlic and turmeric are cooked until soft, you can add the other ingredients plus water.


Adding fresh ginger juice and lemon juice

Adding fresh ginger juice and lemon juice


2. Add chopped carrots and celery; stirring occasionally. Add lemon juice and ginger juice. Note: If you don’t have a juicer, then grate the fresh ginger and squeeze the juice out by hand. Only add the juice; discard the pulp.

You can add either grated ginger or ginger juice, but in my experience, the ginger juice makes for a much more pleasant taste and is not as strong.


Finally, add the grated cabbage and water

Finally, add the grated cabbage and water


3. Add grated cabbage. Fill the remainder of the pot with water; bring to a boil and let simmer for a minimum of 1 hour (up to 2 hours).

Cabbage is naturally high in sulfur, making it a powerful detox food. It also adds a beautiful texture to any soup and is mild in taste.


Pulse the soup in an blender for an easy-to-digest consistency

Pulse the soup in an blender for an easy-to-digest consistency


4. Pour serving into the blender and PULSE 3 TIMES at low speed, for 5 seconds each time. This keeps some of the texture in the soup but makes it soft and easy to digest.

Note: Turmeric powder can turn the color of the blender container to yellow; but it will usually wash out after a few rinses.


Finally, you're ready to serve!

Finally, you’re ready to serve!


5. Pour into serving bowl and add cayenne pepper or black pepper to taste.

Cayenne pepper is very cleansing for the liver and is excellent for blood and circulation. Black pepper is not a major detox food, but it’s a matter of taste…you can add either or and still enjoy a fantastic detox soup!

This recipe is gluten-free, vegan, non-GMO and contains NO food additives. It’s full of fiber, contains natural medicinal foods and is good recipe for an alkaline diet. And, it tastes delicious. Try it for yourself and see!

More on Detox and pH Health:

More Healthy Recipes:

Detox Reaction vs. Allergic Reaction or Intolerance – Which one is it?

Understandably, it can be really frustrating to start eating better and still not feel your best. You might feel confused, discouraged or even angry that you are trying so hard and not seeing the results you want.

All information in this article is for educational purposes only.
It is not for the diagnosis, treatment, prescription or cure of any disease or health condition.

What happens if you start a new cleanse, supplement or detox product and find yourself feeling worse? Doesn’t feeling bad mean that you are having a detox reaction and you should “suffer through it?” And doesn’t foggy brain, fatigue, sugar cravings and rashes always mean you have candida? Definitely, no, or at the very least, mostly no.

Symptoms of a Detox Reaction vs. Allergic Reaction

Symptoms of a Detox Reaction vs. Allergic Reaction

I’ve been in this field for a long time and I want to share with you one of the biggest mistakes that people are making today in the world of detox and natural health: They are calling everything a detox reaction.

In my opinion, the most “over-diagnosed” and incorrect problem that people get labeled with when they’re eating healthy (especially high raw food or vegan) but still feeling bad is: 1) They have candida or 2) They are still detoxing. I’ll address the candida issue in another post, but I can tell you that in my experience of seeing well over 4,500 clients, 95+% of the time, both of these assessments are false.

Did you ever consider that you might actually just have a food intolerance or sensitivity to a food additive? Believe it or not, this happens much more than you could ever imagine. And, when you take the suspicious food out of your diet, you can feel better in a matter of days. Finally, you can start enjoying some real healthy bliss! Read on to understand the difference between a real detox reaction and a potential allergic reaction or an intolerance to a food or food additive.

What is a Detox Reaction

When your start to do a detox, as old, excess toxins flush out and unwanted bacteria, microbes and viruses die off, you can actually experience a temporary detox or cleansing reaction. Based on the work of Dr. Karl Herxheimer in the late 1800s, this temporary feeling of illness is known as the Herxheimer effect and is actually an intense sign of healing. These reactions can indicate that your body has started to cleanse itself as it quickly tries to catch up on the overload of toxins being released.

Symptoms of a Detox Reaction

  • Mild headaches, nausea, chills, sweating.
  • Fatigue, aching muscles.
  • Mucous, body odor, rashes.
  • Dizziness, weakness or even foggy brain.

Typical Length of a Detox Reaction

A detox reaction will last anywhere from a few minutes to a few hours. If you are experiencing a real “healing crisis,” normally that will last from 1 to 3 days total. Usually after the detox reaction, you feel amazingly better, and you will not have that symptom again. For example, you could feel chills or nausea or intense exhaustion, then a few hours later (or after an enema), feel totally energized.

Click on the Disclaimer Link below to read the full disclaimer for this website!

Click on the Disclaimer Link below to read the full disclaimer for this website!

What is an Allergic Reaction or Intolerance

True allergic reactions are much more rare than intolerances but they’re definitely on the rise (thank Monsanto and GMO foods for that). According to the World Health Organization (WHO), there’s been a continued rise in allergic diseases in the industrialized world for over 50 years.

An allergic reaction occurs when your body sees a food such as shellfish, peanuts or wheat as a foreign body or allergen, and starts to attack it by creating antibodies and inflammation.

Symptoms of an Allergic Reaction or Intolerance

The symptoms of an allergic reaction can vary from mild to severe. If you are exposed to an allergen for the first time, your symptoms may be mild. These symptoms may get worse if you are repeatedly exposed to the allergen.

According to the Mayo Clinic, The most common food allergy signs and symptoms include:

  • Tingling or itching in the mouth.
  • Hives, itching or eczema.
  • Swelling of the lips, face, tongue and throat or other parts of the body.
  • Wheezing, nasal congestion or trouble breathing.
  • Abdominal pain, diarrhea, nausea or vomiting.
  • Dizziness, lightheadedness or fainting.

If you have a food additive intolerance, such as an intolerance to Monosodium Glutamate, you can experience:

  • Headaches, chills, fatigue, aching muscles, dizziness.
  • Insomnia, sensitivity to light or sound.
  • Heart palpitations.
  • Fatigue (especially the following day).
  • Abdominal pain, diarrhea, nausea or vomiting.
  • Hives, itching or eczema.
  • Swelling of the lips, eyes, face, tongue and throat or other parts of the body.
  • Wheezing, nasal congestion or constricted breathing.

Typical Length of a Food or Food Additive Allergy/Intolerance Reaction:

An intolerance or allergy can last indefinitely, especially if you continue to eat the food or use the product that you are intolerant to. The problem with “intolerances” is that they usually have a delayed reaction time and they don’t give nearly as severe a reaction as an “allergy.” That’s why they can easily go undiagnosed for years. After a reaction, you may feel temporarily better, but if you eat the suspect food again, you will have the exact same symptoms over and over and never find yourself feeling better.

As you can see from looking at the above lists, it can be easy for a novice to label a food allergy or intolerance incorrectly and call it a detox reaction – the symptoms are almost exactly the same! In rare cases when someone is taking too many detox supplements or doing too many detox protocols at once (far infrared sauna, colonics, zapper, parasite cleanse, heavy metal detox etc.), I recommend to slow down the detox itself and determine the best order and pace of detox for the individual.

In the old days of detox, almost 20 years ago, no one was doing this stuff and the people who were really knew what they were doing. In the world of detox today, there is a TON of misinformation out there. Someone who made 1 green juice or fasted for 3 days is suddenly on every forum as the guru of detox. As with everything, this is a blessing and a curse at the same time. It’s a blessing because more people are getting out there and trying a fast or cleanse for the first time and that is simply awesome. And I no longer get booed out of a room for talking about coffee enemas, lol! But it’s a curse because people are being misled down the wrongs roads.

What kind of foods can you be intolerant to?

You can react to certain fillers in supplements (like malodextrin); chlorella in your green powder blend, Miso soup, seaweed snacks, vegan butters, vegan mayonnaise, and pesticides. I’ve even had clients react to whole foods like tomato paste, sesame seeds or celery. Once we get that food out of the diet, the reaction goes away and then we know for sure that we’re dealing with a classic food intolerance and not a detox reaction. How does it work? I can usually identify which foods you need to remove after 25-30 minutes of Q&A about your symptoms, current diet or recent detox.

If it is a detox reaction, then a few things to get you through a healing crisis include: a castor oil pack, detox onion socks, epsom salt baths, activated charcoal, liquid bentonite clay, extra Vitamin C, magnesium, distilled water, prayer/meditation (to maintain an alkaline pH) and rest.

For more on how to do a detox at home or how to navigate through your detox symptoms and start feeling great, book a private health consult with me via Skype.

How to Book Your Health & Nutritional Coaching Session:

1. Take photos of your eyes with a digital camera.
2. Email the photos to me for approval.
3. We schedule a time to meet via phone or Skype!

More on Detox Reactions:
What are the symptoms of a Herxheimer (Detox) Reaction?

More on Detox:

Raw Detox Salad Recipe

Eating raw organic food can be so much fun! Check out this gorgeous salad that took only a few minutes to prepare…and it’s full of detox foods to make it a mini-cleansing meal!

Use the healing power of raw foods to create a fantastic detox salad

For the salad add: Chopped rocket leaves, grated carrot, chopped cucumber, fresh mint, parsley, sunflower seeds and top with homemade raw sauerkraut. If you can’t find rocket leaves, then just use fresh chopped spinach or romaine lettuce.

Make the dressing with: Chopped garlic, crushed papaya seeds, extra virgin olive oil, raw organic honey (optional), fresh lemon, a dash of cayenne pepper and Himalayan salt to taste. The papaya seeds should be fresh, from a ripe papaya. I usually set aside some papaya seeds after eating the papaya. Store the seeds in a small jar in the fridge for up to one week. Use a few seeds each time you make this recipe.

What makes this a DETOX salad?

  • Fresh parsley: Kidney cleanse
  • Cayenne, olive oil & lemon: Liver cleanse
  • Garlic & papaya seeds: Anti-parasitic foods (kills germs)
  • Sauerkraut: Natural probiotic (good bacteria)
  • Rocket & cucumber: Skin cleanse
  • Sunflower seeds: Good for glandular system
  • Raw honey: Immune booster
  • Fiber: Colon cleanse

Let Your Food be Your Medicine…..Wow, it’s really true!

Click here to learn how to make fermented cabbage and raw sauerkraut. In a temperate climate, it takes as little as 4 days!

What is DETOX?

The highly refined foods that you eat every day, including sugar and white flour, make you susceptible to intestinal problems, and possible diseases. The average diet today is heavily loaded with chemical additives, flavorings, coloring agents, toxic pesticides, herbicides, fungicides, and other toxic chemicals which overburden our bodies. Add to that work and family-related stress, indigestion, illnesses, constipation and sedentary lifestyles, and you have a recipe for an unhealthy colon and an overweight and tired body. Many health conditions are caused by the combination of processed foods, low fiber diets and poor evacuation of waste.

Periods of abstinence from solid food – a ritual performed since ancient times – can allow the body to “cleanse and purify” or “detox”, that is, to remove toxins, excess fat and even parasites caused by years of ingesting processed food, excess food, refined sugar and wheat and even fast food that eventually impairs the normal functioning and our body’s elimination.

During fasting, large amounts of these accumulated metabolic wastes and poisons are eliminated through the cleansing ability of all the organs of elimination – the colon, liver, kidneys, lungs and skin.

Eating more detox foods in your regular diet is a way to have a “mini-cleanse” on a regular basis and that helps the elimination organs keep us with their daily housework. Eat a detox salad for lunch instead of pizza or Chinese food and you will have better digestion, less headaches or insomnia, improve your skin and increase energy levels, simply by choosing better fuel for your body. A raw food diet is a detox on its own. You can continue for 1, 3 or 7 days on a 100% low fat raw food diet as a way to really give the body a good natural cleanse from the inside-out.

For more on how to start a raw food diet, how to do a detox at home or what minerals you may specifically be deficient in, book a private health consult with me via Skype.

How to Book Your Health Coaching Session:

1. Take photos of your eyes with a digital camera.
2. Email the photos to me for approval.
3. We schedule a time to meet!

More on Raw Food:

How to Ferment Cabbage and Make Raw Sauerkraut

If you think that eating more fresh, natural raw food in your diet is too expensive, then this recipe is definitely for you! Making fermented foods at home is one of the most inexpensive ways to enjoy raw food. For optimal digestive health, we need to get good bacteria in gut on a regular basis. Antibiotics destroy all the bacteria in our system, both good and bad. Over time, this can lead to more imbalance in digestion function, absorption and elimination. Some experts even say that food allergies, autism and ADHD may be related to an imbalance of bacteria in the colon. Certainly many digestive diseases like colitis, diverticulitis and Crohn’s disease are caused in part by lack of good bacteria in the gut. Having the right balance of good bacteria helps to strengthen immune system, improve digestive health and long-term, can even prevent dis-ease. Probiotic, or good bacteria, literally means “for life.”

All information in this article is for educational purposes only.
It is not for the diagnosis, treatment, prescription or cure of any disease or health condition.

How to Make Raw Sauerkraut at home, a healthy naturally fermented food

How can we get good bacteria or “probiotics” back in the gut? The Western diet has virtually eliminated all traditionally fermented foods out of the diet, with the exception of yogurt. Store-bought yogurt is pasteurized, and usually contains added sugar, flavor and colorings. It’s also not a suitable option for vegans, and it’s expensive! Nowadays you will see Kombucha drink as a fermented raw food vegan option. Kombucha is fantastic, but it is also expensive at $6.00 per bottle. You may see sauerkraut for sale in supermarkets, but it’s already been pasteurized, so virtually all of the good bacteria has already been destroyed.

Not to worry! If you have just a few heads of cabbage, some salt and a few jars, you can easily make your own raw sauerkraut at home! It’s so easy to make that you will be wondering why you didn’t make it sooner! Cabbage is not expensive, and once the sauerkraut is made, you only need to add about 2 Tbsp. per day to your salad or veggies to get the good bacteria that your body needs. At that rate, 2 heads of cabbage could easily last up to 2 weeks for a family of 4. That’s some healthy savings!

What You Need: Raw cabbage, salt, a grater and jars

How to Make Homemade Raw Sauerkraut

Raw Sauerkraut: Ingredients

  • 2 medium-large organic green cabbage heads (or purple cabbage)
  • 1-1.5 Tablespoons Himalayan Salt or Pure Sea Salt
  • 1 Tablespoon caraway and/or mustard seeds (optional)
  • 2-3 sprigs fresh dill (optional)
  • 2 organic carrots (optional)

Raw Sauerkraut: Equipment

  • Grater or Mandolin
  • Cutting Board and Knife
  • Large Mixing bowl
  • Wooden Mallet (optional)
  • Large widemouth canning jar (or extra large mason jars)
  • Small glass baby-food jar or small glass cup to fit inside the larger jar
  • Clean rock or other weights to fit inside the small jar (to weigh down the cabbage)
  • Old t-shirt or towel for covering the jar
  • Large plate to catch any overspill

Instructions

Clean all materials before starting. Fermentation can be a sensitive process, and if there is any soap residue in your jars or hand cream chemicals on your hands, the fermenting might not work. I prefer to wash everything with a 50/50 mix of tap water and boiled water. For safety reasons, I do not recommend using 100% boiled water. Be careful not to rinse your jars with only boiling water because the glass can crack. Add tap water first, then some boiled water. Swish everything around and rinse. Wash your hands well with clean water and no soap.

Shred the Cabbage. Peel off the leaves of the cabbage and set them aside for later. Grate the cabbage on the large grate side of the grater or use a mandolin to shred the cabbage. Be sure to use the safety mechanism on the mandolin!

Combine Cabbage and Salt. Place the shredded cabbage to a large bowl and sprinkle some of the salt over top. If you have a wooden mallet, then start pounding the cabbage. If using only hands, then begin massaging and squeezing the cabbage with your hands. In just a few minutes, you should start to see the cabbage becoming watery and limp – this is a good sign! You can add some shredded carrot at this stage too (optional).

Making Raw Sauerkraut: Use a wooden mallet and pound away!

Add the salt. Then start squeezing by hand…

As you squeeze the cabbage, it will start to soften and you should see liquid/water. Put the liquid and cabbage in a glass jar for fermenting, pushing out any air bubbles. You can also add fresh dill, whole mustard seeds or caraway seeds for flavor.

Pack Cabbage and Liquid into Jar. Use your hands to pack the cabbage into the jar, pressing out any air bubbles each time you add more. At this stage, you can add some fresh dill, caraway seeds or mustard seeds for flavor. Pour any excess liquid from the cabbage into the jar. When the jar is nearly full, place a few of the larger outer leaves to cover the surface of the sauerkraut. This helps keep the cabbage submerged.

Gently press out air bubbles. Place some large cabbage leaves on top and be sure that your cabbage is all covered by the liquid. If necessary, add a small amount of water to cover the cabbage.

Cover the Jar. Place your filled jar on a dish, cover it with an old t-shirt or towel and put it in a quiet place to happily start fermenting. Ideally, your jar will be on top on a cabinet or on a table where it will not be disturbed. The best place is away from direct sunlight and at a cool room temperature — ideally 65°F to 75°F.

Place your sauerkraut on a dish or in a large bowl. Usually there will be liquid coming out of the jar as it ferments; this way any liquid escaping is caught and will not make a mess.

Finally, cover your sauerkraut with a towel or old t-shirt and keep it undisturbed. Check once a day, pushing out air bubbles and adding more water if needed. It should be ready in about 4 days.

Check Daily. Once a day, be sure to check your cabbage. Open the lid and push down the cabbage to release any air bubbles. If necessary, add a small amount of additional water and salt. By the 2nd day, the cabbage has usually been pressed down enough that there is some extra space in the jar. At that point, add the small baby-food jar or glass cup with rock inside to keep the cabbage submerged under water.

Taste after 4 days. Small batches of sauerkraut like this can be finished in as little as 4 days. On the 4th day, taste your cabbage. If you’re happy with the results, you can transfer your sauerkraut to the fridge where it will continue to ferment, although much more slowly. You can also keep it out to ferment for up to another 10 days, but you must check it every day, press out any air bubbles and add additional water and salt if necessary.

Note: It’s normal to see air bubbles coming through the cabbage during fermentation. When you press them down daily, you are eliminating the air space between the cabbage. In some cases if you forget a day, you may start to see mold, dark scum or smell a bad odor from the cabbage. If the scum can be skimmed off, then it’s ok to do so. If there is a bad smell or visible mold, I recommend to throw out the batch and start over.

When your sauerkraut is ready, put the large container in the fridge or transfer the sauerkraut to smaller jars and then refrigerate. Raw sauerkraut is a fermented product and will stay fresh for a few months. Once you open a jar and start eating it, it’s best to consume the sauerkraut within 30 days.

After 4 days, start tasting your batch. When you like the taste, you can transfer to smaller jars to put in fridge…or share with family and friends!

Making Large Batches of Sauerkraut

You can make much larger batches of sauerkraut in a ceramic fermentation crock, but the crocks are very expensive. It’s probably a good idea to try fermenting in glass mason jars first and see if you actually enjoy eating sauerkraut before making the investment in a crock. (One benefit of the large crock is that you don’t have to check it daily. The weights in the crock keep the air bubbles out.) Over time, if you find you want to make larger batches, then definitely consider making the leap.

How is Sauerkraut Fermented?

Raw sauerkraut is made by a process called lacto-fermentation. We can ferment cabbage thanks to the good bacteria that naturally exist on the surface of the cabbage leaves (and many other veggies too). Food becomes fermented when the “good” lactobacilli bacteria convert their sugars and starches into lactic acid. This is a natural preservative that inhibits the growth of harmful bacteria. The lactic acid also promotes the growth of healthy flora throughout the intestine. Sauerkraut contains high levels of glucosinolates. These compounds have been shown to have anti-cancer activity.

The diets of every traditional culture have included some kind of lacto-fermented food. Kimchi from Korea and cortido from Latin America are 2 examples of traditionally fermented vegetables made from lacto-fermentation. In Europe, people fermented sauerkraut, grape leaves, herbs, and root vegetables. Lacto-fermented veggies are nutrient-dense, enzyme rich, a raw food, vegan, vegetarian and gluten-free. And they taste yummy too! Fermented cabbage is one of my favorite foods for a mini-daily detox and a balanced raw food diet!

More on Fermented Foods:

Beginner’s Guide to Green Smoothies

When was the last time you ate a whole bunch of parsley or spinach in one day? Chances are you never have, yet leafy greens like these pack a powerful punch of nutrition. A great way to utilize the amazing power of green leafy vegetables is with a daily green smoothie.

Beginner’s Guide to Green Smoothies by Jennifer Thompson

I first started Green Smoothie after several months on the raw food diet, and right away, I felt a difference! My energy levels improved even more, and thanks to the added ground flax seed in the Green Smoothie, my bowel movements became even more, well…epic! I knew that this was something that everyone could do at home, even if they didn’t want to go into a strict raw food diet. So, I started telling my Iridology and Health Coaching Clients about Green Smoothies.

Just some of the amazing stories of success I heard: Symptoms of menopause – gone; Acid Reflux – gone; Sugar Cravings – gone; Colitis – gone; PMS – improved; Digestive disorders and constipation: gone; Skin conditions – cleared; Sleep function – improved; Arthritis – gone; and the list just goes on and on!

One of my clients from Switzerland got her 86-year mother hooked on Green Smoothies and saw her digestion function and energy levels improve. Another client canceled his knee replacement surgery after he realized that the chronic pain and inflammation in his knee had disappeared after starting to drink Green Smoothies. I heard from clients who lost weight finally, after years of yo-yo dieting. I even helped a client get pregnant after 8 years on IVF just from having a daily Green Smoothie…she calls her baby a “Green Smoothie miracle!”

What is a Green Smoothie?

A Green Smoothie is a mixture of water, leafy greens and fruits. The ingredients are thoroughly blended with water in a blender. It is important to note that a Green Smoothie is a blended drink and not a juice. A blender is used to break down the cellulose structure in the greens thereby unlocking their valuable nutrients.

Green Smoothies 101: Your FAQs Answered

Green Smoothies 101

Some of the questions people commonly ask when they first enter the world of green smoothies…
When greens are liquidised in a blender, do they lose nutrients?
To break down all the fiber and cellulose in green leaves, you would have to spend several hours a day chewing and have extremely healthy teeth. In a Green Smoothie, the blender does the chewing for you, blending all the greens into very small pieces. So, a Green Smoothie can actually provide more nutrition because it’s blended, not less.

Can I use powdered greens instead of fresh?
The real benefits and healing potential in Green Smoothies lie in the fresh leafy greens, due to their fiber, nutrients and live enzymes. Powdered greens (spirulina, wheatgrass powder, kelp, green powder blends, etc.) are great to add to your Green Smoothie for even more nutritional power, but don’t forget to use fresh greens too. During travel, powdered greens are a practical and easy way to enjoy Green Smoothies on the road.

Can I use ice or frozen fruit?
Energy is required to ‘warm up’ a frozen drink, and that energy takes away from the process of digestion and absorption. Using cold water is ok, because it’s not nearly as cold as ice.

Can I add yogurt or milk instead of water?
Dairy is mucous-forming to the body and can slow down the cleansing and absorption process. You can still enjoy dairy products in your normal daily diet if you choose, but try to keep the Green Smoothie dairy-free so it is easy for your body to digest.

Isn’t that too much fruit sugar?
If you are diabetic, and you find yourself already sensitive to fruit, then use low-glycemic index fruits, such as blackberries, raspberries, strawberries and green apples. If you are unsure in any way, it’s best to consult a medical doctor.

What is the best blender to use for Green Smoothies?
The best blender for Green Smoothies is one that you actually use! Many people think they need an expensive Vitamix or Blendtec blender in order to make Green Smoothies, and that’s simply not true.

A standard household blender is fine, as long as you add water and fruits first, blend, and then add the greens and blend again. That way, you won’t destroy the motor and you will get many delicious Green Smoothies from your blender!

Am I supposed to eat only Green Smoothies?
No! You can eat whatever you normally eat. All you need to do is simply add 1 Green Smoothie a day to your diet.

I eat meat. Will a Green Smoothie still work?
Yes! Green Smoothies will compliment any diet or lifestyle, whether you are a meat eater, vegetarian, vegan or raw food vegan. You do not have to give anything up.

Can children drink Green Smoothies?
Yes! In fact, children seem to really love Green Smoothies! It’s a fantastic breakfast for the entire family and a great start to a healthy day!

How to Make a Green Smoothie with Easy Recipes

Why Green Smoothies?

Primarily because of the health results.

Greens represent a convenient, essentially non-caloric, nutrient-dense source of otherwise hard to obtain minerals like magnesium, calcium, potassium and manganese.

When the body starts to get the nutrition it needs, it will naturally start to crave healthier foods, and that’s a great weight to jump-start eating the right foods for weight loss. Eating fiber in the diet is essential for proper elimination and good colon health.

Aim to drink about 500ml (about 17 ounces or 2 cups) of Green Smoothie per day.

How to Make a Green Smoothie

1. Blend 60% fruit to 40% greens in a blender.
2. Add water and/or high-water content fruits first.
3. Then add greens, blend again.
4. Blend different fruits and greens every day.
5. Try different combinations and find what tastes best to you!

What to Use for Greens

You can try kale, spinach, Romaine lettuce, bok choy, arugula, celery leaves, alfalfa, clover, parsley, mint, coriander (cilantro), dandelion, Collard greens, watercress, beet greens, or Swiss chard.

Avoid using more than 2 different greens at a time – this will ensure smooth, easy digestion and assimilation. It is important to use variety with your greens over a period of time, so try to buy something different each time you shop.

What to Use for Fruits

Enjoy apples, pears, bananas, oranges, papaya, pineapple, peaches, nectarines, grapes, strawberries blueberries or raspberries, depending on what you can find fresh and preferably in season. Watermelon tastes great in a smoothie. You can also use a few medjool dates just to add some sweet flavor.

Use 2-3 different fruits in your smoothie for a pleasant blend of flavors. Banana is delicious in smoothies because it adds a nice sweetness and thickness to the drink.

4 Green Smoothie Recipes

Digestive Power

– 1 Handful Fresh Watercress
– 1/2 bunch Parsley
– 2 cups Grapes
– 2 Red Apples
– Dash of Cinnamon
– 1/4 inch Fresh Ginger
– 1 T Raw Cacao Powder
– 1 T Coconut Oil
– 1 cup Water

Immune Booster

– 1 Handful Baby Spinach
– 1/2 bunch Fresh Mint
– 1 Apple
– 1 Banana
– 1 Lemon
– 1/2 inch Fresh Ginger
– 2 cups Water

Mega Omegas

– 6-7 Large Kale Leaves
– 1 Handful Celery Greens
– 3 Bananas
– 2 T Ground Flax Seed
– 1 T Whole Flax Seed
– 2 T Flax Oil
– 1 tsp. Agave Nectar, Raw Honey or Date Sugar
– 1/2 cup Water

Antioxidant Blend

– 2 Handfuls Romaine Lettuce
– 1 cup Red Grapes
– 1/2 cup Blueberries
– 2 T Goji Berries (soaked)
– 1 Pitted Date (Medjool if available)
– 1 tsp. Acai Powder
– 1/2 tsp. Spirulina Powder
– 1 cup Water

Directions

1. Carefully wash all greens and fruit.
2. In a blender, add the water, fruit and powders and blend until smooth.
3. Add the greens and blend again.
4. Drink and toast to your vibrant health!

Now on DVD: GREEN SMOOTHIE POWER!

Finally, Jennifer’s famous Green Smoothie Class is now available in DVD. Watch and learn…you will soon become a Green Smoothie Expert, ready to bless the world with your green love!

Find out for yourself why thousands of people are turning to Green Smoothies for more energy, better health, detox & weight loss! Are you not experiencing the level of energy and good health you desire? Green Smoothies could be your answer to start getting results. Jennifer’s NEW Green Smoothie Power DVD teaches you how!

here

With the DVD, you also receive 3 eBooks. Use the Quick Reference Guide eBook to get started immediately. Read the How to Make Green Smoothies eBook for inspiration and motivation. Experiment with 200 amazing recipes in the Green Smoothie Recipe eBook. You can be making your first Green Smoothie within minutes!

See how easy it is to add Superfoods to your Green Smoothies, and learn the real secret to Green Smoothie Success: How to Love Your Blender! Plus FREE EXTRAS included: 2 high-quality 100% Cotton Sprout Bags just for you!

BUY the Green Smoothie DVD and 3 eBook Kit:

Green Smoothie Power Kit


or buy the eBooks separately!

eBook: Green Smoothie Quick Start Guide

Quick Start Guide eBook

This is the condensed version of Jennifer’s famous Green Smoothie Class, complete with the most popular FAQs, benefits of Green Smoothies and how to make your Green Smoothie taste great!

Read what others had to say:

“My energy levels are much better and I don’t have cravings for sweets like before.” – Bill

“People started to comment on how well I look and my skin is so much better!” – Helen

“I feel focused!!” – Cathy

New and improved Edition!

BUY Green Smoothie Quick Start Guide eBook:

eBook: Green Smoothie Quick Start Guide (.pdf)


eBook: 200 Green Smoothie Recipes

200 Green Smoothie Recipes eBook

200 Green Smoothie Recipes are available in this great eBook. That’s 4 different Green Smoothies every week for an entire year!

Some of Jennifer’s Amazing Recipes:

Happy Morning, Daily Detox, Quick Cleanse, Fresh Start, Power Blaster, Digestive Balance, Liver Tonic, Instant Health, Basic Instinct, Champion Blend, Enzyme Energy, Pick Me Up, Mega Omegas, Full of Gratitude, Tweet-worthy, Natural Glow, De-Stresser, Simple Pleasure, Soul Food, Fast Tune-Up, Green Gaspacho, Protein Power, Green Kingdom, Antioxidant Blend, Divine Creation, Ab Fab, Super Dude and many more!

New and improved Edition!

BUY 200 Green Smoothie Recipes eBook:

eBook: 200 Green Smoothie Recipes (.pdf)


eBook: How to Make Green Smoothies

How to Make Green Smoothies eBook

Learn what the necessary tools are for healing and understand why you can’t get long-term results without adding more greens to the diet.

See why having greens in a raw and blended form is the superior way to get all the Power of the Greens.

Find out what kind of blender you need, the best combinations of greens, fruits and superfoods for your health and hear amazing success stories, including the reversal of grey hair from Green Smoothies!

New and improved edition!

Why wait any longer to start feeling better, looking great and losing weight?

BUY How to Make Green Smoothies eBook:

eBook: How to Make Green Smoothies (.pdf)


Article written be Jennifer Thompson for Awakenings ME Magazine.

Find out how to book an Iridology Session.

Buy Jennifer’s Green Smoothie DVD here.

Book a Personalized Detox with Jennifer today!

More on Green Smoothies: