Our Farmhouse Kitchen for under $3K!! Before and After DIY Makeover
If you’re like me, then you spend a lot of time in your kitchen. Chopping, grating, slicing, juicing, fermenting, harvesting, cleaning….the list goes on and on! The kitchen should be a room you love, otherwise you won’t want to spend any time there at all. If you can’t find the knife or cutting board you need, it becomes a hassle. Organized cupboards, dried foods and easy access to appliances make a whole world of difference. A nice vibe and a personal touch in the decor always give a good positive energy flow to the space. Changes to your diet and lifestyle have to start in the kitchen!
We recently did a DIY kitchen makeover, from a bad 80’s sitcom feel to a cool and funky farmhouse kitchen…and now our kitchen is a space I love! It’s a fun and organic feel. And for those of you on a budget, you’ll be excited to know that we did everything for under $3000! Now that IS amazing. You don’t have to spend a lot of money to put a new spin and fresh look on your old dark and dated kitchen. Trust me! Here I’m going to share the results!

Farm Kitchen DIY – Before and After pics
The 80’s Kitchen Before
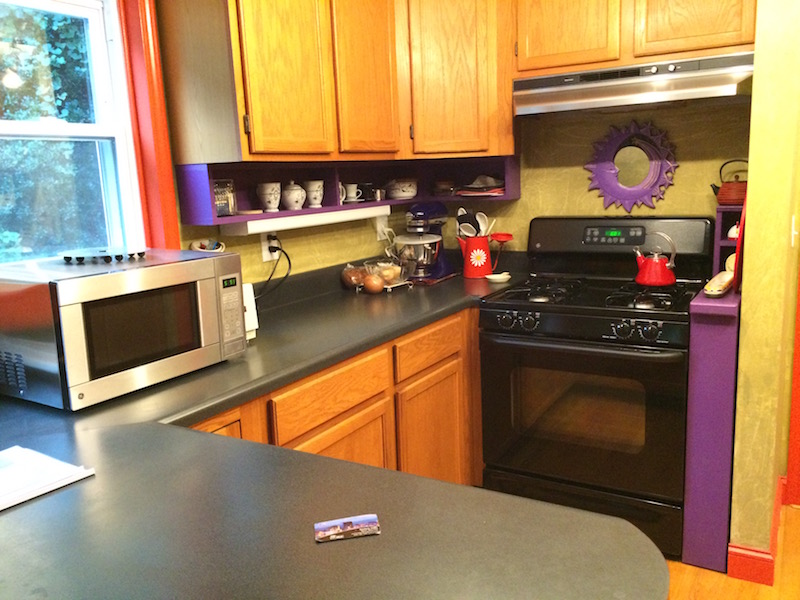
We definitely did not choose our house for the kitchen, to say the least. It’s small and a bit strange in its layout, with the sink by itself against a wall and not under the windows facing outside. The dark oak cabinets were screaming 1981 and my dreams of having a fresh clean modern kitchen were not reflecting reality at all. But, we fell in love with the land (for starting an organic farm) and the area (an all farming area in the mountains of North Carolina) and the rest of the house was nice too so it’s all good.

Farmhouse Kitchen Makeover BEFORE
The Farmhouse Kitchen After
Since we may rehab the entire kitchen in a few years, we didn’t want to waste money on new cabinets or counter-tops or even a new layout yet. Our goal was to give the kitchen we have a decent enough facelift to actually enjoy the space and start having fun preparing lots of healthy food, straight from our veggie garden. Because I was working with existing cabinets and counter-tops, I decided to go for a farmhouse look because a modern design wasn’t possible with what we had. Initially I figured the rehab would take 2 months. In the end, it took 6 months to complete. Well, everyone says these DIY’s take longer than you expect (without a full crew working on it like in those 30-minute HGTV shows that make everything look far, far too easy!).
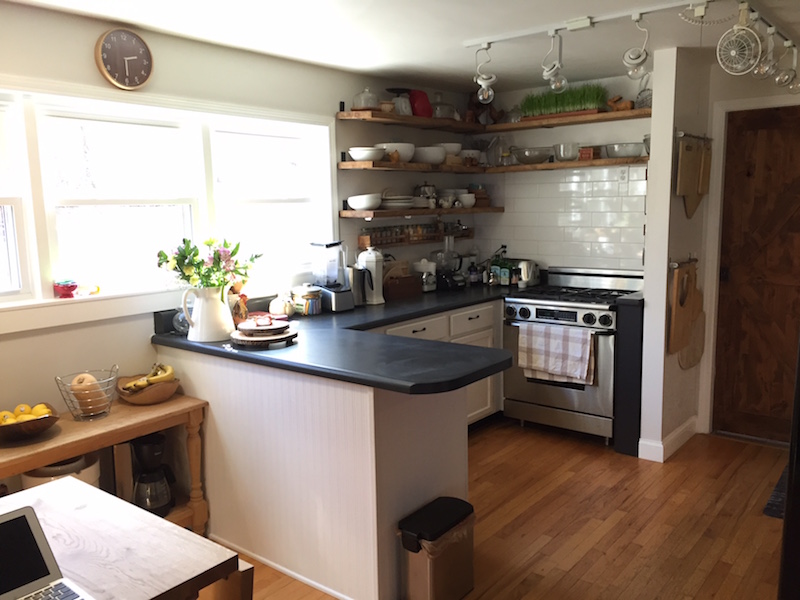
Farmhouse Kitchen Makeover AFTER
Farmhouse DIY Makeover List of What we Did
1. Popcorn ceiling removal – we did this ourselves and it all crumbled off with wet rags, no scraping or spraying at all. Took 2 days in total to complete. (Then we went to Vegas for the weekend, true!)
2. Painted old light fixtures. No idea why but the previous owners had painted the discs red/orange so I painted them white. 1 day.
3. Walls and trim sanded, primed and painted. The old kitchen had a strange greenish paint that had a slight texture which has to be sanded and the trim was a bright orange/red. Yes, time to GO! This was a BIG job. We moved everything to one side and painted 1/2 the kitchen then moved everything to the other side and painted the other half. The paint we used for the walls is Pratt & Lambert “Winchester” in semi-gloss and for the trim, a semi-gloss white. I also added beadboard wallpaper to the kitchen peninsula and painted it too. Beadboard wallpaper is amazing! 1 week.
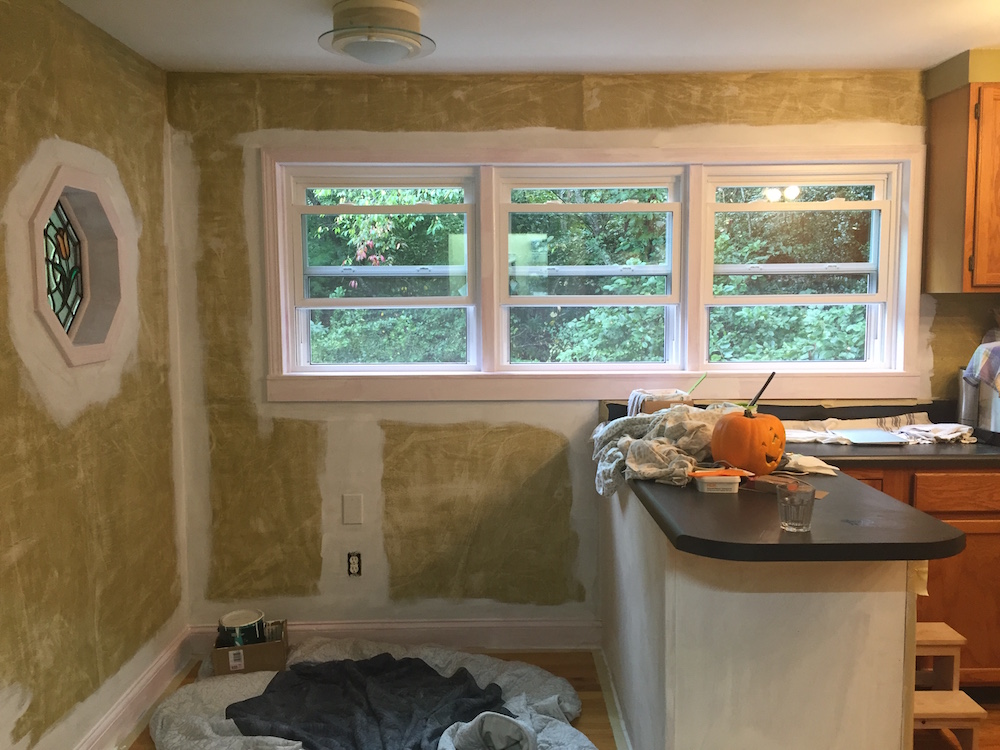
Bye bye green walls! What a difference a coat of paint makes.
4. Cabinets primed and painted white, with beadboard wallpaper added and painted, then installed oil rubbed bronze hardware. I got the cabinet pulls/knobs and cabinet handles from amazon and drilled all the holes myself. Definitely buy the cabinet hardware drilling template if you are going to do this step yourself. This was a huge job that I hope to never have to do again! 1 week.
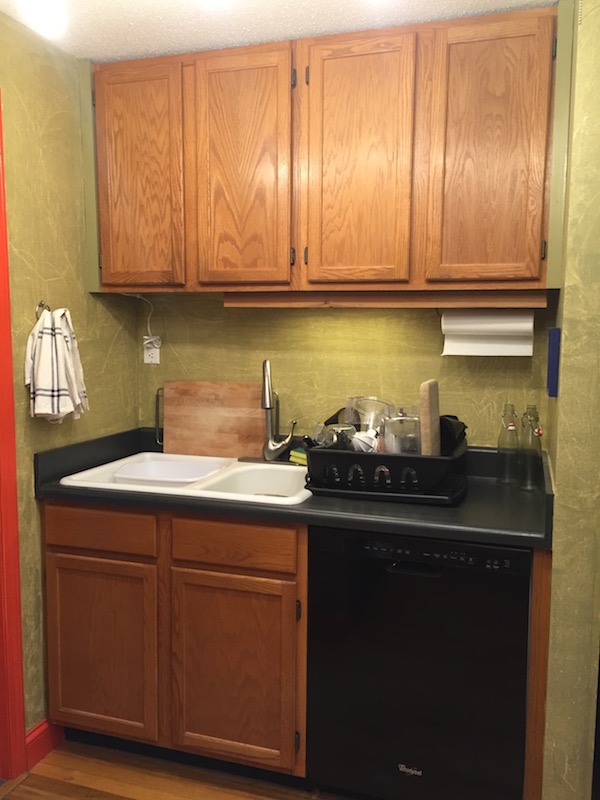
Kitchen Oak Cabinets BEFORE painting – Kitchen Makeover
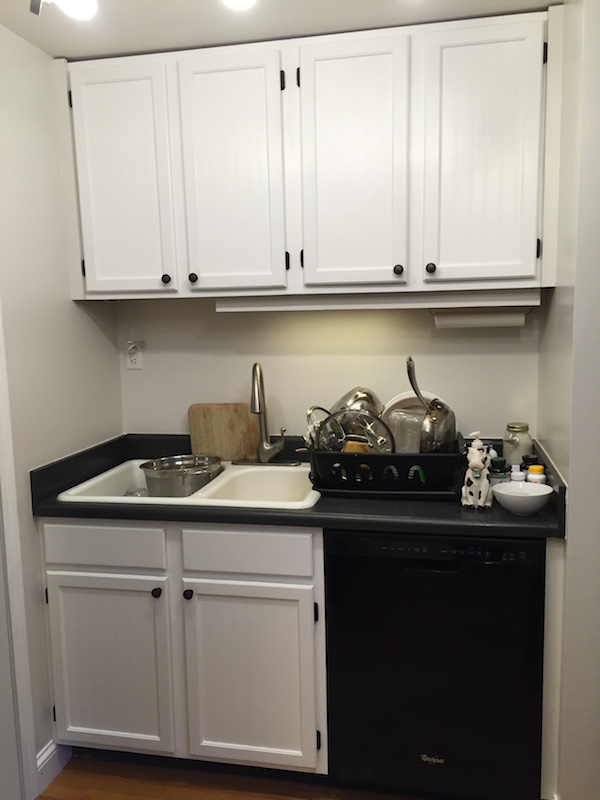
Painted Kitchen Cabinets – AFTER with new hardware – Kitchen Makeover
5. Also painted a pull out cart next to the stove which was originally purple (yes purple). I painted it gray to match the counter tops. Later we realized that the shelf on this cart was too high for the magnetic knife strips on the wall, so my husband cut off one shelf. I then put wood filler in the gaps, then sand prime and paint again. 2 days.
Note the purple pull out cart next to the oven (it holds baking trays and drying racks inside)

The pull out cart next to the oven now painted in grey (and notice the new barn house style pocket door)
6. Finally we were ready to put up the farmhouse shelves! I forgot to mention that my husband pulled down the wall cabinets before we painted the walls. It was a bit of a spontaneous decision. We were both working in the kitchen preparing the walls one day and all of a sudden he said, “I’m taking these down!” And that was that. We had looked at photos or farmhouse wood shelves before that but hadn’t decided to do it or not. Well, in that moment we pretty much decided to go for it! After painting the walls, we measured the space and went to Lowes to buy wood. I had done A LOT of research checking blogs for farm style kitchen shelves, and wasn’t able to find exactly what I wanted which was a thick wood floating shelf without having to make a hollow wood shelf and without spending a lot of money on expensive wood. In the end, we bought simple pine 2 -inch thick shelves (that’s 2x12x12) and here’s a tip: Lowes will even cut the wood for you, just bring the measurements!
7. Farmhouse shelves phase 1: Sanding and staining. We decided on 3 shelves on one wall and 2 on the wall with the stove. Also we took out the old cabinet above the fridge and measure out space for shelves there too. I sanded and stained everything myself (phew!). The stain we used was Minwax Early American, left on the wood for 10 minutes. But, I used a pre-stain wood conditioner first which I think is an important step! Then I left to dry overnight and applied butcher block oil. I didn’t want to use any varnish because of the nasty chemical smells. This took 3 long days.
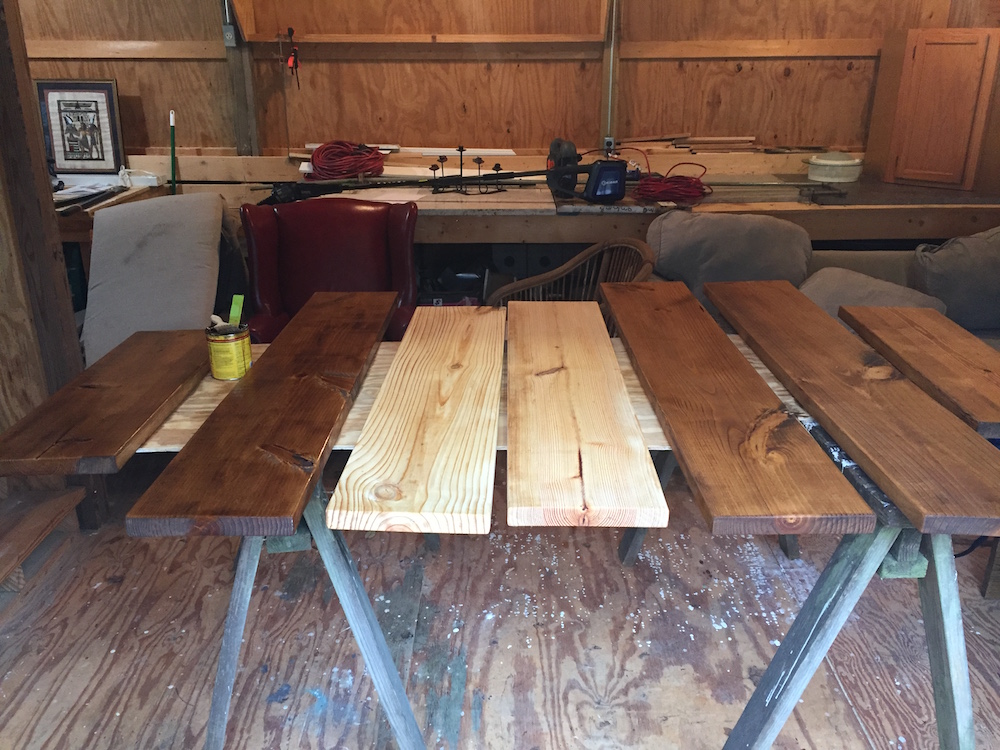
Sanding and staining the farm house style shelves
8. Farmhouse shelves Phase 2: Hanging the shelves. Prepare yourself for lots of measuring, and checking the level many times. We marked all the studs before painting because I knew with shelves like this, we had to hang them in the studs. Almost all the brackets got in studs with the exception of one, so I’d say we did ok! For the brackets, I found nice 8″L x 6″ H hand-made steel metal brackets on amazon. It comes in different sizes for different widths of shelves. We chose wood for a 12-inch width shelf after I measured our dinner plates and largest bowls. 2 days.
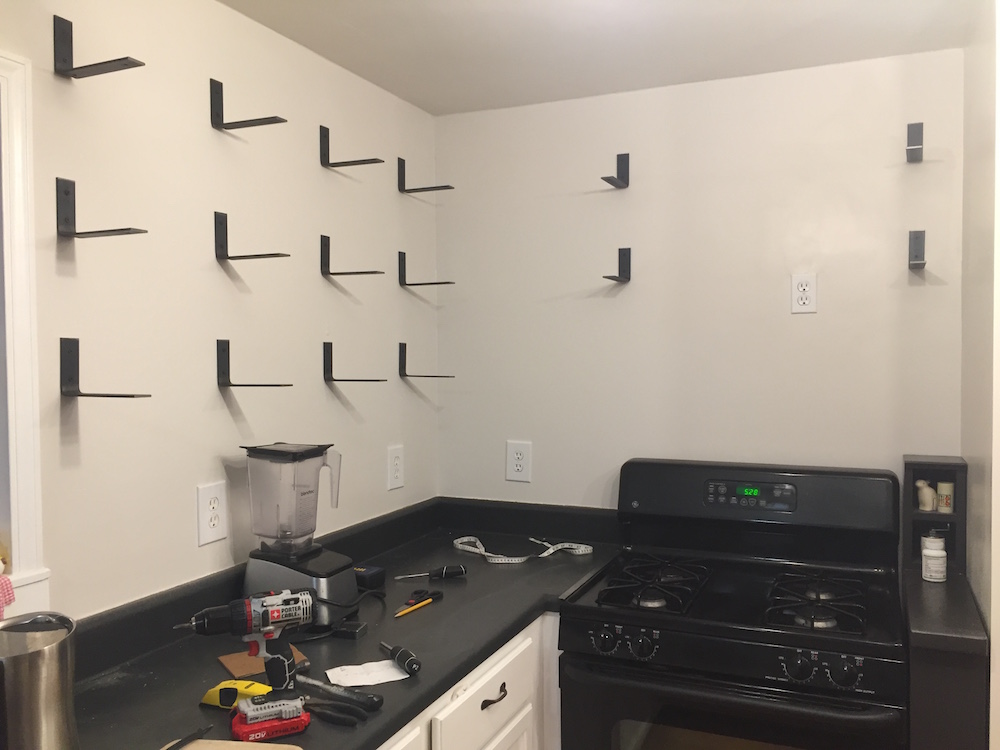
Measuring and installing the brackets for farmhouse kitchen shelves
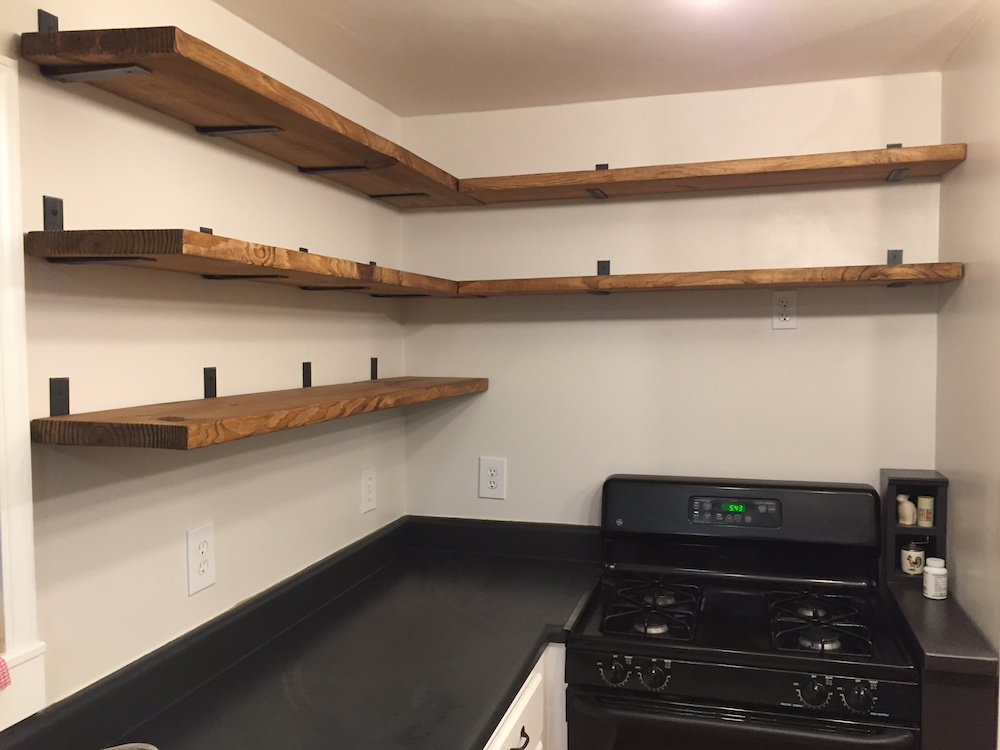
The wood farm style shelves are up – yay!!
9. Hanging new lights – We installed a new ceiling light above the kitchen table and also put up a few battery-operated under the cabinet lights which went under the bottom kitchen shelf. We have very dated and 80’s style track lighting as well, but we weren’t up to the task of changing that just yet, so instead just installed Edison style LED light bulbs. 1 day.
10. Farmhouse doors – how could I forget my favorite part of the kitchen – our farmhouse style doors! We installed one to the pantry (where previously there was a bright red/orange door). Then we installed a new pocket door from the kitchen to the wood stove room, so we could close the kitchen if need be (if a guest is sleeping in the other room for example). The doors were a special order from Home Depot, then were stained in the same way as the shelves. I love these doors! 1 week (it took time for our carpenter to make the pocket door frame and we had to drywall, prime paint, etc after).

DIY Kitchen Makeover BEFORE – the old red/orange pantry door
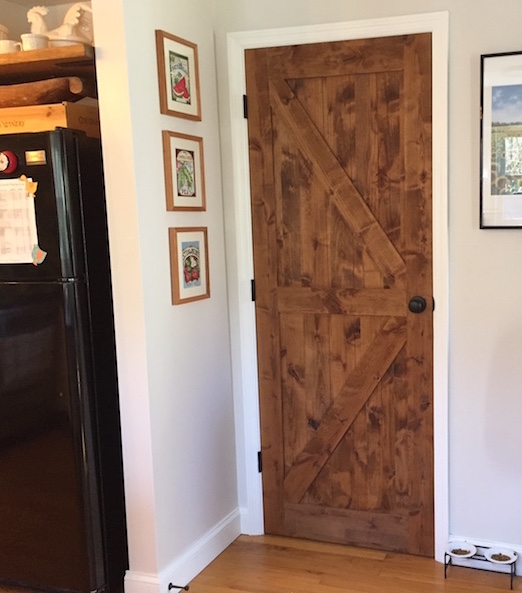
DIY Kitchen Makeover AFTER – the new barn style pantry door LOVE!
11. New oven – By this point of the makeover it was the end of December (we had started in September), and I said to my husband, “Would it be great if we could get a new oven..like a Viking industrial oven?” We started reading reviews and were going “wow” then looking at the price and saying “hmmm..” Literally a few days later we went to Habitat for Humanity and found a Dacor brand convection bake oven, already set for propane gas, for $500. It was unreal. And it fit into the space like a glove. Totally manifested it! This oven new sells for over $5K!! We were over the moon. 1 day.
12. Oven installation – had to get an electrician to install the 240V line for the oven, cost about $200. As you can see all of this was almost 1/3 of the $3000 we spent…and in that budget we still landed a $5K oven! This was over xmas/new year and it took some time to book the electrician. 2 weeks.

Oven envy! LOVE our Dacor convection oven, bought used
13. New farmhouse wood kitchen table from IKEA – and yes this is a big deal because it’s a 2-hour drive to IKEA where we live and I had been looking at this table for months. Then when we were ready to go to IKEA, the table was suddenly on sale for $80 less. Total score!! I wanted this particular table with the drop leaf on either side because our kitchen is so small, however we could have guests with this if need be and also, it’s not easy to find a thick farm style kitchen table with a drop leaf on either side. 1 day.
14. Chalkboard wall painted – Up until now, I thought we were going to have a small section of the wall painted in black chalkboard paint, mostly for my husband because it was his request. (He’s a graphic designer and wanted some room to draw.) Actually he wanted an entire wall for a chalkboard, and I kept saying, “No way. You can have this small space here!” I thought the black color would make the room look too small. Fast forward a few months into the project and all of a sudden I said, “Ok let’s do the whole wall.” He was like, “Really?!” I have no idea what happened, but now that the wall is done, I love it. It actually adds depth to the room and it’s so much fun to have guests over and let them draw whatever they want on the walls. Yes, a lot of our guests will ask if they can draw something! It’s really a lot of fun. I love having a real, genuine feel to the kitchen and the ever-changing chalkboard wall adds that for sure. 2 days.
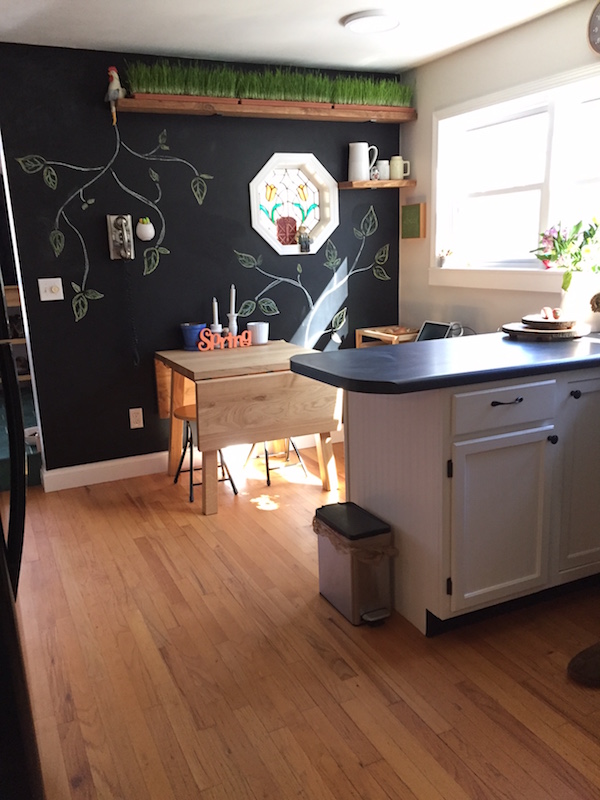
The chalkboard wall and the farmhouse kitchen drop leaf table
15. Kitchen sink backsplash using grey wood-like floor tiles. Yes, we used floor tiles for our backsplash around the sink! I wanted something to go with the grey formica counter tops and not too much white because the cabinets above and below were now white. The grey colored wood tile was a perfect match to go with the counters and add something nice on all that white. We bought the tiles at Lowes and my husband did the tiles himself, first time ever doing tiling and what a great job! 3 days.
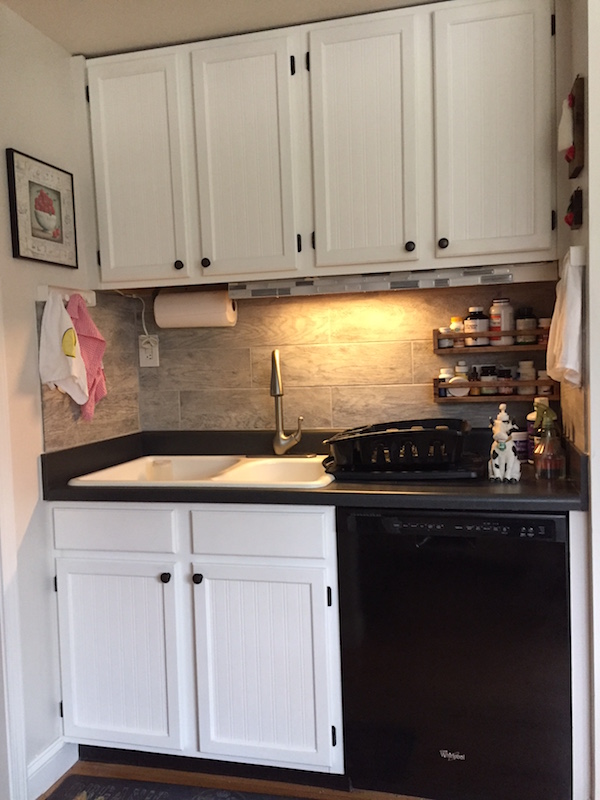
Kitchen sink backsplash with grey wood tile
16. Stove and farmhouse shelf backsplash – for this wall, we chose a large subway tile, much larger than normal because 1) it was less work to use bigger tiles 2) the price was actually better than buying small subway tiles and 3) the classic subway look is getting a bit old and we wanted to put a bit of a spin on it. We chose the 16″ x 4″ white tiles from Lowes. 3 days.
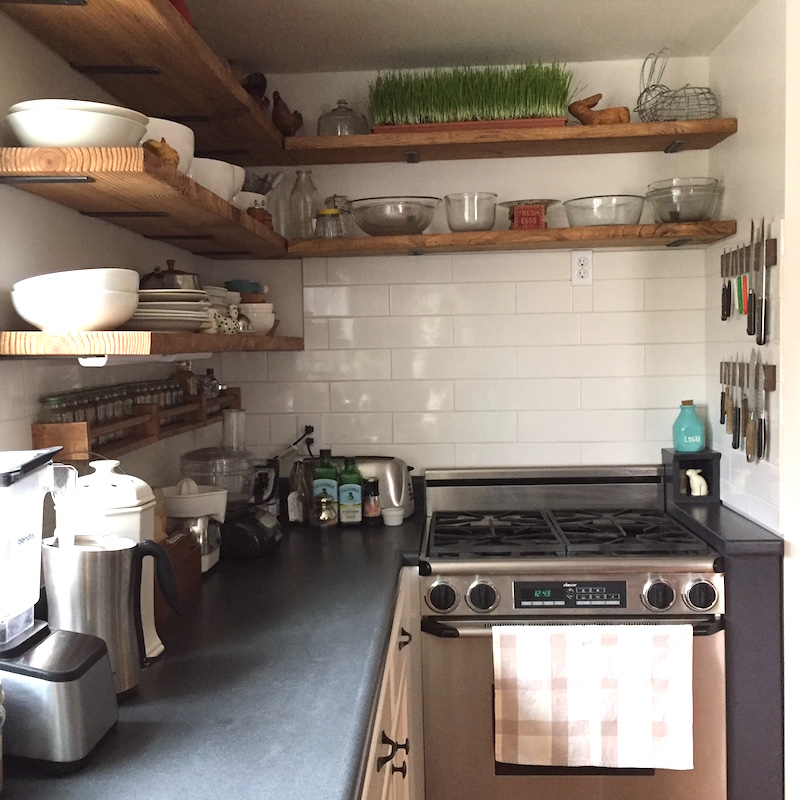
Large white subway tile backsplash – DIY kitchen makeover
17. Cutting board wall – this is one of my favorite changes to the kitchen! I bought a few hanging racks and S hooks and hung them on the wall to make the perfect cutting board station. I have to say that this cutting board rack is the most convenient things ever especially for someone who is often chopping up fruits and veggies several times a day!

Cutting boards hanging on S hooks – LOVE this!
18. Finally, the last touches! I added hooks for towels on either side of the sink, hung pictures on the walls, another 2 shelves on the chalkboard wall, two walnut wood magnetic knife holders that look amazing (one knife strip is never enough if you do a lot of food prep like me!), also shelves for spices and supplements which I installed over the tile after staining the shelves to match everything else, and a few bars and hooks from IKEA for a bit of organizing towels and hanging stuff. 2 weeks.
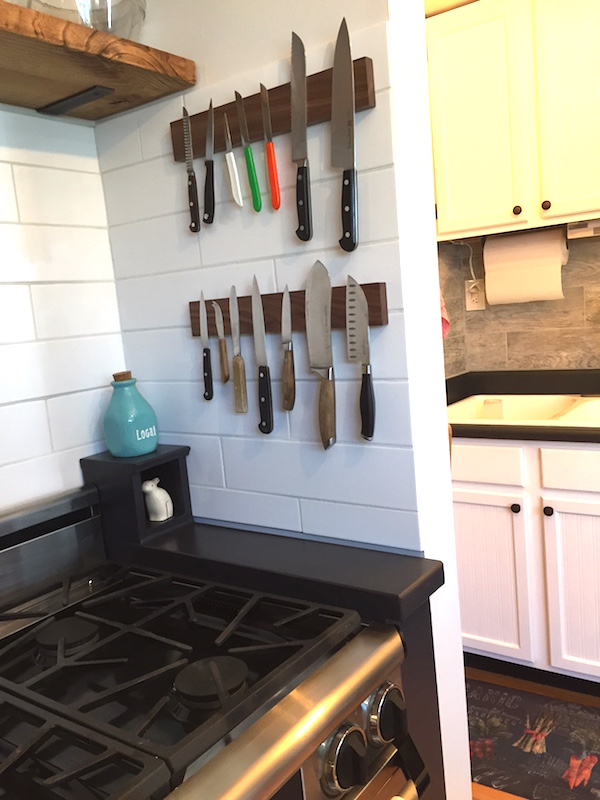
Magnetic knife holders wood farmhouse style kitchen
I hope you like the end result as much as we do, and if not…well maybe you got a few good ideas for your own DIY kitchen makeover. Looking back at all the steps, I have no idea how we did all of that! Now the fun part…is using the new kitchen!


Farm Kitchen DIY – Before and After pics
Jennifer Betesh
Latest posts by Jennifer Betesh (see all)
- What is an elimination diet? - 28 March, 2019
- Intermittent fasting – What’s the best way? - 15 March, 2019
- How do you know when it’s time to STOP fasting - 28 February, 2019
- When is the BEST time (and WORST time) to START a detox - 20 February, 2019


Oh Jennifer I LOVE LOVE LOVE this – not only does it look fab (totes my style) but you did it with a budget. Love your ideas and style. It must be nice to make a place home and really yours after many years being a nomad. Thanks for sharing!
Thanks so much Robyn! We didn’t have any experience at all so we’re pretty amazed that we did it actually, haha!
Hi Jennifer.
I was searching for a Green Smoothie expert, as I love creating green smoothies and I’m a health coach, when I stumbled upon your site. I saw the link for the Farmhouse makeover and just enjoyed reading your post. You’ve given me some ideas on making over my kitchen. Since re-marrying, I’ve been in my husband’s home for almost four years. Each year I keep saying I want to make some changes to the kitchen. Our cabinets are exactly like the ones you started with. How amazing they look with the change in pattern and color. That will be my first project. I should probably create a to-do list, then prioritize from there.
Thanks a bunch for sharing your kitchen and being the brave and adventurous souls to create magic in your home. BTW, how’s it going so far?
Hi Sandra,
Thanks for your comment! It sounds like we have a lot in common 🙂 Painting the cabinets was probably was my least favorite task of the whole makeover project, and mainly because it took so much time and just seemed to never end! All I can so is don’t give up! It’s worth it in the end!!
We are doing great otherwise and have now shifted gears to working outside for the garden season. We’ve been planting non-stop since mid-April: 15 raised beds, 12 blueberry bushes, raspberry and blackberries, fruit trees, herbs and bee pollinators (hopefully we will get honey bees next year!). Last night I harvested our first batch of organic snap peas for dinner and they were A-mazing!! I hope to write about all things gardening in the next post!
To your health,
Jennifer