DIY Indoor Grow Light Stands for under $100
Early spring is the time of year to start working on your summer organic veggie garden. In most climates, the actual growing season isn’t as long as you may like due to late frost in the spring and cool weather in the fall. So, how do you maximize your season to get more veggies growing outside once the warm weather finally hits? The secret to to start your seedling indoors, about 6-8 weeks before you transplant them in the ground.

Grow organic food affordably and easily at home
Starting seedlings indoors is relatively easy once you have a shelf, trays and a grow light. However, you would be amazed how much these systems cost. One 3-tier LED grow light stand will set you back a whopping $699 USD! And that doesn’t include any seeds, drip trays, planting trays or a timer!! A one shelf base unit for a standard stack-n-grow system is $199 USD. It’s insane money if you ask me. I knew I could do it myself way cheaper. And I did! For under $100 USD, I have almost the same setup that would cost you $400 retail. Keep reading, I’m going to show you how you can do it too.
All information in this article is for educational purposes only.
It is not for the diagnosis, treatment, prescription or cure of any disease or health condition.
There are affiliate links in this post.
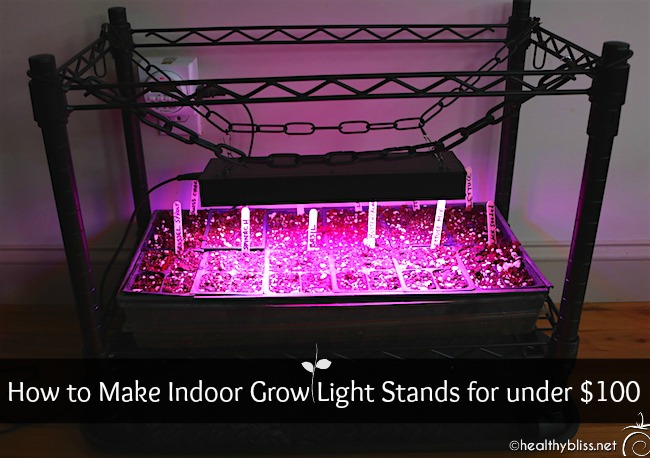
It’s easy to start growing indoors, and you can do it on a budget too
Background: Our Organic Veggie Garden
I should explain that my husband and I are complete amateurs in organic gardening. Between us, we have less than zero gardening experience. But, we are both committed to a healthy lifestyle. Our goal in moving to western North Carolina was to grow our own organic food. We’ve been at it for just 2 years now, and this is the first year that we are actually starting seedlings indoors. Why did it take 2 years? Between work, renovating our house, and working on the land, we’ve just been really busy and are still getting our bearings with living in a totally new place to boot.
The first year, my husband built 8 raised beds. Last year, he built another 7 for a total of 15 raised beds for veggies. We also planted fruit trees, raspberries, blueberries, goji berries, grapes, many herbs and lots of pollinating plants for our future bees. Believe me, that was more than enough to keep us busy from morning ’til night. We barely had time to start seedlings outside! That first year, we had beginner’s luck. The spring was mild, so the outdoor seedlings survived.
Last year, however, was a different situation and a few late frosts killed most of our outdoor seedlings. Then, we had to start all over which wasted valuable time. I had to buy a lot of veggie starts to just get things growing, and that was definitely more expensive. I knew that I had to start collecting parts and equipment to make our indoor seedling grow system so that this year, we could finally start our seeds indoors. Hopefully you will learn from a few of our mistakes there and just start your spring seedlings inside!
Get Started: DIY Indoor Grow Light Stands Materials
You’ve got 2 options in sourcing your materials for making your own indoor seedling station:
- Buy everything new and assemble yourself, or
- Look for sales, bargains and thrift store/yard sale finds to create a budget masterpiece.
If you know me, then you already know what I did. Yep, confessions of a thrift store shopper..But, I managed to find everything I needed, and it wasn’t that hard! I’ll give you both the yard sale list and buy new list so you can combine from both to make what suits you. Since the end of last summer, I’ve been keeping my eyes out for anything that might be useful and putting it aside. In total, it took me about 6 months to put together my super bargain setup.
Shelves for your indoor seedlings
How many shelves do you need? You can buy the 3-shelf systems with lights already set up. I’ve also seen homemade versions with 3 shelves which seem to work fine. But, if you have any curious cats in your house (like we do), then I would not recommend a 3-tier or even a 2-tier system. Can you hear the whole unit crashing? I can! With one particularly curious rescue cat, aka Captain Sneakypuss, we knew that we needed to have one-shelf units to prevent feline adventure accidents.
The first thing I found at a local thrift store was three separate one-shelf units with wheels, each for only $5. I really wanted shelves with wheels in case I had to move them, so I was beyond excited to find such a good deal! Each shelf measures 24″ long x 20″ high x 15″ wide. At the time, I didn’t even know that these shelves are for hanging file folders. I just thought, wow…I can hang a grow light on the top frame of this and put a seedling tray on the shelf – perfect! These 3 shelves went straight to the attic where they sat all winter. But they planted the seed (pun intended) for my vision of our indoor grow station. It doesn’t really matter what type of shelf you use, but a 24″ long shelf is pretty ideal for hanging a grow light in terms of the light being able to cover the planting area.
You can find a similar shelf to what I bought with the same dimensions for $39.99 on amazon here.
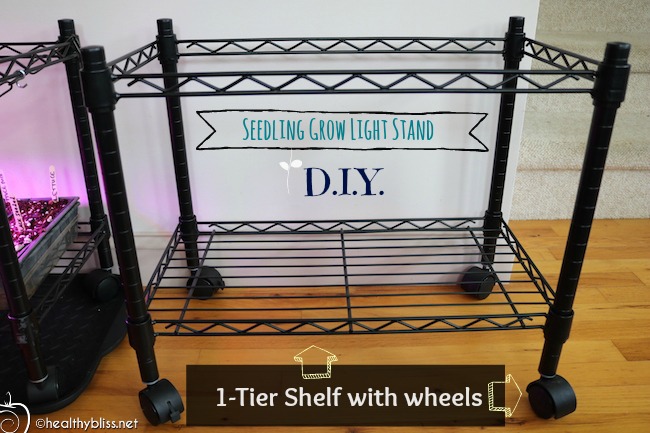
If you’re patient, you can score a good deal. I found 3 of these shelves for $5 each!
Heating Pad for warming seed trays
Certain seeds, like tomato and eggplant, require extra warmth to get started. Most people recommend a grow light AND a heating pad for these. You can buy a fancy seedling heating mat for $40 – $90 USD, depending on the size. Or you can just buy a standard heating pad from CVS. Better yet, check your thrift stores and yard sales. Just make sure that the heating pad has an option for continuous heat, that is, it doesn’t force a automatic shut-off after 1 or 2 hours.
Not all seedlings need heating pads. If you only have 2 shelf units, you probably only need 1 heating pad.
I found a like-new CVS heating pad at Goodwill for $3. Woot woot!
You can find something similar on amazon for under $20 here.

You’ll need a warming or heating pad for tomato and eggplant seedlings
Dual-Outlet Timer
Your heating pad will need to be connected to a timer so you can control the amount of hours of heat applied. You’ll also need a timer for your grow lights (see more on the grow lights below).
I bought a new timer because I wanted a digital one with 2 outlets, and this is not something easy to find used. You’re going to need one outlet for the heating pad and one for the grow light. The beauty of a dual-outlet timer is that you can connect both to one timer with the same on/off program. The model I bought is called the Century 7 Day Heavy Duty Digital Programmable Timer – Dual Outlet (Single Control), available on amazon for $12.99.
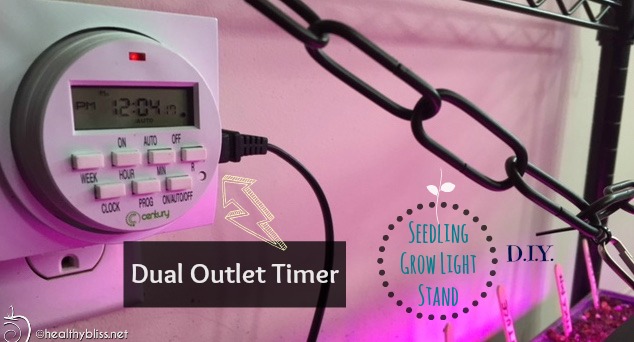
There’s an outlet on each side of the timer so you can program 2 things at the same time, like a light and a warming pad
Boot Trays make the perfect drip trays
Even with a brand new 3-tier seedling setup, you won’t get any drip trays. It won’t take long to realize that you need something to catch any water that leaks through your seedling trays. With hardwood floors, I definitely did not want water dripping! Measure the size of your shelves, that way you’ll know if boot trays will work. In my case, they fit perfectly under each shelf and turned out to be the perfect drip trays. I found 2 brand-new boot trays at Goodwill for $2 each, for a total of $4. I had another one at home that I bought at IKEA (and was actually using it as a boot tray). I added the IKEA tray to my setup and had everything I needed to secure any water from my seedling trays.
You can get 2 boot trays for $22 online here. That’s not a bad deal at all! Remember to check the measurements of your shelf to make sure they will fit.
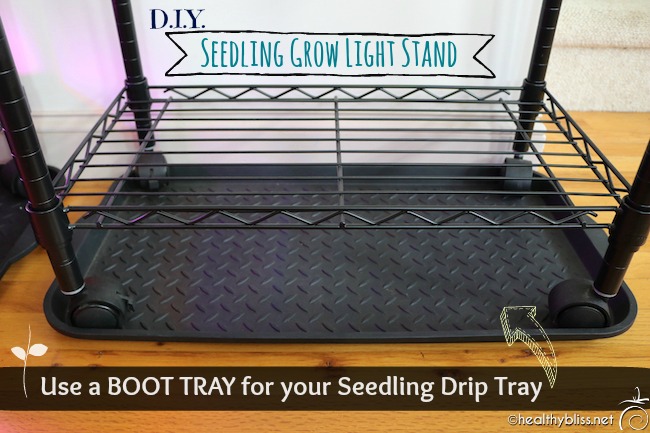
I found these boot trays at Goodwill for 2 bucks each!
LED Grow Light
A grow light is probably the most important part of your indoor setup, because without it, your seedlings are not likely to survive. A window is just not enough light in early spring for seeds to get growing. They need at least 12 hours per day under grow lights to create the right conditions for sprouting. (And the soil needs to be moist, so don’t forget to check the seedlings twice a day and water accordingly.)
I found an affordable grow light on amazon, and so far it’s working great. I decided to buy one at first and try it, before buying another one for my other shelf. Once I started to see little sprouts pushing out of the soil (yay!), I knew the light was ok so I bought another one. This was the most expensive part of my system, but also the most essential and still very affordable. The one I bought was the Newforshop 30W LED Grow Light for $29.99.
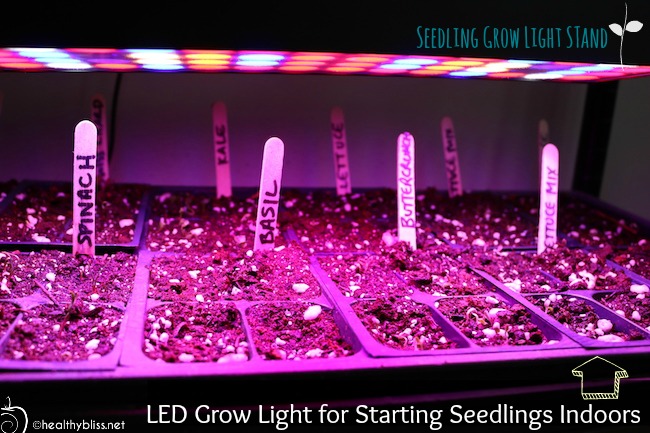
The LED grow light looks like a 70’s dance floor, but it works great and uses less energy
Chains, S Hooks, Zip Ties to attach your light
You’ll also need a few items to help hang your grow light on the shelf. One thing that makes the expensive systems more costly is that they have pully systems to easily move the light up and down as your seedlings grow. But, you can easily move your light up and down manually too. Especially if you want to save a couple hundred bucks. Simple materials like zip ties, S hooks and metal chains are all super useful to hang your grow light at the height you want. Check your grow light for its manufacturer recommendations, but as a general rule, you want to start with your grow light about 6 inches higher than the soil. Having chains makes it easy to adjust the height of your light once your seedlings start to grow.
Last summer, I found a big bag of various chains for $1 at a yard sale, and happily added it to my seedling station materials box. At another yard sale, I bought a jar full of screw and other bits for $1; inside of that were a few metal S hooks. I usually buy my zip ties at the Dollar Store but you can sometimes find those at yard sales too.
You can also buy short pieces of hanging chain with S hooks online here for $5.50.
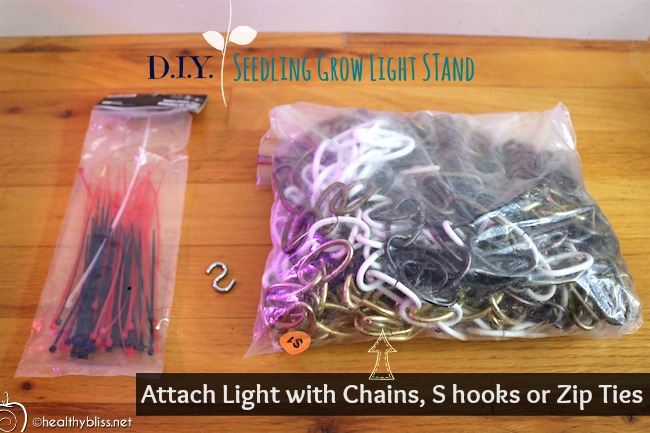
Honey I bought a bag of chains! Huh? It’s for our seedlings! OH!
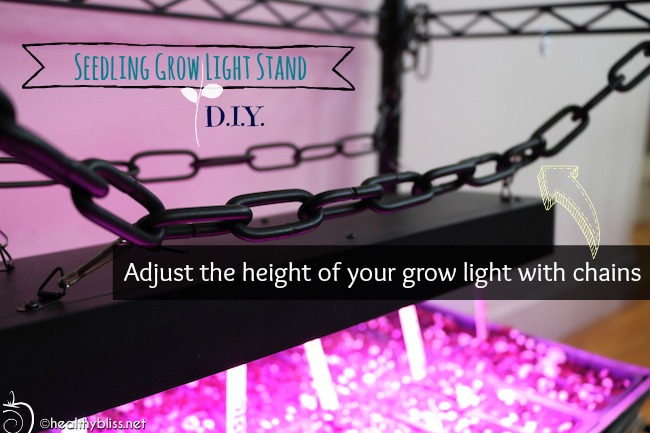
Chains and Zip ties or S hooks make it super easy to adjust the height of your light
Shopping List: DIY indoor seedling Grow Light Stand
- One-Tier Metal Rolling Shelf unit $39.99 (x2 for 2 shelves)
- Sunbeam King-Size Heating Pad (no auto shut-off) $18.59
- Century 7 Day Heavy Duty Digital Programmable Timer – Dual Outlet (Single Control) $12.99
- Set of Two (2) Multi-Purpose Boot Trays $21.95
- LED 30W Grow Light $29.99 (x2 for 2 shelves)
- Hanging Chain with S Hooks to adjust your grow light height $5.50

It’s easy to start growing indoors, and you can do it on a budget too

Organic good grown at home is the ultimate in health
Cost – Buying New vs. Used
Buying all new materials, you can create ONE grow light shelf unit for $129.01 or TWO shelf units for $198.99.
Even if you buy everything NEW, you can get TWO grow light shelf units for the price of one ($199) at a comparable online garden supply store. That’s 50% less!!
Buying some used materials (like I did), you can create ONE shelf unit for $54.98 or TWO shelf units for $91.97.
Either way, you save money! Simply by starting your own plants from seed, you can save hundreds of dollars EVERY YEAR from not having to buy starter plants. (1 organic start plant costs $4-6, whereas 1 packet of 100 organic seeds costs $3 or $0.03 per plant.) Your investment in starting from seed will quickly pay off after only one season!


Additional Stuff you’ll need
Once you get your grow light shelves set up, you’ll need a few more things to actually start your seedlings:
- Starter soil (I recommend 3 parts Peat Moss to 1/2 part Perlite 10 1/2 part Vermiculite)
- Planting trays (I got mine for free on Craigslist; also check gardening stores at the end of the season for freebies)
- Spray bottle for watering
- Popsicle sticks for labeling your trays (I scored a huge bag at a yard sale for 50c)
- And of course….some quality non-GMO organic seeds (I recommend Sow True Seed brand)
- Fertilizer (use this once the seedlings are growing so they don’t stall in growth)


Have any personal tips on starting seeds indoors to share? Please leave a comment below!
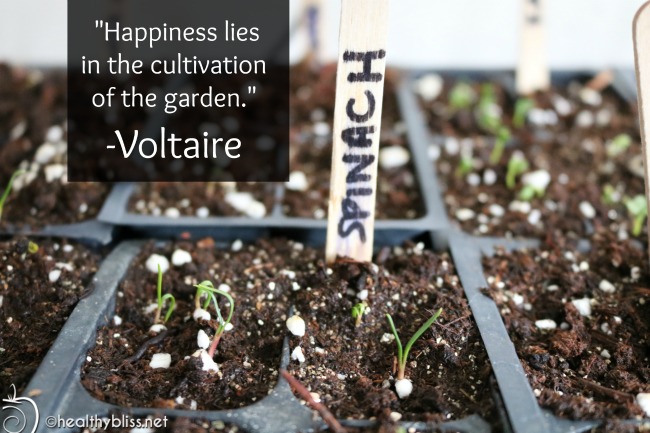
Organic gardening for health, joy and happiness
For more on how to achieve your health goals and actually start feeling great, book a private health consult with me via Skype.
How to Book Your Health & Nutritional Coaching Session:
1. Take photos of your eyes with a digital camera.
2. Email the photos to me for approval.
3. We schedule a time to meet via phone or Skype!
More on Organic Farming:
- Raw Food, Detox & Organic in Tel Aviv, Israel
- Genetically Engineered Food – No more Frankenfoods!
- Our Farmhouse Kitchen for under $3K!! Before and After DIY Makeover
- Visions of the Big Island, Hawaii
- How to Ask the Right Questions at a Farmers Market
More on Immune System:
- What to do for Food Poisoning: What You Need to Know
- The last time I got sick was…
- 5 Tips on How to protect yourself against Ebola (or any virus/bacteria)
- Knowing Botanical Food Families for Cross-Reactivity Allergies
- What are the symptoms of Heavy Metal toxicity?
Jennifer Betesh
Latest posts by Jennifer Betesh (see all)
- What is an elimination diet? - 28 March, 2019
- Intermittent fasting – What’s the best way? - 15 March, 2019
- How do you know when it’s time to STOP fasting - 28 February, 2019
- When is the BEST time (and WORST time) to START a detox - 20 February, 2019





Leave a Reply
Want to join the discussion? Please be respectful of other participants in the conversation and keep your comments respectful, friendly and relevant. Differences of opinion are welcome, but trolling and abuse of other commentators and the Healthy Bliss team is not and will result in blacklisting. Thank you for keeping this a bully-free zone!