Tag Archive for: Recipes

Beginner’s Guide to Green Smoothies

When was the last time you ate a whole bunch of parsley or spinach in one day? Chances are you never have, yet leafy greens like these pack a powerful punch of nutrition. A great way to utilize the amazing power of green leafy vegetables is with a daily green smoothie.
Beginner’s Guide to Green Smoothies by Jennifer Thompson

I first started Green Smoothie after several months on the raw food diet, and right away, I felt a difference! My energy levels improved even more, and thanks to the added ground flax seed in the Green Smoothie, my bowel movements became even more, well…epic! I knew that this was something that everyone could do at home, even if they didn’t want to go into a strict raw food diet. So, I started telling my Iridology and Health Coaching Clients about Green Smoothies.

Just some of the amazing stories of success I heard: Symptoms of menopause – gone; Acid Reflux – gone; Sugar Cravings – gone; Colitis – gone; PMS – improved; Digestive disorders and constipation: gone; Skin conditions – cleared; Sleep function – improved; Arthritis – gone; and the list just goes on and on!

One of my clients from Switzerland got her 86-year mother hooked on Green Smoothies and saw her digestion function and energy levels improve. Another client canceled his knee replacement surgery after he realized that the chronic pain and inflammation in his knee had disappeared after starting to drink Green Smoothies. I heard from clients who lost weight finally, after years of yo-yo dieting. I even helped a client get pregnant after 8 years on IVF just from having a daily Green Smoothie…she calls her baby a “Green Smoothie miracle!”

What is a Green Smoothie?

A Green Smoothie is a mixture of water, leafy greens and fruits. The ingredients are thoroughly blended with water in a blender. It is important to note that a Green Smoothie is a blended drink and not a juice. A blender is used to break down the cellulose structure in the greens thereby unlocking their valuable nutrients.
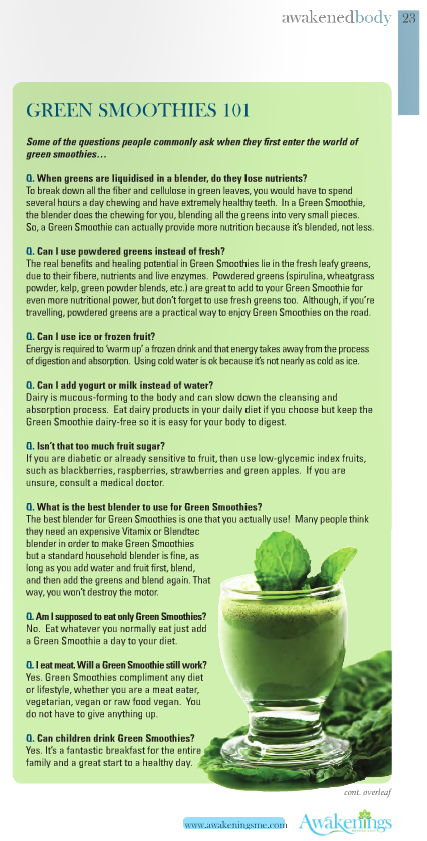
Green Smoothies 101: Your FAQs Answered

Green Smoothies 101

Some of the questions people commonly ask when they first enter the world of green smoothies…
When greens are liquidised in a blender, do they lose nutrients?
To break down all the fiber and cellulose in green leaves, you would have to spend several hours a day chewing and have extremely healthy teeth. In a Green Smoothie, the blender does the chewing for you, blending all the greens into very small pieces. So, a Green Smoothie can actually provide more nutrition because it’s blended, not less.

Can I use powdered greens instead of fresh?
The real benefits and healing potential in Green Smoothies lie in the fresh leafy greens, due to their fiber, nutrients and live enzymes. Powdered greens (spirulina, wheatgrass powder, kelp, green powder blends, etc.) are great to add to your Green Smoothie for even more nutritional power, but don’t forget to use fresh greens too. During travel, powdered greens are a practical and easy way to enjoy Green Smoothies on the road.

Can I use ice or frozen fruit?
Energy is required to ‘warm up’ a frozen drink, and that energy takes away from the process of digestion and absorption. Using cold water is ok, because it’s not nearly as cold as ice.

Can I add yogurt or milk instead of water?
Dairy is mucous-forming to the body and can slow down the cleansing and absorption process. You can still enjoy dairy products in your normal daily diet if you choose, but try to keep the Green Smoothie dairy-free so it is easy for your body to digest.

Isn’t that too much fruit sugar?
If you are diabetic, and you find yourself already sensitive to fruit, then use low-glycemic index fruits, such as blackberries, raspberries, strawberries and green apples. If you are unsure in any way, it’s best to consult a medical doctor.

What is the best blender to use for Green Smoothies?
The best blender for Green Smoothies is one that you actually use! Many people think they need an expensive Vitamix or Blendtec blender in order to make Green Smoothies, and that’s simply not true.

A standard household blender is fine, as long as you add water and fruits first, blend, and then add the greens and blend again. That way, you won’t destroy the motor and you will get many delicious Green Smoothies from your blender!

Am I supposed to eat only Green Smoothies?
No! You can eat whatever you normally eat. All you need to do is simply add 1 Green Smoothie a day to your diet.

I eat meat. Will a Green Smoothie still work?
Yes! Green Smoothies will compliment any diet or lifestyle, whether you are a meat eater, vegetarian, vegan or raw food vegan. You do not have to give anything up.

Can children drink Green Smoothies?
Yes! In fact, children seem to really love Green Smoothies! It’s a fantastic breakfast for the entire family and a great start to a healthy day!
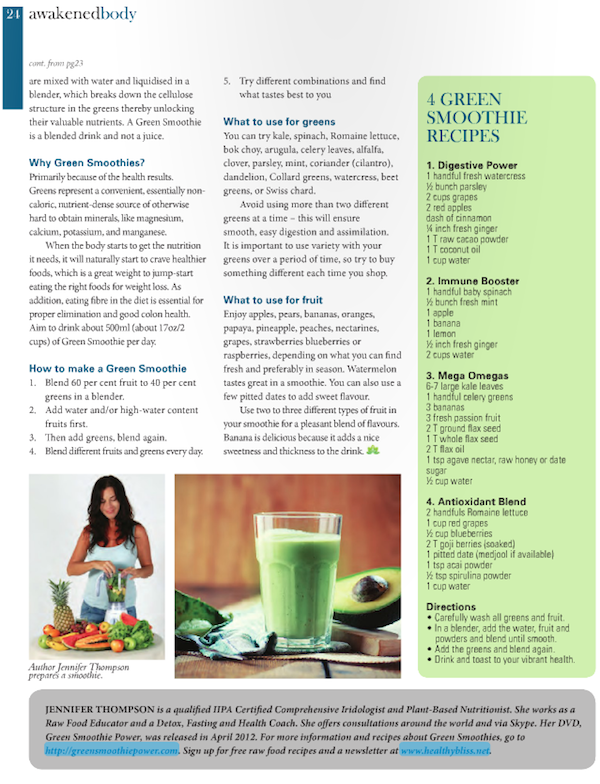
How to Make a Green Smoothie with Easy Recipes

Why Green Smoothies?

Primarily because of the health results.

Greens represent a convenient, essentially non-caloric, nutrient-dense source of otherwise hard to obtain minerals like magnesium, calcium, potassium and manganese.

When the body starts to get the nutrition it needs, it will naturally start to crave healthier foods, and that’s a great weight to jump-start eating the right foods for weight loss. Eating fiber in the diet is essential for proper elimination and good colon health.

Aim to drink about 500ml (about 17 ounces or 2 cups) of Green Smoothie per day.

How to Make a Green Smoothie

1. Blend 60% fruit to 40% greens in a blender.
2. Add water and/or high-water content fruits first.
3. Then add greens, blend again.
4. Blend different fruits and greens every day.
5. Try different combinations and find what tastes best to you!

What to Use for Greens

You can try kale, spinach, Romaine lettuce, bok choy, arugula, celery leaves, alfalfa, clover, parsley, mint, coriander (cilantro), dandelion, Collard greens, watercress, beet greens, or Swiss chard.

Avoid using more than 2 different greens at a time – this will ensure smooth, easy digestion and assimilation. It is important to use variety with your greens over a period of time, so try to buy something different each time you shop.

What to Use for Fruits

Enjoy apples, pears, bananas, oranges, papaya, pineapple, peaches, nectarines, grapes, strawberries blueberries or raspberries, depending on what you can find fresh and preferably in season. Watermelon tastes great in a smoothie. You can also use a few medjool dates just to add some sweet flavor.

Use 2-3 different fruits in your smoothie for a pleasant blend of flavors. Banana is delicious in smoothies because it adds a nice sweetness and thickness to the drink.

4 Green Smoothie Recipes

Digestive Power

– 1 Handful Fresh Watercress
– 1/2 bunch Parsley
– 2 cups Grapes
– 2 Red Apples
– Dash of Cinnamon
– 1/4 inch Fresh Ginger
– 1 T Raw Cacao Powder
– 1 T Coconut Oil
– 1 cup Water

Immune Booster

– 1 Handful Baby Spinach
– 1/2 bunch Fresh Mint
– 1 Apple
– 1 Banana
– 1 Lemon
– 1/2 inch Fresh Ginger
– 2 cups Water

Mega Omegas

– 6-7 Large Kale Leaves
– 1 Handful Celery Greens
– 3 Bananas
– 2 T Ground Flax Seed
– 1 T Whole Flax Seed
– 2 T Flax Oil
– 1 tsp. Agave Nectar, Raw Honey or Date Sugar
– 1/2 cup Water

Antioxidant Blend

– 2 Handfuls Romaine Lettuce
– 1 cup Red Grapes
– 1/2 cup Blueberries
– 2 T Goji Berries (soaked)
– 1 Pitted Date (Medjool if available)
– 1 tsp. Acai Powder
– 1/2 tsp. Spirulina Powder
– 1 cup Water

Directions

1. Carefully wash all greens and fruit.
2. In a blender, add the water, fruit and powders and blend until smooth.
3. Add the greens and blend again.
4. Drink and toast to your vibrant health!

Now on DVD: GREEN SMOOTHIE POWER!

Finally, Jennifer’s famous Green Smoothie Class is now available in DVD. Watch and learn…you will soon become a Green Smoothie Expert, ready to bless the world with your green love!

Find out for yourself why thousands of people are turning to Green Smoothies for more energy, better health, detox & weight loss! Are you not experiencing the level of energy and good health you desire? Green Smoothies could be your answer to start getting results. Jennifer’s NEW Green Smoothie Power DVD teaches you how!

here

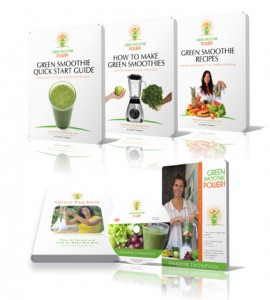
With the DVD, you also receive 3 eBooks. Use the Quick Reference Guide eBook to get started immediately. Read the How to Make Green Smoothies eBook for inspiration and motivation. Experiment with 200 amazing recipes in the Green Smoothie Recipe eBook. You can be making your first Green Smoothie within minutes!

See how easy it is to add Superfoods to your Green Smoothies, and learn the real secret to Green Smoothie Success: How to Love Your Blender! Plus FREE EXTRAS included: 2 high-quality 100% Cotton Sprout Bags just for you!

BUY the Green Smoothie DVD and 3 eBook Kit:

Green Smoothie Power Kit


or buy the eBooks separately!

eBook: Green Smoothie Quick Start Guide

Quick Start Guide eBook

This is the condensed version of Jennifer’s famous Green Smoothie Class, complete with the most popular FAQs, benefits of Green Smoothies and how to make your Green Smoothie taste great!

Read what others had to say:

“My energy levels are much better and I don’t have cravings for sweets like before.” – Bill

“People started to comment on how well I look and my skin is so much better!” – Helen

“I feel focused!!” – Cathy

New and improved Edition!

BUY Green Smoothie Quick Start Guide eBook:

eBook: Green Smoothie Quick Start Guide (.pdf)


eBook: 200 Green Smoothie Recipes

200 Green Smoothie Recipes eBook

200 Green Smoothie Recipes are available in this great eBook. That’s 4 different Green Smoothies every week for an entire year!

Some of Jennifer’s Amazing Recipes:

Happy Morning, Daily Detox, Quick Cleanse, Fresh Start, Power Blaster, Digestive Balance, Liver Tonic, Instant Health, Basic Instinct, Champion Blend, Enzyme Energy, Pick Me Up, Mega Omegas, Full of Gratitude, Tweet-worthy, Natural Glow, De-Stresser, Simple Pleasure, Soul Food, Fast Tune-Up, Green Gaspacho, Protein Power, Green Kingdom, Antioxidant Blend, Divine Creation, Ab Fab, Super Dude and many more!

New and improved Edition!

BUY 200 Green Smoothie Recipes eBook:

eBook: 200 Green Smoothie Recipes (.pdf)


eBook: How to Make Green Smoothies

How to Make Green Smoothies eBook

Learn what the necessary tools are for healing and understand why you can’t get long-term results without adding more greens to the diet.

See why having greens in a raw and blended form is the superior way to get all the Power of the Greens.

Find out what kind of blender you need, the best combinations of greens, fruits and superfoods for your health and hear amazing success stories, including the reversal of grey hair from Green Smoothies!

New and improved edition!

Why wait any longer to start feeling better, looking great and losing weight?

BUY How to Make Green Smoothies eBook:

eBook: How to Make Green Smoothies (.pdf)


Article written be Jennifer Thompson for Awakenings ME Magazine.

Find out how to book an Iridology Session.

Buy Jennifer’s Green Smoothie DVD here.

Book a Personalized Detox with Jennifer today!

More on Green Smoothies:
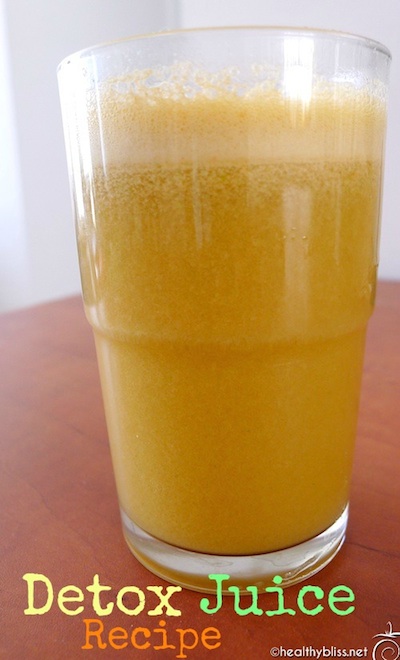
Detox Juice Recipe

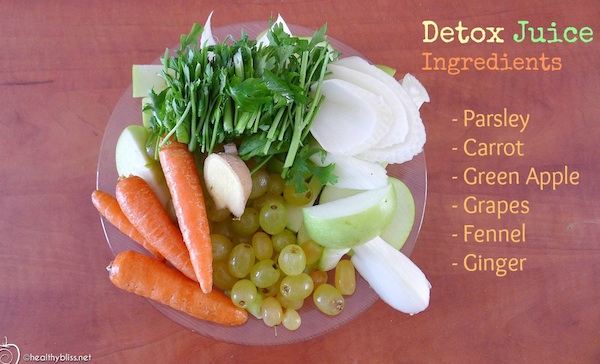
When’s the last time you made a delicious detox juice at home? Yes, it’s time to pull out that juicer and start using it! Each ingredient in this recipe is full of phytonutrients, and that means more health benefits for the body.

All information in this article is for educational purposes only.
It is not for the diagnosis, treatment, prescription or cure of any disease or health condition.

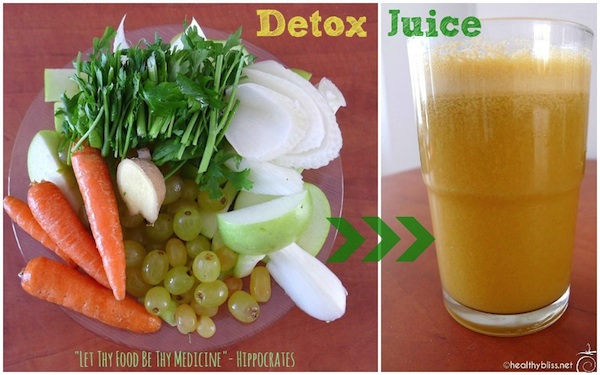
Place All Ingredients in a Juicer for a Healthy Detox Drink!

Apples and carrot help to detox the liver. Carrots are also high in beta-carotene, a powerful antioxidant. Grapes have been found to have strong anti-cancer properties due to the anti-inflammatory effect of resveratrol. Ginger is a natural anti-inflammatory food and helps strengthen digestion. Parsley helps to cleanse the kidneys and contains folic acid and chlorophyll which can help to regulate blood pressure. The most powerful detox ingredient in this juice is fennel, a simply amazing detox food. Fennel helps to cleanse the colon; it relieves constipation; it’s great for the immune system with its natural anti-parasitic, anti-fungal and anti-viral properties and it’s particularly known to be very alkaline-forming and that means excellent for an alkaline diet and as a natural antacid remedy. When the body heals from the inside-out, the skin clears naturally too! If at all possible, choose organic for your juice ingredients.

A Juice has NO fiber and in made in a Juicer.

What’s the difference between a juicer and a blender? A juicer separates the fiber from the liquid, and you drink only the juice. A blender blends all ingredients together and you drink the fiber and the liquid, called a “smoothie.” This recipe is for a juice, but if you don’t have a juicer, you can certainly mix all the ingredients in a blender and make a nice detox Green Smoothie too! Juice is easy to digest and absorb and is particularly good to high-boost your mineral, vitamin and micro-nutrient reserve.

How To Make a Detox Juice

Place all Ingredients in a Juicer and Juice. Makes 1 Serving.
Detox Juice Recipe:

– 2 Green Apples
– 4 Small Carrots OR 1 Large Carrot
– 2 Cups of Grapes
– 1/2 inch slice of Fresh Ginger
– 1 Handful of Fresh Parsley
– 1 Cup of Fresh Chopped Fennel

Drink Immediately. You can also add 1-2 Tbsp. of Raw Apple Cider Vinegar, stir well and drink.

Use Variety in Your Juices. Make Different Variations!

This is a great juice recipe, all vegan, vegetarian and of course a raw food, but it complements any diet. You can make variations of this recipe by using cucumber instead of carrot or celery instead of apple or kale instead of parsley. Don’t be afraid to try different combinations! More fresh juice packed with fruits and vegetables is always a good thing!

Drink once a day or 3-4 times per week for preventative maintenance. Add to your juice fasting routine. Share with any family and friends who are sick to help them recover more quickly. As Hippocrates (the Father of Modern Medicine) said, “Let Your Food be Thy Medicine and Thy Medicine be Thy Food.”

If you're ready for juicing, this is the juicer for you!

If you’re ready for juicing, this is the juicer for you!

More on Juicing and Smoothies:
Recipe: Fast & Easy Raw Food Salad…a delicious meal in minutes!

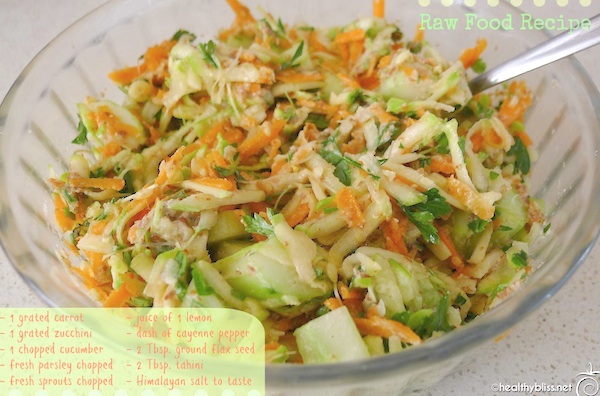
What does a raw foodie eat as a salad for lunch? Check out this easy-to-make option using all fresh, natural, healing foods. It’s a simple salad made from parsley, carrot, zucchini, cucumber and sprouts but it’s the texture, the dressing and combination of flavors that make it taste great.

How to Make a Delicious Raw Food Lunch in Just Minutes

Raw Food Recipe: Modern Israeli Salad

This salad is a modified version of the classic “Israel Salad” or “Arabic Salad” which is traditionally made using finely chopped tomato, cucumber and parsley with a tahini and lemon dressing. In this version, I’ve added more fiber with ground flax seed, a nice texture with shredded zucchini and carrots, additional enzymes from the sunflowers sprouts and some liver cleansing power with the cayenne pepper. You could also add a bit more protein with 2-3 Tbsp. raw organic sunflower seeds.

In total, this salad should take less than 10 minutes to prepare. It’s well worth it to take extra minute or two to shred your carrots and zucchini with a grater because it changes the texture completely and makes the salad much more enjoyable to eat.

Modern Israeli Salad Ingredients & Recipe (2 servings)

In a bowl, combine:

    – 1 Carrot, peeled and grated
    – 1 Medium to large zucchini, peeled and grated
    – 2 Medium cucumbers, peeled and chopped
    – 1 Handful of sunflower sprouts, chopped
    – 2 handfuls of fresh parsley, chopped
    – 2 Tbsp. ground flax seed
    – Dash of cayenne pepper, to taste
    – Dash of Himalayan Salt, to taste

Mix ingredients well. For the dressing, add:

    – Juice of 1 lemon
    – 2-4 Tbsp. organic tahini (sesame seed paste)

You can grind the flax seed in advance and have it stored in the fridge, ready to add to any salad for added fiber and omega proteins. A high-fiber diet helps to reduce constipation and promotes better digestive health and even helps to balance blood sugar levels. Raw tahini can be made at home if you can’t find it at your local health food store. The sesame seeds in tahini are a great vegan source of calcium. With all of these natural, whole and pure healing foods as ingredients, you are creating a real detox meal!

This is a salad that I usually have for lunch, due to the fat content in the tahini. I like to eat my “heaviest” meal in the middle of the day and save a lighter, lower-in-fat meal option for dinner.

As you can see, there is no need for a blender, juicer, food processor or dehydrator in this recipe. All you need is a cutting board, vegetable peeler, knife, and grater.

Yes, raw food recipes can be simple and not require a lot of expensive appliances!

Add chopped tomato to this recipe to make it a more classic Middle Eastern salad, but this version is just to show you other possibilities. There are many variations! Try adding some fresh pomegranate or a small amount (8-10 leaves) of finely chopped fresh mint.

This recipe is all raw, vegan, vegetarian and gluten-free!

More on Raw Food:

Top 10 Tips for the Best Healthy Sunscreen

For many people, the summer months are a time to be outside, enjoying the beach or nature…and also the sun! But, what do you do to protect yourself from sunburn or sun damage? What can be used as a healthy sunblock? Is there such thing as a chemical-free or organic sunscreen?

All information in this article is for educational purposes only.
It is not for the diagnosis, treatment, prescription or cure of any disease or health condition.

Staying healthy in the sun!

Danger of Homemade Sunscreen Recipes

First of all, it’s important to be clear that homemade sunscreens are NOT a healthy alternative. I’ve seen many “mommy-and-me”-type blogs posting recipes for making sun creams at home, and there is definitely a lack of knowledge regarding the safety of ingredients. Why? Because the main ingredient is titanium dioxide, a known carcinogen! That’s right, a proven cancer-causing ingredient is right in the middle of that “made-with-love” sunscreen recipe!

It is true that there is some debate on the level of carcinogenic risk there is with titanium dioxide, with some people saying that ii is a safe ingredient when 99% pure and can only cause health risks when in a nano particle form. But do you want to take part in the human experiment? I don’t! And I certainly don’t want to make my own recipe where I could potentially use too much or use a version which hasn’t been tested for purity.

Zinc Oxide, another popular ingredient in homemade sunscreen recipes, has been found to have potential evidence of reproductive toxicity according to the Environmental Working Group investigation of sunscreens and other sun-blocking products. So, be sure to avoid any recipes containing this suspect ingredient as well.

How to Protect Yourself from the Sun

As someone who has lived on the beach for the last 12 years, I’ve spent a lot of time in the sun (mainly in Australia, USA, Thailand and Israel).

Here are my top ways to spend time enjoying the sun safely.

What to Use for the Best Healthy Sunscreen:

1.Wear a hat. It’s just that easy. Find one that is comfortable so you actually wear it.

2. Limit your time in direct sun, and avoid the hours between 10am – 2pm. I can usually spend between 60 – 90 minutes in the sun without sunscreen and without burning, but that’s after I have a base tan. Build your time exposer slowly. No need to fry yourself to a crisp!

3. Move to the shade. You can still enjoy many hours on the beach under an umbrella or in the shade of a tree. This is Mother Nature’s natural organic sun protection!

4. Wear a rash guard shirt in the sea. This is especially a good option for kids. Many surfing shirts actually have a high sun protection factor in the material of the shirt.

5. Have a sarong and/or long-sleeve light-weight cotton shirt to cover-up if necessary. When you feel yourself burning, it’s time to cover the skin!

6.Add chlorophyll to your diet. Why don’t plants and trees get sunburn or leaf cancer, especially when there are exposed to sun all day every day? Because the chlorophyll in leaves protects them from getting burned, and it can help protect you too! A daily Green Smoothie is the best way to start your day before you hit the beach!

7. If necessary, buy children’s sunblock  or sunscreens. The child and/or baby formulas will have the least amount of toxic chemicals. When I know I’ll be out for more than 90 minutes, I apply a baby sunscreen to my nose and shoulders. A small amount is going to be much better for you than a full body immersion.

8. Check the labels and choose a brand with the least amount of titanium dioxide. I recently looked at some popular sunscreen brands, and I saw one expensive bottle contained 38% titanium dioxide in nano particles! Another brand contained only 12%. Can you see how you can still make a better choice, even if you still choose to use a traditional chemical formula?

9. Do not  choose anything above Factor 30. When you increase the sunscreen factor, you also
increase the toxic chemicals in the ingredients. By choosing a Factor 30 sunscreen and limiting your time in the sun, you will be making a healthier choice  for you and your family.

10. Be sure to shower after you finish your fun inthe sun. This sounds like common sense, but if you choose to put a chemical on your skin, you need to wash it off, hopefully with a sodium laureth sulfate (SLS)-free soap and only some organic coconut oil to hydrate your skin after.

Stay protected. Your skin will look better & younger, longer!

(Note: Coconut oil is NOT a safe option for sunscreen…I’ve seen many tourists getting fried to a red and blistered crisp in Thailand trying this, and it doesn’t work.)

Limiting your time and moving to the shade is the best alternative. A diet high in antioxidants will minimize any free-radical damage to the skin and will also limit the amount of “burn” to the skin. It’s certainly true that with a high raw food diet, I don’t ever seem to burn anymore, even after spending longer amounts of time in the sun. But I’m still careful not to overdo it.

More on Lymphatic Detox/Cleansing:

Recipe: Raw Vegan Veggie Wraps

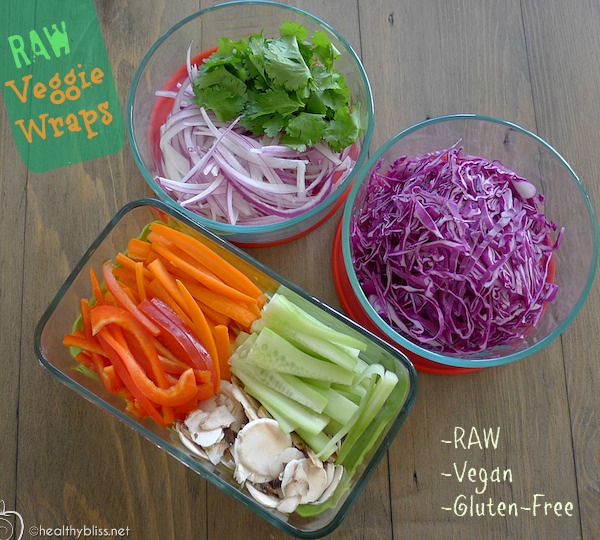
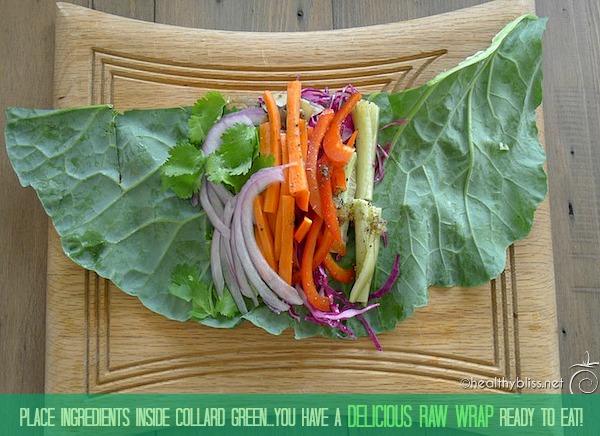
Julienne Cut your favorite raw veggies. Chop up some fresh herbs.

Raw veggie wraps are a great way to eat salad with your hands and enjoy the feeling of eating a wrapped tortilla again, except this one is all raw and gluten-free! These are great for lunch or a raw food potluck or even to take to a family gathering and let people see how beautiful real, raw food can be!

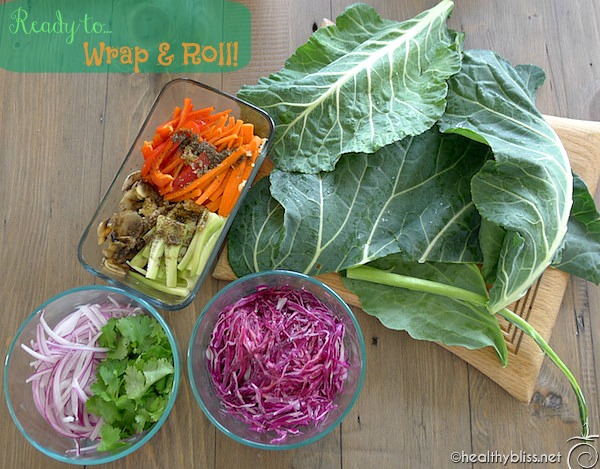
In this recipe, I simply took what raw vegetables I had at home and julienne-cut the veggies into long, narrow strips. In this case, I used carrot, red bell pepper, cucumber, red cabbage and mushrooms. I also chopped up some fresh cilantro (coriander) and some red onions. Note: the taste of red onions is very strong when they are raw! If it’s too strong for you, then you can always leave them out!

I prepared all the veggies in advance. Then I made a quick raw marinade to drizzle over the veggies and let them sit for 2-3 hours. Every time I make this recipe, I used slightly different ingredients and I make different dressings…and you should too! That makes it fun!

For this marinade, I used 1/3 cup raw apple cider vinegar, 3 Tbsp. extra virgin olive oil, 1/2 fresh lemon squeezed, dash of cayenne pepper, 1 teaspoon dried Zatar spice (a Middle Eastern Spice made from Thyme and Sesame Seeds) and a dash of Himalayan Salt to taste.

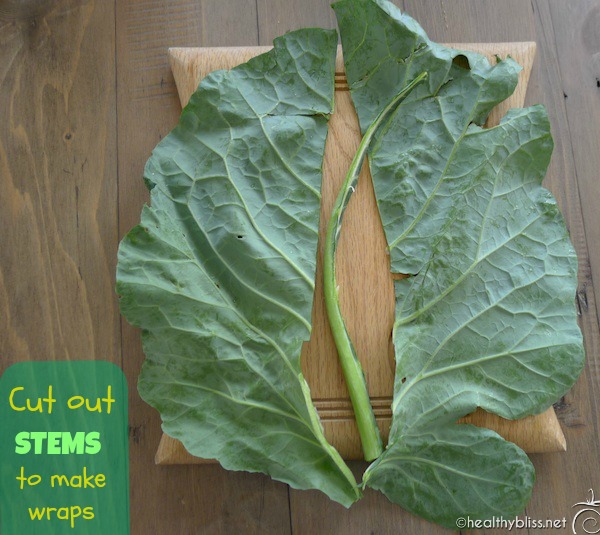
Collard Greens are a great choice for wraps because they’re flat and very big!

The next step is to wash and prepare the Collard Greens. Slicing out the stem is a good idea so you have 2 nice flat halves to use for wraps. For the smaller leaves that don’t have such a thick stem, you can leave them as they are.

Be creative with your wraps! Use different ingredients and dressings every time!

Finally, you are ready to make some raw vegan wraps! Other optional sauces to include are Raw Tahini Dressing, Homemade Spicy Mexican Salsa or Raw Pumpkin Seed Cheese. Be creative!

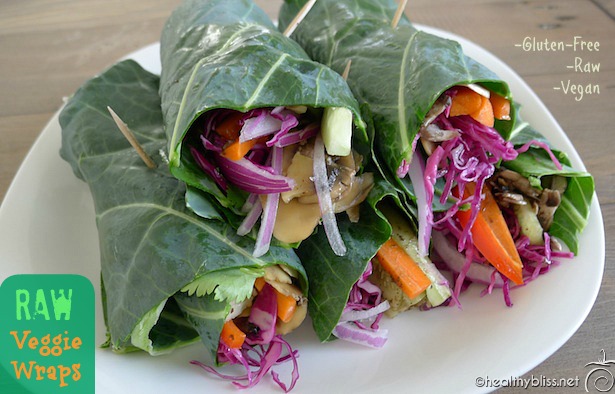
Get some toothpicks ready to pin your wraps together.

Have some toothpicks on hand to keep your wraps closed after rolling!

Isn’t organic raw food so beautiful and inviting, full of natural color from the earth? No need for flavor enhancers, chemical coloring, preservatives or any carcinogenic food additives!

I love raw food!!

Raw Veggie Wraps Recipe

  • 1 Organic Cucumber, Julienne Cut
  • 1-2 Organic Carrots, Julienne Cut
  • 1 Organic Red Bell Pepper, Julienne Cut
  • 1 bunch fresh Cilantro (Coriander), Chopped
  • 7-8 medium-size Organic Mushrooms, Sliced Thin
  • 1/2 head Organic Red Cabbage, Julienne Cut
  • 1 Red Onion Sliced (Optional)
  • 1 Bunch Fresh Organic Collard Greens

Raw Marinade Recipe

  • 1/3 Cup Raw Apple Cider Vinegar
  • 3 Tablespoons Extra Virgin Olive Oil
  • 1/2 Fresh Organic Lemon, Squeezed
  • Dash of Cayenne Pepper (to taste)
  • 1 teaspoon dried Zatar Spice
  • dash of Himalayan Salt (to taste)

Et Voila! You have beautiful wraps that are all raw, vegan and gluten-free!

More Healthy Recipes:
How to Make Almond Milk or Seed Milk at Home

Benefits of Making Your own Nut or Seed Milk

Natural nut and seed milks offer an excellent source of body-building protein and packed with life-giving nutrients: vitamins, minerals and enzymes. Especially when soaked overnight and the enzyme inhibitors are released from the nut or seed, the milk is made from live food, even better and more enzyme-packed than a raw food! Nut milks are easy to digest and absorb. There is no added sugar, preservatives, colorings or chemical additives (as in commercial soy and almond milk). There are also no added hormones or antibiotics (as in commercial dairy milk). Nut and seed milks are gluten-free, lactose-free and non-mucous forming: a great vegan, plant-based healthy alternative to dairy milk. And they taste great!
All information in this article is for educational purposes only.
It is not for the diagnosis, treatment, prescription or cure of any disease or health condition.

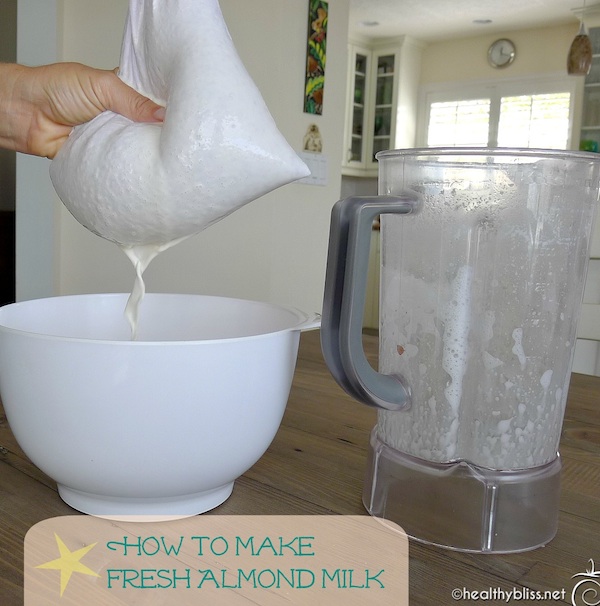
Make your own Fresh Almond Milk at Home!

You can easily make your own nut or seed milks at home, and this is something you can do more in the winter when there is less availability of fresh raw foods. Use the nut milk as the base for a delicious smoothie (keep reading for some yummy recipes to try yourself!)

How to Make Homemade Almond Nut or Seed Milk

1. Think Healthy

Start in a positive, loving and healthy vibration.

Think of all the good you are doing for your body!

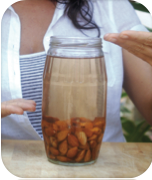
2. Soak Overnight

Soak 1 cup nuts or seeds overnight (8-10 hours)
in a glass jar or container.

Use 1/3 nuts/seeds to 2/3 water.

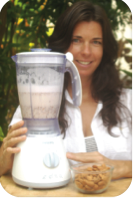
3. Rinse and Blend

Rinse the soaked nuts or seeds with fresh water.

Blend 1 cup soaked nuts or seeds in the blender with 3-5 cups fresh water.

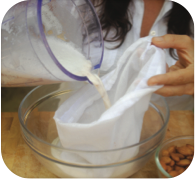
4. Strain Using Cotton Bag

Strain the blended mixture using the cotton bag. You may use the pulp to make raw crackers.

The liquid is your ‘milk!’

5. Add fruit, honey or dates

Refrigerate and use for 3-5 days.

Can blend again with dates, honey or fresh fruits for a delicious alternative to dairy.

Drinking Your Milk

Enjoy your nut milk as a healthy vegan source of protein full of enzyme power! You may drink it plain, add it to smoothies, raw soups or raw granola or add to a raw recipe.

Storing Your Milk

Store your Fresh Almond Milk in a glass jar in the fridge

It is best to store your nut or seed milk in a glass jar or glass container in the refrigerator. Shake well before using. If it is too thick, simply add more fresh water.

The fresh milk will keep for 3-5 days when refrigerated. Use the milk as a base to create other smoothies and fruit blends.
To make a fruit blend, take 1 cup of nut or seed milk and blend again with dates, fresh fruit or honey.

Good Nuts and Seeds for Milk

Good Nuts for Beginners

Try almond, macadamia, brazil nuts, pecans or cashews for your nut milks.

Good Seeds for Beginners

For seed milk, you can use pumpkin seeds or sesame seeds. If you use sunflower seeds, it is best to not strain them with the bags because the seed tend to get quite ‘sticky.’ For sunflower milk, simply keep the seed pulp in the milk.

More about Nuts and Seeds

Do NOT use roasted or salted nuts or seeds for your milk. Be sure to use raw unsalted nuts or seeds. Sunflower seeds and pumpkin seeds should be shelled, raw and unsalted. Always discard the soaked water from the overnight soaking process. Use fresh water when blending the milk.

Almond Milk Smoothie Recipe

1 Cup Fresh Almond Milk
2 Medjool dates (pitted)
1 Banana
2 Tablespoons Ground Flax Seed
1 Tablespoon Raw Maca Powder
1 Tablespoon Coconut Oil

Blend all ingredients in the blender until smooth. Enjoy!

Brazil Nut Milk Smoothie

1 Cup Fresh Brazil Nut Milk
2 Tbsp. Raw Cacao (or Carob) Powder
2 Tablespoons Raw Honey
Dash of Cinnamon Powder (to taste)

Blend all ingredients in the blender until smooth. Enjoy!

2 Sprout Nut Seed Milk Cotton Bags + eBook with Recipes – Raw Food Cooking
$15.99

More on Nut Milk and Healthy Recipes:

Recipe: Banana Softie with Cinnamon Sauce, A Raw Food Vegan ‘Ice-Cream’

100% Raw Food and Healthy Bliss!

This raw food vegan dessert is a favorite, even amongst cooked-food eaters! The banana makes this dish look and taste creamy, just like real ice cream, but there is no dairy or added sugar as you will soon see. I hope, with this recipe, you can see how much more there is to make with a blender than just smoothies! Personally, I found that my Ninja blender motor wasn’t strong enough to blend frozen bananas. Luckily, I borrowed a KitchenAid blender and used the Puree Button and it worked just fine. When you consider spending more money on an expensive blender like the Vitamix, it’s the high-power motor that makes the difference.

The main ingredient of the Banana Softie is frozen bananas. Organic is best if possible of course!

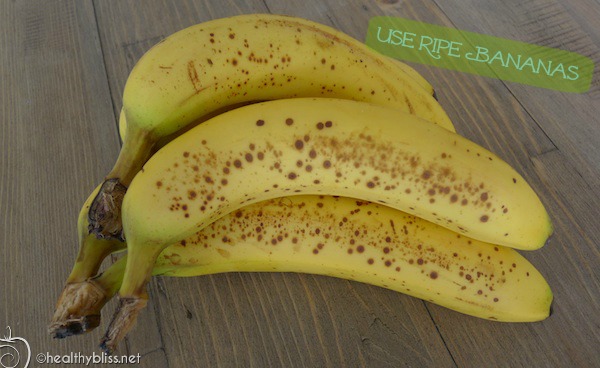
Buy bananas ripe before freezing

I like to buy organic bananas on sale, just before they are too ripe, and use them for this dish. You can keep a small stockpile of frozen bananas in the freezer ready to make a batch of softie for family and friends. The key to freezing the bananas is 1) peel each banana first and 2) chop into pieces before freezing.

Store frozen bananas peeled and chopped

If you’ve ever tried to freeze a banana whole with the skin on, you would have quickly learned how difficult it is to peel a frozen banana and how much harder it is to put whole frozen bananas in the blender! So, peel, chop and place your frozen banana pieces in a plastic bag or glass container in the freezer. Let freeze solid before making this recipes (at least 24 hours is best).

Banana Softie (100% Raw Vegan Ice Cream) Ingredients:

  • 6 organic bananas (peeled, chopped and frozen)

Banana Softie Sauce/Topping Ingredients:

  • 1/2 tsp organic cinnamon powder
  • 4 Tbsp. Raw Honey or 2 Organic Medjool Dates (pitted)
  • 2 Tbsp. filtered water
  • 1-2 Organic Medjool Dates, chopped for added topping (optional)
  • 2 Tbsp. Raw Cacao Nibs for added topping (optional)

Banana Softie Directions:

The lucky winner of the Vitamix Blender can use their new blender to make this recipe. You can also use a normal blender, but make sure it has a decent motor. For example, a Cuisinart brand should be ok but a Nutri-Bullet may not be able to blend the frozen banana.

Blend, and serve…so easy!

All you need to do is place the frozen chopped banana pieces in the blender and add about 1/4 cup filtered water. (The water just helps to puree the bananas into a creamy blend). If your blender doesn’t blend the bananas, let then sit out for about 10 minutes to thaw a bit and try again. (Of course, with a Vitamix…this will not be a problem!)

Once the bananas are blended in a yummy creamy softie form, you will be ready to serve! Be prepared to serve immediately because the softie will start to melt rather quickly. For that reason, it’s best to make fresh and serve fresh. If necessary, you can make the softie and store in the freezer prior to serving.

In that case, keep the sauce and topping separate and garnish later.

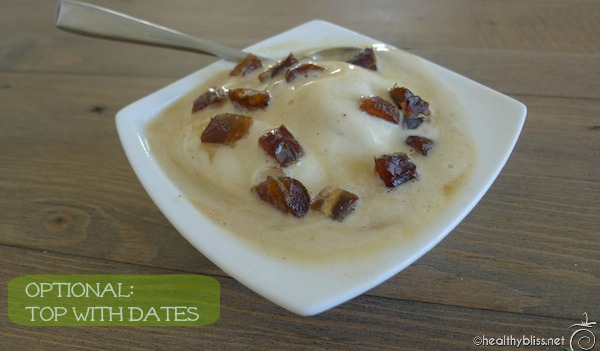
Optional: Cinnamon Sauce and Raw Toppings
The Cinnamon Sauce tastes amazing with Banana Softie! To make the sauce, stir raw honey (or pureed organic Medjool dates), cinnamon and water into a sauce. If your raw honey is quite thick, you can blend the sauce in a mini food processor.  Note: raw honey is not a vegan food; if you’re vegan, use organic Medjool dates in your Cinnamon sauce.

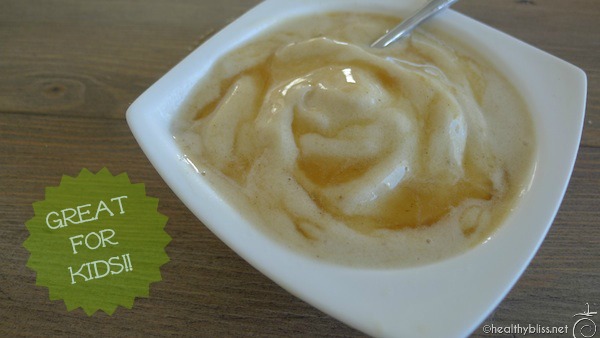
Banana Softie with Cinnamon Sauce

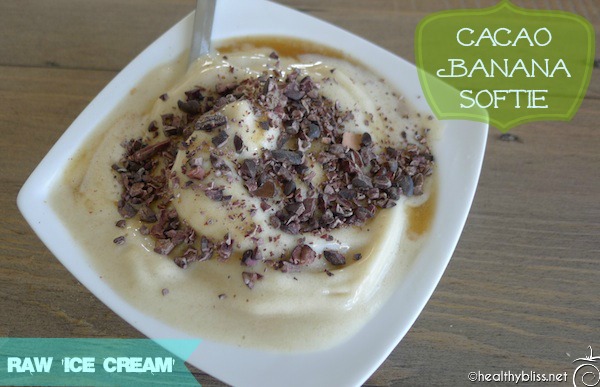
Drizzle the cinnamon sauce on top of each bowl of banana softie and suddenly your raw food dessert is looking very yummy! Additionally, you may add some raw cacao nibs and/or chopped dates on top.

Banana Softie with Chopped Dates

When I worked at the Spa Samui Detox Resort in Koh Samui, Thailand, this dish was very popular and all of the fasters wanted to know how soon after their fast could they eat the Banana Softie! At Spa Samui, they also offered Mango Softie (which is the same dish but uses fresh frozen mango instead). Personally, I never liked the Mango Softie because it was never creamy like the Banana Softie but you can certainly give it a try and decide for yourself. If you want to try Mango Softie, simply peel, chop and freeze about 4-5 mangoes and follow the instructions as per above. You can also experiment by preparing ‘2 scoops’ of ‘ice-cream,’ one banana and one mango.

A ‘normal’ ice-cream will contain added sugar, artificial colors and flavors, sometimes gluten and of course dairy. No wonder people get acne, bad skin, puffiness, port digestion and even acid-reflux after eating it. Choose the raw food vegan gluten-free version and you have no added chemicals. Instead, you get extra the healing power of real food! Cinnamon is known to help regulate blood sugars, bananas are a great source of potassium and mangoes are high in Vitamin C, and several trial studies suggest that polyphenolic anti-oxidant compounds in mango are known to offer protection against breast and colon cancers. See how much fun eating raw food can be! And it’s good for you too!

More Raw Food Desserts:

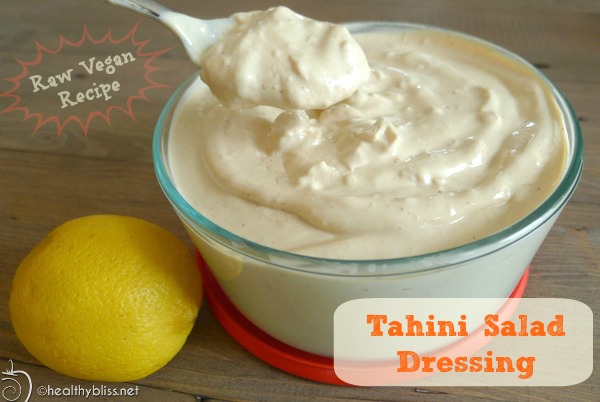
Recipe: Raw Tahini, Garlic and Lemon Salad Dressing or Veggie Dip…and it’s Amazing!

Raw Tahini Salad Dressing is one of my absolute favorites!

This recipe takes less than 10 minutes to make and gives you a great healthy homemade veggie dip or salad dressing to use all week long! I’ve decided to feature an easy-to-blend-and-create recipe this week to show you how many different things you can make in a blender…and not just smoothies!

Ingredients for Tahini Dressing

Raw tahini, or sesame paste (think peanut butter made with sesame seeds instead of peanuts), can be found in most supermarkets and health food stores. I bought the tahini for this blog post at a Greek supermarket and deli, but you can also find it in any type of Mediterreanean or Middle Eastern Supermarket as well.

In the US and North America, people tend to call sesame paste ‘tahini‘ but it the Middle East you will see it called ‘tahina.’ In Israel, there are countless brands of tahina for sale. They even have a sprouted raw tahini sesame paste from Ethiopia which is outstandingly delicious!!

What’s interesting to know is that in Israel, people rarely eat tahini straight from the jar. For them, it’s too thick and it’s not tasty without any spices or fresh lemon juice. It seems to me that in the USA, tahini is under-appreciated and under-utilized because people don’t know the traditional way to prepare it. In the recipe below, I will show you how!

Easy to make and tastes amazing!!

Typically I will use one whole jar of tahina or sesame seed paste to blend up my tahina dressing for the week. Here, I used one 16-oz. (or 454 gram) container of tahina to make a container of 32 oz. (or 950 ml) of dip or salad dressing. Making salads that taste good is a key to raw food success, and there is no faster way to kill a good salad than by adding a store-bought salad dressing full of sugar, preservatives, flavor enhancers (MSG), thickeners and emulsifiers.

I always make my own salad dressing and I am a happier, healthier person for it!

Sesame seeds are a great vegan source of calcium and they’re also naturally high in zinc. Fresh lemon is extremely alkalizing, good for pH health. Cumin is known to aid in digestion. Cayenne pepper is very good for the heart and blood (circulation). Garlic is a natural anti-inflammatory food and a great immune system booster.

*Can’t find tahini or sesame seed paste where you live? You can make it from scratch with organic sesame seeds! Check out the recipe for it here: How to Make Raw Tahini

Tahini Salad Dressing/Dip Ingredients:


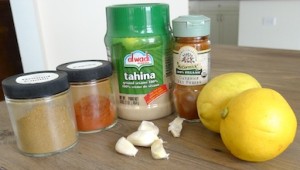
  • 2 – 3 large garlic cloves (optional)
  • 1 16 oz. container tahini (sesame seed paste)
  • Juice of 2 lemons (freshly squeezed is best)
  • 1 cup water (filtered is best)
  • 1 tsp. cumin powder
  • 1/2 tsp. cayenne pepper
  • 1/2 tsp. paprika (optional)
  • dash sea salt or Himalayan salt (to taste)


Tahini Salad Dressing Directions:

The lucky winner of the Vitamix Blender can use their new blender to make this recipe. For the commoners (like me!), you can use a normal blender. Peel the garlic and put garlic and water in the blender. Blend. Add the entire jar of tahini paste (with the oil which is usually separated on top), spices, fresh lemon juice and salt and blend again. Adjust spices to taste (you may need to add more cumin, salt or cayenne pepper) and blend again. If the result is too thick, add more water…slowly! Start with adding 1/4 cup water, blend and assess. If too thick, add another 1/4 cup water and blend again. The final result should be creamy, but not runny. (Each brand of tahina will give a slightly different thickness so you always have to experiment a little.)

Optional: You can also add 1/2 cup of fresh parsley and blend. Fresh parsley is highly recommended over dried parsley for this recipe (in the Middle East, no one uses dried parsley in tahina!). If you use dried parsley (which I do not recommend simply because fresh parsley tastes 1,000x better), add only 1 Tbsp. of dried parsley. The garlic and paprika are also optional, depending on your taste.

Tip: For garlic, try to find organic garlic which, not only is a normal size like you see in the photo and not GMO-ed gargantuan size, but organic garlic has a nice, mild fresh taste. The gigantic non-organic garlic from China (sold in most supermarkets) has an unnaturally strong taste (perhaps in relation to it’s unnaturally large size!). Choose organic garlic to really enjoy the subtle flavor of this healing food.

Note: The dressing should keep in the fridge for up to 7 days.

How to Eat

In Israel, this salad dressing is on the table with nearly every meal and most often eaten with a classic ‘Israeli Salad’ or ‘Arab Salad,’ consisting of finely chopped cucumber, fresh parsley and tomato. However, you can use it on any raw food salad as a tasty dressing. Try this combo: Peel 3 organic carrots and then grate with a normal size grater into a bowl. Add 1 celery stalk chopped, fresh romaine lettuce chopped, and 1 cucumber peeled and chopped. Mix all ingredients well and drizzle 4 Tbsp. of the Tahini Salad Dressing on top.

Share good health with family & friends!

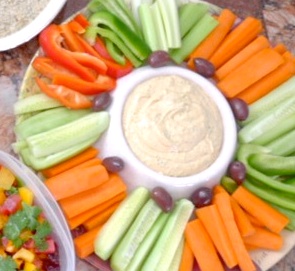
Another option is to serve this as a dip with freshly sliced cucumber and carrot sticks for a delicious 100% raw food gluten-free vegan snack. I recently brought that to a gathering with many cooked foods eaters, and they loved it!

This is certainly a healthier option than the ‘old-style’ spinach dip made with dairy (mucous-forming) and dried soup mix (containing MSG!) served in a bread bowl. Isn’t it time to start spreading the love and showing your family and friends how delicious raw food can be?!

Another popular Middle Eastern dish made with sesame seeds is called Halva, and it’s traditionally made as a dessert with ground sesame seeds and sugar. You can make a delicious raw food version of Halva using raw sesame seeds and raw honey (or agave). Click here to check out my Recipe for Raw Halva or Sesame Balls.

More Raw Food Dressings & Dips:

Enter my FREE Vitamix Blender Giveaway here!

This Beauty of a Blender could be Yours for FREE!

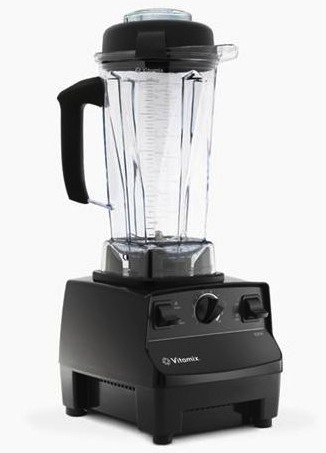
Imagine starting the New Year with a Vitamix Blender…for FREE! Thanks to the generous folks at Vitamix, I have one FREE Vitamix Blender to giveaway this holiday season! This blog post will tell you everything you need to know about the FREE Vitamix giveaway, so keep reading and be sure to add your comment below! In addition, I’m also offering a FREE online Iridology Analysis and a FREE Green Smoothie DVD and eKit to the lucky winner. This is our way of saying ‘Thank you’ to all of my loyal Twitter followers, clients and Facebook friends. If we are willing to offer you the chance of a clean, fresh start to your health and well-being for 2013, you better believe that we believe in what we do and we believe in you too!

Just in case you don’t know what a Vitamix is, it’s a blender. That means it blends the fiber and the liquid of whatever you put inside. It is not a juicer (a juicer separates the fiber from the liquid, leaving only the liquid for you to drink). A blender is very practical for busy people because it takes a just a few minutes to prepare your creation, is very easy to clean, and with a blender, you get all the nutrients from your food plus you get the fiber too. Most people are simply not eating enough fiber in their daily diet; the result can lead to poor digestion, acid reflux, arthritis, bad skin, weak liver, sluggishness, foul breath and even restless sleep. Getting fiber in your diet is so easy when you simply have 1 healthy smoothie a day. Add superfoods to your smoothie and you can really maximize the power of your foods to get the most fiber, nutrients, minerals and chlorophyll – all valuable tools for healing and all elements needed to make you feel that Healthy Bliss!

The ‘BMW’ of blender motors!

Now you know that the Vitamix is a blender. But I didn’t mention that it is the BMW of blenders. Well, it better be…for a price of $449.00 USD!! It’s the dream blender of every raw foodist and health enthusiast I know, including me! The reason why the Vitamix Blender is considered the best blender on the market is because it has an excellent motor, it’s extremely well made and it’s guaranteed for 7 years. You can blend anything in this blender thanks to that motor, even an avocado seed, it’s true! This is a blender that lasts for life; that’s why people pay a lot for it, because it’s really a long-term investment in your health. I am really excited to have the chance to give this away because I’ve seen the change that my clients have made, and I know that good food is the key.

The Vitamix Blender ($449.00 value): What it can do for you

Enter in the Comments below to Win!

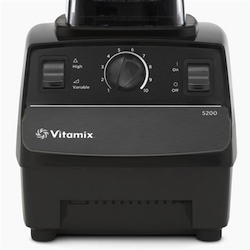
Create every course of your home-cooked meal—from frozen drinks to creamy desserts—in minutes. The Vitamix 5200 is the universal tool for family meals and entertaining. A Vitamix blender is designed and built for outstanding performance and unsurpassed durability. You’ll enjoy:

  • Easy-to-use equipment paired with extreme versatility
  • The ability to chop, cream, blend, heat, grind, churn, and more, with a single machine
  • Quick and easy self-cleaning with a drop of dish soap and warm water; just run on High for 30 seconds
  • 7-year full warranty – Industry’s best
  • Ongoing recipe ideas and community support

An Online Iridology Analysis ($99.95 value): What it can do for you

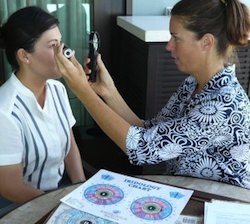
Iridology is the science of the iris, or colored portion, of the eye. The iris is connected to every organ and tissue of the body by way of the brain and central nervous system through the optic nerve. The optic nerve connects to the central nervous system (CNS) which is the main communication link to everything that goes on in the body.

Jennifer Offers Iridology via Skype, Phone or Email

Jennifer Thompson is a Certified Comprehensive Iridologist (CCI) and offers a complete Iridology Analysis via Skype, email or phone. After taking your iris photos with a digital camera or iPhone, you will email the photos to Jennifer and arrange a time and day to discuss the results. During the reading, Jennifer gives you a good, clear understanding of where your body is at in terms of strengths, weakness, imbalance and any areas of toxicity or inflammation. She makes recommendations for improvement that may involve doing some form of a detox (colon cleanse, heavy metal detox, kidney cleanse, skin cleanse, etc) and a change in diet that may include adding certain foods to your diet and reducing/minimizing others.

  • The skype call is 1-hour in length and is recorded. The video file is sent to you by email after the call.
  • Any skype chat is also sent by email after the call so you have all records of any scientific terms discussed.
  • Follow-up Q&A by email is available for up to 2 months your consultation to ensure you have all knowledge and information needed to achieve your goals.

Green Smoothie DVD and eKit ($69.95 value): What it can do for you

The Green Smoothie DVD and eKit Course

Jennifer’s Instructional DVD will make you a Green Smoothie Expert! Find out for yourself why thousands of people are turning to Green Smoothies for more energy, better health, detox & weight loss! Are you not experiencing the level of energy and good health you desire? Green Smoothies could be your answer to start getting results. Jennifer’s NEW Green Smoothie Power DVD teaches you how!

With the DVD, you also receive 3 eBooks. Use the Quick Reference Guide eBook to get started immediately. Read the How to Make Green Smoothies eBook for inspiration and motivation. Experiment with 200 amazing recipes in the Green Smoothie Recipe eBook. You can be making your first Green Smoothie within minutes!

  • Green Smoothie DVD by Jennifer Thompson
  • How to Make Green Smoothies eBook by Jennifer Thompson
  • Green Smoothie Quick Start Guide eBook by Jennifer Thompson
  • 200 Green Smoothie Recipes for Your Health & Well-Being eBook by Jennifer Thompson
  • How to Sprout and How to Make Nut/Seed Milk book by Jennifer Thompson
  • Set of 2 Sprout and Nut/Seed Milk Bags (9.5×11″, 100% Cotton)

Sample Smoothie Recipe for the Lucky Vitamix Winner

Here’s a fun recipe to make in a your new Vitamix Blender: Hearty Selenium Boosting High Anti-Oxidant Smoothie! This Smoothie is so fast, easy and yummy! It’s perfect for a cold winter morning or after a workout when you’re really hungry and want something filling!

Now that’s some Healthy Bliss!

INGREDIENTS
– 1 red apple, cut into slices and core
– 1 banana
– 1 large handful of fresh blackberries
– 1/3 cup raw walnuts
– 1 Tbsp. organic tahini (sesame paste)
– 2 Tbsp. ground flax seed
– 1 Tbsp. Fresh organic aloe vera juice
– 1/2 cup filtered water

DIRECTIONS
Place all ingredients in a blender. Blend until smooth. Pour into a glass and enjoy!

Blackberries are very high in anti-oxidants (for immune system); Tahini is high in calcium (for the bones); Walnuts are high in selenium (for the brain); Aloe vera is great for the skin and digestion. Let your food be your medicine!

How to Sign-Up for the FREE Vitamix Giveaway

All you need to do is this:

1. Follow me (@rawfoodbliss) on twitter
2. Follow Vitamix (@vitamix) on twitter
3. Leave a Comment on this post, answering the following question:


What is one positive change that you’ve made in your diet and how has your health improved as a result?


Thanks for entering, and Good Luck!

That’s it, you will be entered in the giveaway.

All entries must be received by 25 December 2012 at 12 midnight USA EST.
The winner will be announced on 26 December, 2012 at 12 noon USA EST.

The winner will receive a FREE Vitamix Blender, a FREE online Iridology Analysis and a FREE Green Smoothie DVD eKit course.

This contest is open up to all entries worldwide. Please note: The winner will receive a blender with whatever voltage is required for their country (either 220v or 110v). Any import duties imposed at delivery (for an international winner outside of USA or EU) are the sole responsibilty of the recipient.

Answer this in the comments below:
What is one positive change that you’ve made in your diet and how has your health improved as a result?

Your comment will not appear immediately as all comments are moderated for spam before approval. The winner will be contacted by email, and will also be announced on my Twitter feed and Facebook page on December 26, 2012 at 12 noon USA EST. Thank you!

And the winner is…….
Lois and Earl Stokes of Volcano, Hawaii!!

Congratulations to Lois and here is her entry:

“My husband had a stroke and found out that he was a diabetic one year ago. We have turned his diabetes around (no more insulin shots) and have improved his blood work by limiting processed foods and drinking two green smoothies a day. I as a side benefit have lost 30 pounds and no longer suffer from bowel spasms. Mahalo (Thank You) for this generous offer and for the opportunity to become a winner. Actually I am already a winner because of our lifestyle change.”

Thank you to everyone who entered this amazing contest…I wish I had a free Vitamix to give to all of you…..your stories of healing touched my heart!!

More on Vitamix:

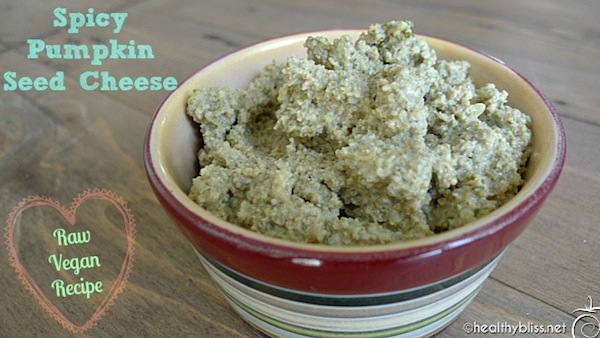
Raw Food Recipe: Spicy Pumpkin Seed Cheese

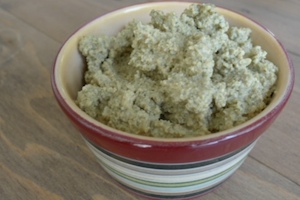
Finally, I am sharing this recipe after so many requests! I made this yesterday and everyone loved it! Luckily I remembered to photograph it before it was all gone!

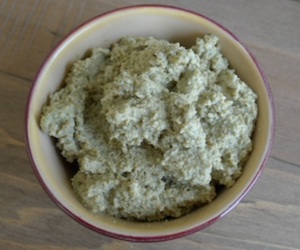
Add Spicy Pumpkin Seed Cheese to a Yummy Raw Organic Salad

Pumpkin seeds are naturally high in zinc and are therefore excellent for the glandular system. They are also a good anti-parasitic and anti-fungal food, combine that with the garlic and you have a powerful immune booster!

Pumpkin Seed Cheese Ingredients:

  • 2 – 3 large garlic cloves
  • 1.5 – 2 cups raw pumpkin seeds
  • Juice of 4-5 limes (freshly squeezed is best)
  • 1 tsp. cayenne pepper (add more to increase ‘spicy taste’)
  • 1 tsp. cumin powder (to taste)
  • dash sea salt or Himalayan salt (to taste)

Spicy Pumpkin Seed Cheese Directions:

A delicious 100% vegan raw food cheese

Grind the dry pumpkin seeds in a mini food processor. Empty and put aside. Then, chop/grind the fresh garlic in the same mini food processor.

Add the ground pumpkin seeds again, squeeze in the fresh lime and add the spices to taste.

Chop/grind again.

The consistency should be moist; if still dry, add more lime juice. This dip tastes best if left to sit overnight, but can also be eaten immediately.

You can also add 1 Tbsp. of nutritional yeast for some extra B vitamins and ‘cheesey’ taste.

How to Eat

Serve with fresh veggies or add to a salad

Serve this dip with freshly sliced cucumber and carrot sticks for a delicious 100% raw food vegan snack. To use as a salad dressing, try this combo: Peel 3 medium zucchini and then grate with a normal size grater into a bowl. Add 1 bag or bunch of fresh spinach (rinsed and clean). Mix the zucchini and spinach in the bowl. Add 3/4 – 1 cup of the pumpkin seed cheese, mix all ingredients and serve. A simple salad that tastes amazing and is so good for you!

Please note: I call this a ‘seed cheese’ because the fresh lime gives it a slightly cheesey flavor, but there is no cheese or dairy in this recipe, it is pure cholesterol-free vegan protein and raw food bliss!

Raw Pepitas or Raw Pumpkin Seeds

Be sure to use raw pumpkin seeds and not dry roasted pumpkin seeds so you get all the enzymes of the raw food version (and it will taste better too!).

You can buy raw pumpkin seeds in the bulk section of WholeFoods or at your local health food store. The good thing about buying them in bulk is you will often be able to get organic pumpkin seeds.

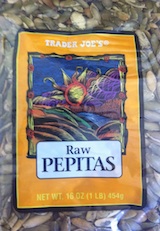
Occasionally, you may see pumpkin seeds labeled as ‘pepitas’ (Spanish for pumpkin seed). For example, at Trader Joe’s, you will find the raw pumpkin seeds packaged as ‘Raw Pepitas.’ However, the ones at Trader Joe’s are not organic. Remember, always do the best you can with what you have.

More Raw Food Dressings & Dips:

Benefits of Raw Apple Cider Vinegar

Raw Apple Cider Vinegar (or ACV for short) is one of those amazing healing foods that has lived up to its health benefits for almost 2,000 years. I always say, look at the ‘tried and true’ if you are looking to add better staple foods to your diet. I’d say a 2,000 year success rate is pretty good, don’t you think?!

All information in this article is for educational purposes only.
It is not for the diagnosis, treatment, prescription or cure of any disease or health condition.

Raw Apple Cider Vinegar (ACV) is a Raw Food!

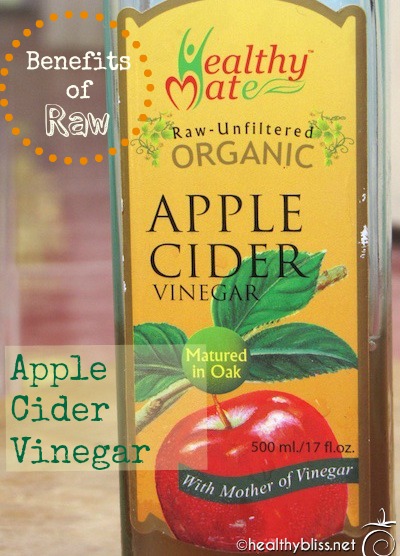
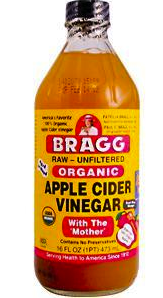
First of all raw ACV should be raw and that means unpasteurized. It should say on the label ‘raw’ or ‘from the Mother.’ Household brand names of ACV like Heinz are not raw. It’s the fermented or raw ACV that is so good for you so be sure to buy the right one. My favorite brand is the Bragg’s Raw Apple Cider Vinegar. Raw ACV is the only vinegar that is alkaline-forming to the body. All other vinegars (white, balsamic, red wine, etc) are acid-forming. For a health balanced pH, raw apple cider vinegar is one of the best things to add to your diet. To understand more about acid and alkaline pH, read this article: ‘Alkalize Your pH – How Alkaline Acid Balance affects your Health’.

According to Paul Bragg, Apple Cider Vinegar is a ‘perfect food’:

Natural (undistilled) organic, raw ACV can really be called one of Mother Nature’s most perfect foods, the worlds first natural medicine. It is made from fresh, crushed apples which are then allowed to mature naturally in wooden barrels, as wood tends to “boost” the natural fermentation. Research worldwide supports and commends what Hippocrates (the father of medicine) found and treated his patients with in 400 B.C. He discovered that natural, undistilled Apple Cider Vinegar (or ACV)* is a powerful cleansing and healing elixir – a naturally occurring antibiotic and antiseptic that fights germs, bacteria, mold and viruses – for a healthier, stronger, longer life!

Label reads ‘With Mother of Vinegar’

One of the benefits of having raw ACV every day is it is a naturally high source of potassium and enzymes. Many people link potassium deficiency to dark circles under the eyes, early senility, chronic fatigue, high blood pressure, arterial and heart problems, arthritis, kidney stones, irritable bowel syndrome and Crohn’s disease. Signs of potassium deficiency include fatigue, achy bones and muscles, tired eyes, itchy eyes, dry scalp and brittle hair and lack of mental alertness.

Paul Bragg says, “But the truth is . . . you must have potassium to build and maintain youthful, healthy tissues! If you don’t get required amount of potassium daily, you soon acquire an old-age look and feel.This premature ageing is usually due to potassium deficiency and unhealthy living!”

Can you see how a healthy diet is really the key to feeling better?

With the standard diet of devitalized foods that clog the small intestine and ferment, leaving backup and buildup, most people have a much lower absorption rate than normal. The reason why raw apple cider vinegar is a good source of potassium is because, in liquid form, it is almost instantly and fully absorbed.

Available Online, Click Here

You can even gargle with raw ACV (1tsp. to 1/2 glass of water) to help clear a sore throat, naturally! It is also good for insect stings, bites, ear infections, acne, viruses, yeast (candida) and fungus problems. You can apply a watered-down solution directly to the infected area and also drink 2 Tbsp. of raw ACV in a glass of water both morning and night.

To improve digestion, gas, heartburn, burping and stomach bloating sip 3 tsp. of ACV before your meal. Hold in mouth for a minute before swallowing. This helps digestion to start in the mouth.

On a daily basis, try to have at least 2 Tbsp. of raw Apple Cider Vinegar to keep your body healthy and strong. You can mix 2 Tbsp. with water and drink upon rising, add the ACV to a juice or smoothie, or make a delicious salad dressing.

For a salad dressings try this recipe:

Mix 2 garlic cloves (chopped), 2 Tbsp. ACV, 2 Tbsp. extra virgin olive oil, 1 Tbsp. raw organic honey, 1 Tbsp. fresh lemon juice, 1/3 cup water, 1 tsp. dried basil leaves, dash cayenne pepper, dash cumin powder and Himalayan salt to taste.

For more information on the healing power of ACV, I highly recommend the book Apple Cider Vinegar Miracle Health System by Paul and Patricia Bragg.

A good brand of ACV to try for yourself is the Bragg’s Organic Raw Apple Cider Vinegar.

Read more information on the liver and liver cleansing here:

Gallstone Liver Flush – Recipe & Cleanse Info

How to Do a Coffee Enema at Home

How to Do a Castor Oil Pack for Liver Cleansing

How to Do Onion Socks for Healing

More on Skin Cleansing:

Raw Food Dessert Recipe: Cacao, Hazelnut & Banana Bliss

Raw Hazelnut Cacao Bliss

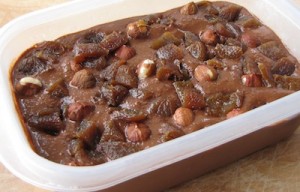
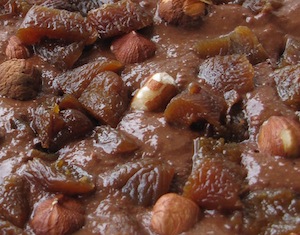
This recipe is fast and easy for a delicious raw food dessert. Have you ever tasted a fudgesicle pop? Well, if you freeze this chocolate-like creation, it actually tastes like a fudgesicle! But this is a healthy version, full of anti-oxidants and other nutrients.

Make this tasty gluten-free vegan treat to share with family and friends…they will not even know it’s a raw food! It’s also great for kids, and with this dessert…they are getting valuable nutrients in addition to a great taste.

Raw Food Recipe: Cacao, Hazelnut & Banana Bliss

Ingredients:

  • 1 cup raw hazelnuts, ground (can also use raw almonds)
  • 3 ripe bananas
  • 3 Tbsp. raw cacao powder
  • 1 Tbsp. raw maca powder
  • Water from 1 young green coconut plus coconut flesh (can replace with 1.5 cups cold water + 3 Tbsp. coconut oil)
  • 2 Tbsp. raw honey (optional)
  • 2 Tbsp. raw ginger, grated (optional)
  • 6 raw dried organic apricots, chopped (optional)

Healthy Bliss…yes!

Grind the hazelnuts or almonds with maca and cacao powder. There is no need to soak the nuts. Use a mini-food processor to grind the nuts to a fine powder. (You could also add 1-2 Tbsp. of other superfoods, such as acai powder, pomegranate powder or goji berries.)

In a blender, blend the coconut water and bananas. Add the ground nuts and powders and blend again. Add the raw honey and/or fresh ginger (optional) and blend again.

Pour mixture into a container. Top with chopped hazelnuts or almonds and chopped apricots. Place in freezer and let sit for 6-8 hours. Serve with love, and enjoy!

More on Superfoods: