Tag Archive for: Recipes

Easy Recipe: Make organic pickles at home!

Are you ready to make your own fermented foods at home? (Answer: Yes!) Pickling cucumbers is a great start to build up your confidence with fermentation. And who doesn’t love a crisp tasty pickle on a hot summer day? You can have your pickles ready to eat in as little as 7 days with the easy recipe below.
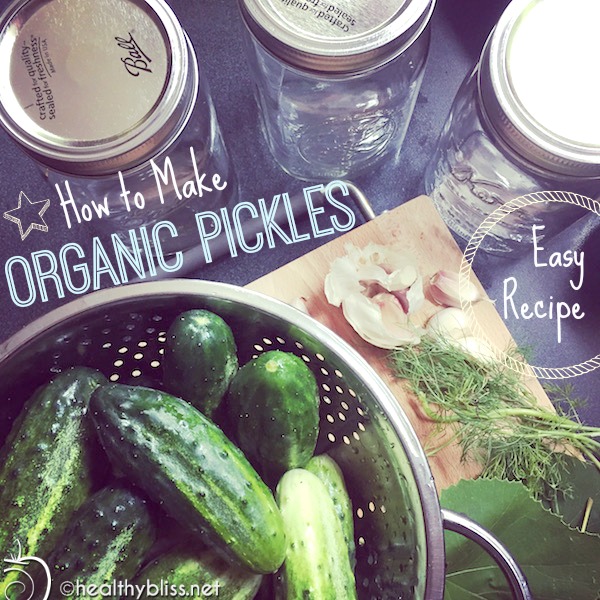
Use this fast and easy recipe to make delicious pickles at home

Health benefits of Fermented Foods

For optimal digestive health, we need to get good bacteria in the gut on a regular basis. Antibiotics destroy all the bacteria in our system, both good and bad. Over time, this can lead to more imbalance in digestion function, absorption and elimination. Some experts even say that food allergies, autism and ADHD may be related to an imbalance of bacteria in the colon. Certainly many digestive diseases like colitis, diverticulitis and Crohn’s disease are caused in part by lack of good bacteria in the gut. Having the right balance of good bacteria helps to strengthen immune system, improve digestive health and long-term, can even prevent dis-ease. Probiotic, or good bacteria, literally means “for life.”

You may think that fermented foods are only made with yeast (like beer or wine), but there are other cultures used for fermentation. Other types of natural bacteria are used as well as SCOBY’s (Symbiotic Culture of Bacteria and Yeast). With pickles, the natural bacteria on the skin of the cucumber itself is what’s used to start the “lacto fermentation” process.

Pickles are perfect to try if you’ve never done any type of fermentation before. You get relatively fast results (in 7 days), unlike kombucha, for example, that can take a few weeks. And there isn’t a lot of hard work involved or checking required, like in making raw sauerkraut. You should see bubbles rising in the pickle jars when you flip them every day, and when you eventually open the jar to eat them, the jar should make a “pop.” Then you know you’ve done everything correctly and can enjoy the fruits of your fermentation labor. Scroll down to get the recipe below.

Homemade pickles have no food additives!

There are other great reasons to eat homemade pickles instead of store-bought, besides the obvious better taste. Commercially sold pickles are pasteurized, which means all those beneficial natural probiotics are destroyed. Homemade pickles keep all the good bacteria intact, making for good gut health when eaten. A healthy microbiome is the basis for a strong and healthy immune system.

Store-bought pickles can also contain nasty food additives, the worst offender being Yellow #5. Banned in many countries (including all of Europe) since it was shown to be a carcinogen, Yellow #5, or tartrazine, is a coal-tar derivative. It is currently still allowed in foods in the USA. Yellow #5 is frequently used in your favorite brands of pickles for added color to make the pickles look brighter and fresher. Most store-bought pickles also contain preservatives, the most common one being sodium benzoate (not good).

Examples of Yellow #5 in pickles:

Vlasic: Hamburger Dill Chips Pickles – Cucumbers, Water, Distilled Vinegar, Salt, Sodium Benzoate (Preservatives), Calcium Chloride, Natural Flavor, Polysorbate 80, Yellow 5. “Great taste & crunch. Classic dill taste.” (No thanks!)

Vlasic Bread & Butter Spears No Sugar Added Pickles – Cucumbers, Water, Distilled Vinegar, Salt, Spice, Calcium Chloride, Sucralose, Yellow 5. “No sugar added!” (But you kept the carcinogens, great work.)

Mt. Olive Sweet Gherkins No Sugar Added Pickles – Cucumbers, Water, Vinegar, Salt, Calcium Chloride, 0.1% Sodium Benzoate (Preservative), Alum, Sucralose (Splenda Brand), Natural Flavors, Xanthan Gum, Polysorbate 80, & Yellow 5. “Mt. Olive Pickles are Picklicious!” (Don’t think so…)

Heinz Dill Spear Pickles – Fresh cucumbers, water, distilled white vinegar, salt, sodium benzoate, garlic extract, gum acacia, calcium chloride, natural flavoring, polysorbate 80, fd&c yellow 5. “Classic dill taste and crunch Heinz pickles are 100% fat free, Gluten free.” (But they contain chemical crap, hmmm…)

Organic brands of pickles are often no better. I’ve seen xantham gum, natural flavors, spices and agave syrup…all of which are suspect ingredients that I avoid as much as possible.

The bottom line is this: YOU deserve the very best in life and you are worth having only the very best ingredients in your food. Taking the time to make your own food is one of the best investments in yourself, your health and your family’s health.

High-five some hashtags to health!! #homemade #homegrown #farmtotable #organic #cleanfood #cleaneating

Choosing organic ingredients

The best part about making cucumbers at home is that you can use all 100% certified organic and whole food ingredients. Look for smaller sized pickling cucumbers at your local farmer’s market. You can also grow your own pickling cucumbers in your backyard garden at home – they’re actually very easy to grow! Choose fresh organic dill. And definitely use organic garlic. (Non-organic garlic is mostly all grown in China, so the quality is a big unknown. But I find that non-organic garlic has a too strong and overpowering taste; whereas organic garlic has a soft yet flavorful and more delicate taste. Organic garlic also doesn’t leave a bad taste in your mouth or a bad smell on your skin.)

The water you add to your pickle jars should not contain any chlorine, because chlorine can stop the natural fermentation process. The best option is to use natural spring water or clean well water. If you are using tap water, then be sure to pour your water into a big pot or glass bowl and let it sit out on the counter overnight before using. This should off-gas the chlorine so it’s no longer in the water by the next morning. (If you’ve ever had pet fish, then you’re familiar with doing this when changing their tank water.)

Remember to cut off the blossom ends!

When you’re pickling cucumbers yourself, you must cut off the blossom ends. There’s an enzyme in the blossom that can make the pickle soft and unsafe to eat. The blossom end also tastes bitter when you eat a raw cucumber. That bitter taste can make an entire juice or smoothie taste bitter too, so it’s generally just a good practice to always cut off about 1/16-inch on the blossom end of all your cucumbers. In fermentation, cutting the blossom ends will help your pickles get more crisp and crunchy.
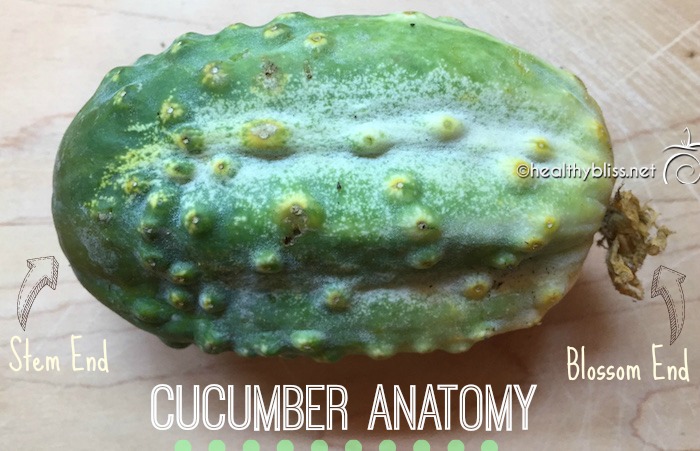
Every cucumber has 2 ends: A Blossom end and a Stem end

The blossom end of the cucumber is the end that grew the flower. The opposite side is where you will find the stem that connected the cucumber to the vine. Sometimes it’s easier to identify the stem end first. Then, you know that the other side is the blossom end.

Which end is the blossom end of the cucumber? To identify the blossom end, check both sides of your cucumber.

The picture below shows the stem end of the cucumbers. Do you see the smooth, indented dot? That’s where the cucumber was picked off the stem.
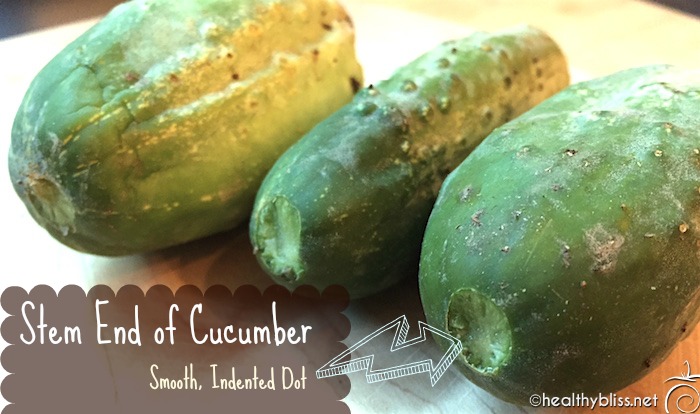
The stem end has a smooth, indented dot

The next picture shows the blossom end of the cucumbers. Even though the flower is gone, you can see that there is no indentation. This is the side that you want to cut about 1/16-inch off.

Note there is no indentation in the Blossom end of the cucumber
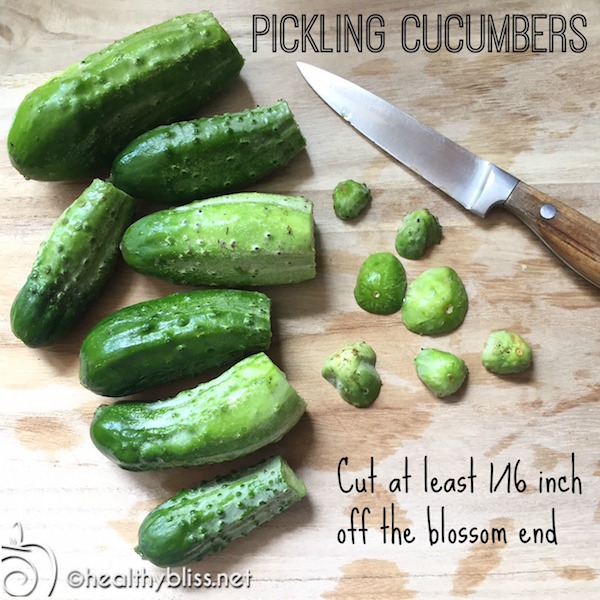
Don’t forget to cut those blossom ends for a crunchy, crispy pickle

Recipe for Organic Pickles

With this recipe, the pickles take 7 days to ferment and then you’ve got the best tastiest pickles ever! No sugar, no honey, no preservatives and no cancer-causing Yellow #5. Oh yeah, and these are 100% organic farm-to-table and made with love!

Pickling Ingredients

  • Pickling cucumbers (approx. 6-8 small cucumbers needed for each jar)
  • 1 1/2 cups (or 360ml) filtered water
  • 1/2 cup (or 120ml) organic raw apple cider vinegar
  • 1 tsp. – 1 Tbsp. fine Himalayan salt (as desired)
  • 1/2 tsp. organic crushed red pepper flakes
  • 1/4 tsp. organic mustard seeds
  • 1/2 tsp. organic back peppercorns
  • 1 sprig fresh organic dill
  • 2 organic garlic cloves (peeled)
  • 2 organic fresh grape leaves* (optional)
    You can buy the organic dried ingredients listed above on iherb.comAlso will need:- Wide mouth clean Mason jars with canning lids
    – 1 permanent marker
    You can buy Mason jars plus organic raw apple cider vinegar on amazon.com

Pickling Instructions

1. In a glass bowl, mix 1/2 cup organic raw apple cider vinegar + 1.5 cups water.
Add peppercorns, red pepper flakes, mustard seed, and up to 1T Himalayan salt.

2. Rinse your cucumbers but don’t scrub them. You want them to ferment from natural bacteria in the skins. Make sure you cut 1/16-inch from the blossom ends of each cucumber, then slice the cucumbers in spears. You want to keep the skins intact (do NOT peel the cucumbers), so the good bacteria in the skins can kick off the lacto-fermentation process.

3. Add 2 organic garlic cloves, fresh dill, and 1 grape leaf to the bottom of the Mason jar. Stack in chopped cucs and pack tightly. Add liquid and spices. Add another grape leaf to the top before closing. Secure the lid tight by hand. Write the date on the lid with a permanent marker.

4. Place the jar on a tray or plate on a shelf or counter-top. Flip the jar once daily for 7 days. Sometimes liquid may seep out of the jar, which is why having a tray or plate underneath is a good idea. You should see small bubbles rising in the pickle juice when you flip the jar. And that’s the fermentation happening right there!

5. After one week, put the jar in the fridge. Now, you can open, eat and enjoy!
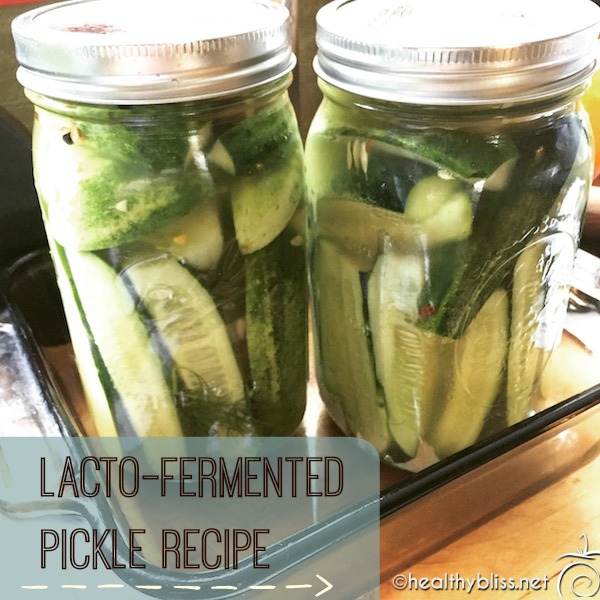
Store pickles in a tray or glass container to prevent spillage during 7 days of flipping once daily

*Fresh grapes leaves are recommended because they’re supposed to help keep the pickles more crisp and crunchy. I don’t know if they are totally necessary or not, but because we have plenty of wild organic muscadine grape vines growing all over our land, it’s no problem for me to pick a few leaves and add them to each jar. Sometimes in summer, you can find fresh grapes leaves for sale at local farmer markets. If you don’t have access to fresh grape leaves, don’t be discouraged. You can still make this recipe without them!

Homemade Pickle Eat-by Date

Using the above recipe, there is no canning or heating required. That’s nice because it keeps the cucs as a raw food, with all the enzymes intact. But, because they are not totally sealed the way canning or heating will do, these pickles should be eaten with 3 months of making them. Just keep that in mind if you give them to family or friends. After 3 months the pickles may turn soft or watery. If you see that, then it’s best to toss them in the compost bin. Writing the date on the lid of each jar helps to know how long to keep them.

My Pickle Detox/Cleanse

Last summer, we had so many cucumbers from our organic veggie garden that I was making 2 jars of pickles per day! By mid-August, we were up to our ears in pickles and the fridge was almost full. I had been planning to do a 7-10 day green juice fast as a nice transition from the end of summer into fall. But when I looked at all the pickles, I said to my husband, “Why don’t we just do a pickle detox and eat only organic pickles for 10 days?” So we did!

On average, we each ate about 1.5 jars of pickles per day and we drank all the pickle juice too. We also drank plenty of water in between. It was totally unplanned and un-researched. But it turned out great. We both felt energized. Our guts got a major boost of probiotics from the lacto fermentation and the organic raw apple cider vinegar. We had a mini-parasite cleanse from eating so many fermented garlic cloves. The pickles were cold and refreshing during the hot summer days. We had high energy and slept great. The was no juicer to clean! And we used organic clean food fresh from our garden. This year, we may do a 3-day pickle cleanse and go into green juices after that. I’ve got plenty of organic dandelion, celery and parsley that I’d love to use in juices or smoothies so we’ll see….!


For more on how to do a detox at home or how to navigate through your detox symptoms and start feeling great, book a personalized health consult with me via Skype.

How to Book Your Health & Nutritional Consultation:

1. Take photos of your eyes with a smart phone or digital camera.
2. Email the photos to me for approval.
3. We schedule a time to meet via phone or Skype!

Recipe for Super Energy Seed Crackers…& without a Dehydrator!

This is one of the easiest recipes you could ever make and the results are super-amazing-delicious! And, you can share these seed crackers with your vegan, vegetarian, gluten-free, yeast-free, dairy-free, sugar-free, anti-candida AND paleo friends. Now, that IS amazing!

Check out this fast and easy recipe - you'll be amazed!

Check out this fast and easy recipe – you’ll be amazed!

Super Energy Seed Crackers Recipe

Ingredients:

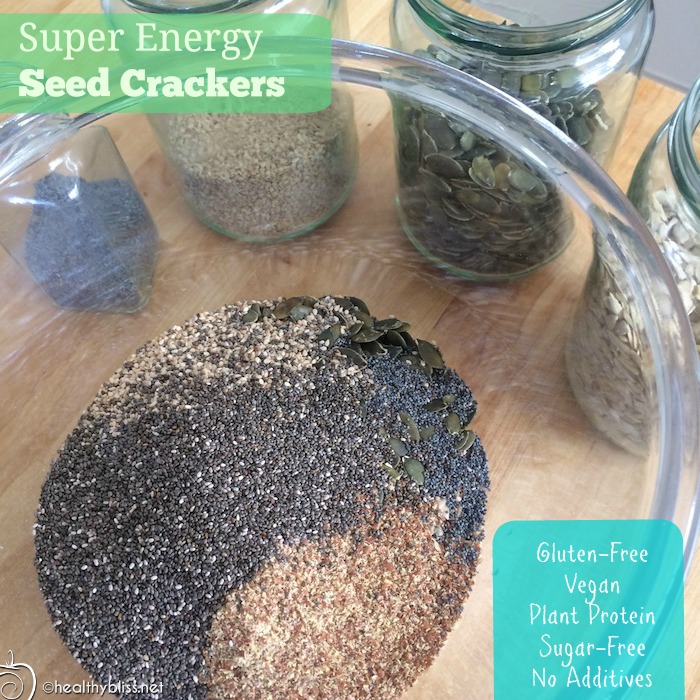
  • 1 cup organic pumpkin seeds, raw and unsalted
  • 1 cup organic sunflower seeds, raw and unsalted
  • 1/2 cup organic ground flaxseed
  • 1/2 cup organic whole flaxseed
  • 1/2 cup organic chia seeds
  • 1/2 cup organic sesame seeds, raw and unsalted
  • 1 Tbsp. organic poppy seeds
  • 1 organic medium size white onion
  • 1 tsp. Himalayan salt
  • 1 cup water
  • 2 sheets of baking parchment paper
  • Optional added spices: cayenne pepper, cumin or turmeric powder

Directions:

1. In a large bowl, combine all the dry seeds.

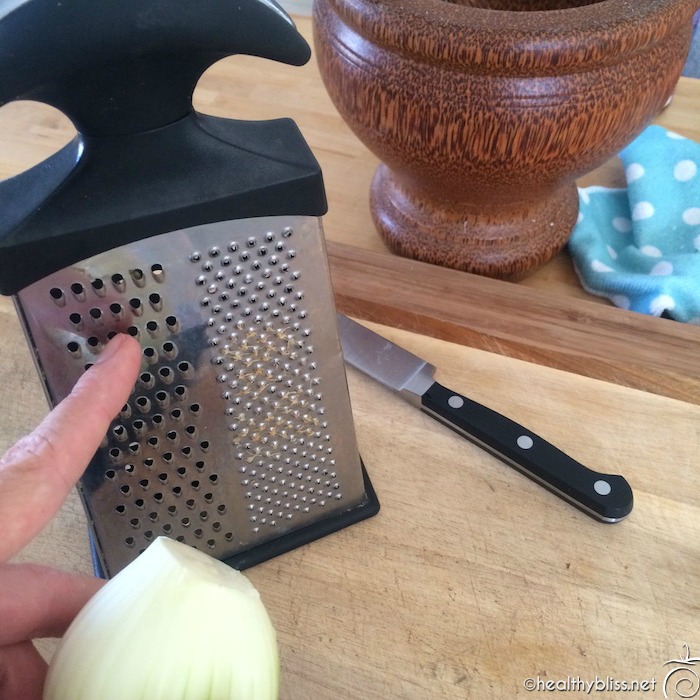
2. Peel the outer skin from the onion. Then, using a grater, grate the onion on the medium-size holes. Add to the mix.

3. Measure 1 cup of filtered water and add to the bowl. Stir all ingredients together, adding the salt and any additional spices (I make these without any dried spices because they are delish enough on their own!) You can also grate a few raw garlic gloves and add them is desired. Once stirred, the mix should be sticking together. If not, slowly add a few more tablespoons of water until the mixture stays together.

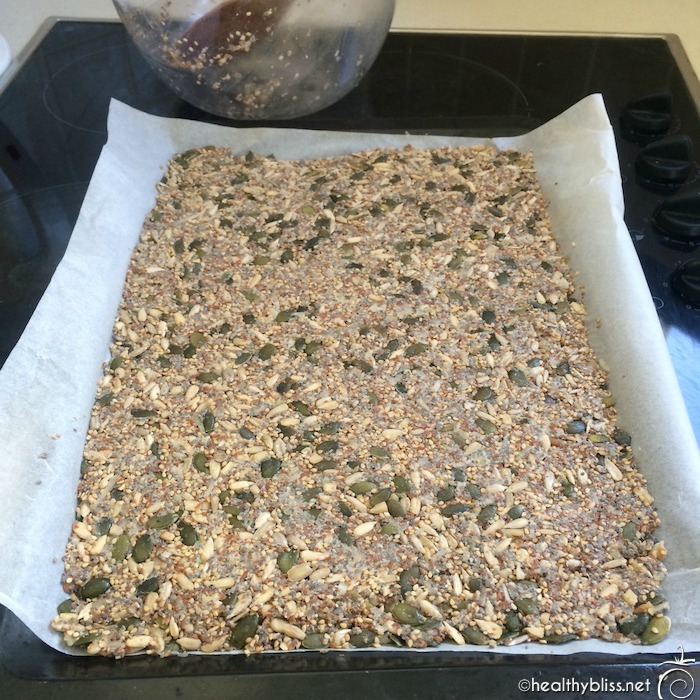
4. Prepare a baking sheet with a piece of parchment paper. Spread the mixture onto the paper, keeping the thickness uniform across the baking sheet. This is also the time to score the crackers if you want them to come out in even squares. (I never remember to do that, and they get eaten so fast that no one seems to care if they’re in uneven sizes!)

5. Place in the oven at 200C or 400F for about 15-20 minutes or until they look golden brown. (Keep scrolling down to FAQs to find out why I don’t use a dehydrator.)

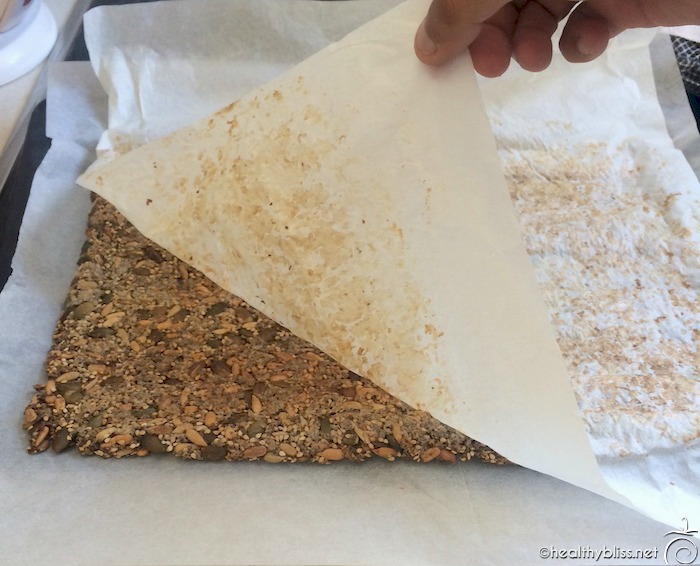
6. Remove from oven to flip the crackers. To flip them easily, place the other piece of parchment paper on top of the cooked mix. Then, carefully flip onto a new baking tray. If you’re really agile, you can do a flawless flip onto the same tray. Remove the original parchment paper from the top of the now flipped crackers. Place back in the oven for another 15-20 minutes.

7. Remove from oven and break off into pieces. You can serve with some yummy pumpkin seed cheese or delicious garlic and lemon tahini.

Use organic seeds, raw and unsalted for these Paleo - Vegan - Gluten-Free crackers.

Use organic seeds, raw and unsalted for these Paleo – Vegan – Gluten-Free crackers.

1. In a large bowl, combine all the dry seeds.

Grate 1 medium onion, add to seeds plus 1 cup water then stir into mix.

Grate 1 medium onion, add to seeds plus 1 cup water then stir into mix.

2. Peel the outer skin from the onion. Then, using a grater, grate the onion on the medium-size holes. Add to the mix.

3. Measure 1 cup of filtered water and add to the bowl. Stir all ingredients together, adding the salt and any additional spices (I make these without any dried spices because they are delish enough on their own!) You can also grate a few raw garlic gloves and add them is desired. Once stirred, the mix should be sticking together. If not, slowly add a few more tablespoons of water until the mixture stays together.

Spread cracker mix evenly on pan and be sure to use parchment paper so they don't stick!

Spread cracker mix evenly on pan and be sure to use parchment paper so they don’t stick!

4. Prepare a baking sheet with a piece of parchment paper. Spread the mixture onto the paper, keeping the thickness uniform across the baking sheet. This is also the time to score the crackers if you want them to come out in even squares. (I never remember to do that, and they get eaten so fast that no one seems to care if they’re in uneven sizes!)

Ready to go into the oven at 200C or 400F for 15-20 minutes.

Ready to go into the oven at 200C or 400F for 15-20 minutes.

5. Place in the oven at 200C or 400F for about 15-20 minutes or until they look golden brown.

Flip crackers onto clean paper, then peel off the old one and discard. Back into oven for another 15-20 minutes.

Flip crackers onto clean paper, then peel off the old one and discard. Back into oven for another 15-20 minutes.

6. Remove from oven to flip the crackers. To flip them easily, place the other piece of parchment paper on top of the cooked mix. Then, carefully flip onto a new baking tray. If you’re really agile, you can do a flawless flip onto the same tray. Remove the original parchment paper from the top of the now flipped crackers. Place back in the oven for another 15-20 minutes.

7. Remove from oven and break off into pieces. You can serve with some yummy pumpkin seed cheese or delicious garlic and lemon tahini.

These vegan crackers are GREAT to share with family and friends or at a pot luck.

These vegan crackers are GREAT to share with family and friends or at a pot luck.

How to Make Seed Crackers FAQs

1. Why don’t you use a dehydrator?

Years ago I bought a dehydrator and I got really into it for an entire summer. I was dehydrating mangos and bananas round the clock, literally. After 1 month, I noticed my electric bill had jumped more than 40% higher than normal. Jeez! They don’t tell you that in the marketing. Energetically, I also felt that something was wrong. Blowing hot air on perfectly natural bananas for 2 days just to eat them in 1 minute seemed like a huge waste. Then I learned about positive ions and I realized I was blowing them into my house continuously when running a dehydrator. After that, I sold in on ebay and never looked back.

2. What are positive ions?

The air we breathe is full of oxygen molecules. Any molecule with an electron deficiency is called a positive ion and one with an extra electron is called a negative ion. Positive ions come from damaged molecules of air, in heating/air conditioning systems and from hair dryers…and food dehydrators. They are bad for our health because they can cause irritability, anxiety, depression and fatigue. Negative ions come from ocean waves, trees, plants and running streams. They have the opposite effect, leaving us feeling energized, healthy, happy and balanced.

Ever wonder why you feel more tired and depressed in the winter months? It could have to do with the build-up of positive ions in your house, right under your very nose!

3. Are you okay with these not being a RAW FOOD?

Yes, totally. I’ve been living a high raw food diet (80%-90%) for almost 10 years now and I am comfortable with where I’m at in my journey. I also love raw seeds and I often sprinkle them on salads but these crackers fulfill my occasional desire for something crunchy. It’s so awesome to eat a huge salad with 2 of these yum crackers on the side!

4. Can I use almond pulp or other ground nuts too?

Certainly you can try whatever combo or variation you want! But, I can tell you that almond pulp will probably not stick together very well. Same goes for ground cashews and other nuts. Seeds are unique because they have a special coating called mucilage which makes them naturally sticky or gelatinous when exposed to liquids. The stickiness helps the crackers stay together and not fall apart. Grated onion and water form the perfect “glue” to keep everything together even when cooked.

5. Why don’t you soak the seeds in advance?

Soaking the seeds in advance is an option if you are shooting for a live food, but since one of the things I like most about this recipe is that the crackers get crunchy, I don’t soak the seeds in advance.


This recipe is gluten-free, vegan, non-GMO and contains NO food additives. It’s full of fiber, contains natural medicinal foods and is loaded with vegan and plant-based proteins. And best of all, everyone seems to love them! I personally bring these to dinners with friends and also during Passover for traditional chametz meals and I can honestly say that everyone LOVES them!

More on Detox and pH Health:

More Healthy Recipes:

Easy Recipe: Make organic pickles at home!

Are you ready to make your own fermented foods at home? (Answer: Yes!) Pickling cucumbers is a great start to build up your confidence with fermentation. And who doesn’t love a crisp tasty pickle on a hot summer day? You can have your pickles ready to eat in as little as 7 days with the easy recipe below.

Use this fast and easy recipe to make delicious pickles at home

Health benefits of Fermented Foods

For optimal digestive health, we need to get good bacteria in the gut on a regular basis. Antibiotics destroy all the bacteria in our system, both good and bad. Over time, this can lead to more imbalance in digestion function, absorption and elimination. Some experts even say that food allergies, autism and ADHD may be related to an imbalance of bacteria in the colon. Certainly many digestive diseases like colitis, diverticulitis and Crohn’s disease are caused in part by lack of good bacteria in the gut. Having the right balance of good bacteria helps to strengthen immune system, improve digestive health and long-term, can even prevent dis-ease. Probiotic, or good bacteria, literally means “for life.”

You may think that fermented foods are only made with yeast (like beer or wine), but there are other cultures used for fermentation. Other types of natural bacteria are used as well as SCOBY’s (Symbiotic Culture of Bacteria and Yeast). With pickles, the natural bacteria on the skin of the cucumber itself is what’s used to start the “lacto fermentation” process.

Pickles are perfect to try if you’ve never done any type of fermentation before. You get relatively fast results (in 7 days), unlike kombucha, for example, that can take a few weeks. And there isn’t a lot of hard work involved or checking required, like in making raw sauerkraut. You should see bubbles rising in the pickle jars when you flip them every day, and when you eventually open the jar to eat them, the jar should make a “pop.” Then you know you’ve done everything correctly and can enjoy the fruits of your fermentation labor. Scroll down to get the recipe below.

Homemade pickles have no food additives!

There are other great reasons to eat homemade pickles instead of store-bought, besides the obvious better taste. Commercially sold pickles are pasteurized, which means all those beneficial natural probiotics are destroyed. Homemade pickles keep all the good bacteria intact, making for good gut health when eaten. A healthy microbiome is the basis for a strong and healthy immune system.

Store-bought pickles can also contain nasty food additives, the worst offender being Yellow #5. Banned in many countries (including all of Europe) since it was shown to be a carcinogen, Yellow #5, or tartrazine, is a coal-tar derivative. It is currently still allowed in foods in the USA. Yellow #5 is frequently used in your favorite brands of pickles for added color to make the pickles look brighter and fresher. Most store-bought pickles also contain preservatives, the most common one being sodium benzoate (not good).

Examples of Yellow #5 in pickles:

Vlasic: Hamburger Dill Chips Pickles – Cucumbers, Water, Distilled Vinegar, Salt, Sodium Benzoate (Preservatives), Calcium Chloride, Natural Flavor, Polysorbate 80, Yellow 5. “Great taste & crunch. Classic dill taste.” (No thanks!)

Vlasic Bread & Butter Spears No Sugar Added Pickles – Cucumbers, Water, Distilled Vinegar, Salt, Spice, Calcium Chloride, Sucralose, Yellow 5. “No sugar added!” (But you kept the carcinogens, great work.)

Mt. Olive Sweet Gherkins No Sugar Added Pickles – Cucumbers, Water, Vinegar, Salt, Calcium Chloride, 0.1% Sodium Benzoate (Preservative), Alum, Sucralose (Splenda Brand), Natural Flavors, Xanthan Gum, Polysorbate 80, & Yellow 5. “Mt. Olive Pickles are Picklicious!” (Don’t think so…)

Heinz Dill Spear Pickles – Fresh cucumbers, water, distilled white vinegar, salt, sodium benzoate, garlic extract, gum acacia, calcium chloride, natural flavoring, polysorbate 80, fd&c yellow 5. “Classic dill taste and crunch Heinz pickles are 100% fat free, Gluten free.” (But they contain chemical crap, hmmm…)

Organic brands of pickles are often no better. I’ve seen xantham gum, natural flavors, spices and agave syrup…all of which are suspect ingredients that I avoid as much as possible.

The bottom line is this: YOU deserve the very best in life and you are worth having only the very best ingredients in your food. Taking the time to make your own food is one of the best investments in yourself, your health and your family’s health.

High-five some hashtags to health!! #homemade #homegrown #farmtotable #organic #cleanfood #cleaneating

Choosing organic ingredients

The best part about making cucumbers at home is that you can use all 100% certified organic and whole food ingredients. Look for smaller sized pickling cucumbers at your local farmer’s market. You can also grow your own pickling cucumbers in your backyard garden at home – they’re actually very easy to grow! Choose fresh organic dill. And definitely use organic garlic. (Non-organic garlic is mostly all grown in China, so the quality is a big unknown. But I find that non-organic garlic has a too strong and overpowering taste; whereas organic garlic has a soft yet flavorful and more delicate taste. Organic garlic also doesn’t leave a bad taste in your mouth or a bad smell on your skin.)

The water you add to your pickle jars should not contain any chlorine, because chlorine can stop the natural fermentation process. The best option is to use natural spring water or clean well water. If you are using tap water, then be sure to pour your water into a big pot or glass bowl and let it sit out on the counter overnight before using. This should off-gas the chlorine so it’s no longer in the water by the next morning. (If you’ve ever had pet fish, then you’re familiar with doing this when changing their tank water.)

Remember to cut off the blossom ends!

When you’re pickling cucumbers yourself, you must cut off the blossom ends. There’s an enzyme in the blossom that can make the pickle soft and unsafe to eat. The blossom end also tastes bitter when you eat a raw cucumber. That bitter taste can make an entire juice or smoothie taste bitter too, so it’s generally just a good practice to always cut off about 1/16-inch on the blossom end of all your cucumbers. In fermentation, cutting the blossom ends will help your pickles get more crisp and crunchy.

Every cucumber has 2 ends: A Blossom end and a Stem end

The blossom end of the cucumber is the end that grew the flower. The opposite side is where you will find the stem that connected the cucumber to the vine. Sometimes it’s easier to identify the stem end first. Then, you know that the other side is the blossom end.

Which end is the blossom end of the cucumber? To identify the blossom end, check both sides of your cucumber.

The picture below shows the stem end of the cucumbers. Do you see the smooth, indented dot? That’s where the cucumber was picked off the stem.

The stem end has a smooth, indented dot

The next picture shows the blossom end of the cucumbers. Even though the flower is gone, you can see that there is no indentation. This is the side that you want to cut about 1/16-inch off.

Note there is no indentation in the Blossom end of the cucumber

Don’t forget to cut those blossom ends for a crunchy, crispy pickle

Recipe for Organic Pickles

With this recipe, the pickles take 7 days to ferment and then you’ve got the best tastiest pickles ever! No sugar, no honey, no preservatives and no cancer-causing Yellow #5. Oh yeah, and these are 100% organic farm-to-table and made with love!

Pickling Ingredients

  • Pickling cucumbers (approx. 6-8 small cucumbers needed for each jar)
  • 1 1/2 cups (or 360ml) filtered water
  • 1/2 cup (or 120ml) organic raw apple cider vinegar
  • 1 tsp. – 1 Tbsp. fine Himalayan salt (as desired)
  • 1/2 tsp. organic crushed red pepper flakes
  • 1/4 tsp. organic mustard seeds
  • 1/2 tsp. organic back peppercorns
  • 1 sprig fresh organic dill
  • 2 organic garlic cloves (peeled)
  • 2 organic fresh grape leaves* (optional)
    You can buy the organic dried ingredients listed above on iherb.comAlso will need:- Wide mouth clean Mason jars with canning lids
    – 1 permanent marker
    You can buy Mason jars plus organic raw apple cider vinegar on amazon.com

Pickling Instructions

1. In a glass bowl, mix 1/2 cup organic raw apple cider vinegar + 1.5 cups water.
Add peppercorns, red pepper flakes, mustard seed, and up to 1T Himalayan salt.

2. Rinse your cucumbers but don’t scrub them. You want them to ferment from natural bacteria in the skins. Make sure you cut 1/16-inch from the blossom ends of each cucumber, then slice the cucumbers in spears. You want to keep the skins intact (do NOT peel the cucumbers), so the good bacteria in the skins can kick off the lacto-fermentation process.

3. Add 2 organic garlic cloves, fresh dill, and 1 grape leaf to the bottom of the Mason jar. Stack in chopped cucs and pack tightly. Add liquid and spices. Add another grape leaf to the top before closing. Secure the lid tight by hand. Write the date on the lid with a permanent marker.

4. Place the jar on a tray or plate on a shelf or counter-top. Flip the jar once daily for 7 days. Sometimes liquid may seep out of the jar, which is why having a tray or plate underneath is a good idea. You should see small bubbles rising in the pickle juice when you flip the jar. And that’s the fermentation happening right there!

5. After one week, put the jar in the fridge. Now, you can open, eat and enjoy!

Store pickles in a tray or glass container to prevent spillage during 7 days of flipping once daily

*Fresh grapes leaves are recommended because they’re supposed to help keep the pickles more crisp and crunchy. I don’t know if they are totally necessary or not, but because we have plenty of wild organic muscadine grape vines growing all over our land, it’s no problem for me to pick a few leaves and add them to each jar. Sometimes in summer, you can find fresh grapes leaves for sale at local farmer markets. If you don’t have access to fresh grape leaves, don’t be discouraged. You can still make this recipe without them!

Homemade Pickle Eat-by Date

Using the above recipe, there is no canning or heating required. That’s nice because it keeps the cucs as a raw food, with all the enzymes intact. But, because they are not totally sealed the way canning or heating will do, these pickles should be eaten with 3 months of making them. Just keep that in mind if you give them to family or friends. After 3 months the pickles may turn soft or watery. If you see that, then it’s best to toss them in the compost bin. Writing the date on the lid of each jar helps to know how long to keep them.

My Pickle Detox/Cleanse

Last summer, we had so many cucumbers from our organic veggie garden that I was making 2 jars of pickles per day! By mid-August, we were up to our ears in pickles and the fridge was almost full. I had been planning to do a 7-10 day green juice fast as a nice transition from the end of summer into fall. But when I looked at all the pickles, I said to my husband, “Why don’t we just do a pickle detox and eat only organic pickles for 10 days?” So we did!

On average, we each ate about 1.5 jars of pickles per day and we drank all the pickle juice too. We also drank plenty of water in between. It was totally unplanned and un-researched. But it turned out great. We both felt energized. Our guts got a major boost of probiotics from the lacto fermentation and the organic raw apple cider vinegar. We had a mini-parasite cleanse from eating so many fermented garlic cloves. The pickles were cold and refreshing during the hot summer days. We had high energy and slept great. The was no juicer to clean! And we used organic clean food fresh from our garden. This year, we may do a 3-day pickle cleanse and go into green juices after that. I’ve got plenty of organic dandelion, celery and parsley that I’d love to use in juices or smoothies so we’ll see….!


For more on how to do a detox at home or how to navigate through your detox symptoms and start feeling great, book a personalized health consult with me via Skype.

How to Book Your Health & Nutritional Consultation:

1. Take photos of your eyes with a smart phone or digital camera.
2. Email the photos to me for approval.
3. We schedule a time to meet via phone or Skype!

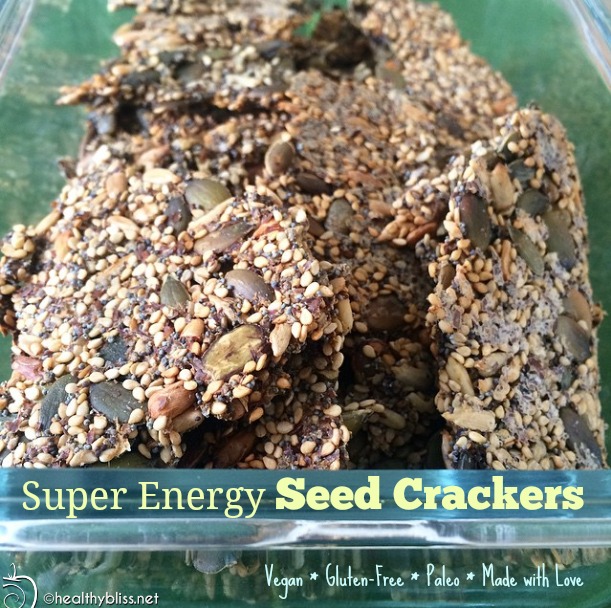
Recipe for Super Energy Seed Crackers…& without a Dehydrator!

This is one of the easiest recipes you could ever make and the results are super-amazing-delicious! And, you can share these seed crackers with your vegan, vegetarian, gluten-free, yeast-free, dairy-free, sugar-free, anti-candida AND paleo friends. Now, that IS amazing!

Check out this fast and easy recipe - you'll be amazed!

Check out this fast and easy recipe – you’ll be amazed!

Super Energy Seed Crackers Recipe

Ingredients:

  • 1 cup organic pumpkin seeds, raw and unsalted
  • 1 cup organic sunflower seeds, raw and unsalted
  • 1/2 cup organic ground flaxseed
  • 1/2 cup organic whole flaxseed
  • 1/2 cup organic chia seeds
  • 1/2 cup organic sesame seeds, raw and unsalted
  • 1 Tbsp. organic poppy seeds
  • 1 organic medium size white onion
  • 1 tsp. Himalayan salt
  • 1 cup water
  • 2 sheets of baking parchment paper
  • Optional added spices: cayenne pepper, cumin or turmeric powder

Directions:

1. In a large bowl, combine all the dry seeds.

2. Peel the outer skin from the onion. Then, using a grater, grate the onion on the medium-size holes. Add to the mix.

3. Measure 1 cup of filtered water and add to the bowl. Stir all ingredients together, adding the salt and any additional spices (I make these without any dried spices because they are delish enough on their own!) You can also grate a few raw garlic gloves and add them is desired. Once stirred, the mix should be sticking together. If not, slowly add a few more tablespoons of water until the mixture stays together.

4. Prepare a baking sheet with a piece of parchment paper. Spread the mixture onto the paper, keeping the thickness uniform across the baking sheet. This is also the time to score the crackers if you want them to come out in even squares. (I never remember to do that, and they get eaten so fast that no one seems to care if they’re in uneven sizes!)

5. Place in the oven at 200C or 400F for about 15-20 minutes or until they look golden brown. (Keep scrolling down to FAQs to find out why I don’t use a dehydrator.)

6. Remove from oven to flip the crackers. To flip them easily, place the other piece of parchment paper on top of the cooked mix. Then, carefully flip onto a new baking tray. If you’re really agile, you can do a flawless flip onto the same tray. Remove the original parchment paper from the top of the now flipped crackers. Place back in the oven for another 15-20 minutes.

7. Remove from oven and break off into pieces. You can serve with some yummy pumpkin seed cheese or delicious garlic and lemon tahini.

Use organic seeds, raw and unsalted for these Paleo - Vegan - Gluten-Free crackers.

Use organic seeds, raw and unsalted for these Paleo – Vegan – Gluten-Free crackers.

1. In a large bowl, combine all the dry seeds.

Grate 1 medium onion, add to seeds plus 1 cup water then stir into mix.

Grate 1 medium onion, add to seeds plus 1 cup water then stir into mix.

2. Peel the outer skin from the onion. Then, using a grater, grate the onion on the medium-size holes. Add to the mix.

3. Measure 1 cup of filtered water and add to the bowl. Stir all ingredients together, adding the salt and any additional spices (I make these without any dried spices because they are delish enough on their own!) You can also grate a few raw garlic gloves and add them is desired. Once stirred, the mix should be sticking together. If not, slowly add a few more tablespoons of water until the mixture stays together.

Spread cracker mix evenly on pan and be sure to use parchment paper so they don't stick!

Spread cracker mix evenly on pan and be sure to use parchment paper so they don’t stick!

4. Prepare a baking sheet with a piece of parchment paper. Spread the mixture onto the paper, keeping the thickness uniform across the baking sheet. This is also the time to score the crackers if you want them to come out in even squares. (I never remember to do that, and they get eaten so fast that no one seems to care if they’re in uneven sizes!)

Ready to go into the oven at 200C or 400F for 15-20 minutes.

Ready to go into the oven at 200C or 400F for 15-20 minutes.

5. Place in the oven at 200C or 400F for about 15-20 minutes or until they look golden brown.

Flip crackers onto clean paper, then peel off the old one and discard. Back into oven for another 15-20 minutes.

Flip crackers onto clean paper, then peel off the old one and discard. Back into oven for another 15-20 minutes.

6. Remove from oven to flip the crackers. To flip them easily, place the other piece of parchment paper on top of the cooked mix. Then, carefully flip onto a new baking tray. If you’re really agile, you can do a flawless flip onto the same tray. Remove the original parchment paper from the top of the now flipped crackers. Place back in the oven for another 15-20 minutes.

7. Remove from oven and break off into pieces. You can serve with some yummy pumpkin seed cheese or delicious garlic and lemon tahini.

These vegan crackers are GREAT to share with family and friends or at a pot luck.

These vegan crackers are GREAT to share with family and friends or at a pot luck.

How to Make Seed Crackers FAQs

1. Why don’t you use a dehydrator?

Years ago I bought a dehydrator and I got really into it for an entire summer. I was dehydrating mangos and bananas round the clock, literally. After 1 month, I noticed my electric bill had jumped more than 40% higher than normal. Jeez! They don’t tell you that in the marketing. Energetically, I also felt that something was wrong. Blowing hot air on perfectly natural bananas for 2 days just to eat them in 1 minute seemed like a huge waste. Then I learned about positive ions and I realized I was blowing them into my house continuously when running a dehydrator. After that, I sold in on ebay and never looked back.

2. What are positive ions?

The air we breathe is full of oxygen molecules. Any molecule with an electron deficiency is called a positive ion and one with an extra electron is called a negative ion. Positive ions come from damaged molecules of air, in heating/air conditioning systems and from hair dryers…and food dehydrators. They are bad for our health because they can cause irritability, anxiety, depression and fatigue. Negative ions come from ocean waves, trees, plants and running streams. They have the opposite effect, leaving us feeling energized, healthy, happy and balanced.

Ever wonder why you feel more tired and depressed in the winter months? It could have to do with the build-up of positive ions in your house, right under your very nose!

3. Are you okay with these not being a RAW FOOD?

Yes, totally. I’ve been living a high raw food diet (80%-90%) for almost 10 years now and I am comfortable with where I’m at in my journey. I also love raw seeds and I often sprinkle them on salads but these crackers fulfill my occasional desire for something crunchy. It’s so awesome to eat a huge salad with 2 of these yum crackers on the side!

4. Can I use almond pulp or other ground nuts too?

Certainly you can try whatever combo or variation you want! But, I can tell you that almond pulp will probably not stick together very well. Same goes for ground cashews and other nuts. Seeds are unique because they have a special coating called mucilage which makes them naturally sticky or gelatinous when exposed to liquids. The stickiness helps the crackers stay together and not fall apart. Grated onion and water form the perfect “glue” to keep everything together even when cooked.

5. Why don’t you soak the seeds in advance?

Soaking the seeds in advance is an option if you are shooting for a live food, but since one of the things I like most about this recipe is that the crackers get crunchy, I don’t soak the seeds in advance.


This recipe is gluten-free, vegan, non-GMO and contains NO food additives. It’s full of fiber, contains natural medicinal foods and is loaded with vegan and plant-based proteins. And best of all, everyone seems to love them! I personally bring these to dinners with friends and also during Passover for traditional chametz meals and I can honestly say that everyone LOVES them!

More on Detox and pH Health:

More Healthy Recipes:

Win a FREE Nutri NINJA Blender DUO + Green Smoothie Book Giveaway!

Just when you thought the blender giveaways were over…..think again! This time I’ve teamed up with the awesome folks at Ninja and they are generously giving away a NEW Nutri Ninja Blender DUO for one lucky winner!  This is YOUR chance to win a FREE Professional Quality Blender and start making the best Green Smoothies ever! And extra special thanks to John Wiley & Sons for gifting a copy of my new book Green Smoothies for Dummies to the WINNER too!

Nutri Ninja Blender DUO Giveaway: Online Contest

Someone’s getting a brand new sweet Nutri Ninja Duo Blender, ready to make Green Smoothies for many years to come! This FREE giveaway is for you: 1 Nutri Ninja DUO Blender + My NEW Book: Green Smoothies for Dummies

(Over $215+ total value)

How to Sign Up

The more tasks you complete in RaffleCopter, the greater your chances are to WIN!

Good Luck and Healthy Blessings!

Click on the Rafflecopter link to Enter to WIN:

Free Ninja Blender

Start Date: 16 March 2015
End Date: 26 March 2015
Winner Announced: 26 March 2015
Open to: US and Canada Addresses ONLY
Prize: Nutri Ninja Blender DUO (110V) and Green Smoothies for Dummies Book

No purchase necessary. 
Contest closes at Midnight (EST), 26 March 2015.
Winner announced at 12pm noon (EST) 26 March 2015 EST on twitter @rawfoodbliss, FB at http://facebook.com/healthybliss and also here on https://healthybliss.net.

Nutri Ninja DUO: The Blender

This blender is a great value for the money and features the super Ninja double blade that is unique to all Ninja blenders.

“The Nutri Ninja | Ninja Blender Duo with Auto-iQ Technology takes the guesswork out of drink making! Auto-iQ Technology features intelligent programs that combine unique, timed pulsing, blending and pausing patterns that do the work for you! The digital countdown timer displays how much time is remaining on the selected Auto-iQ program, or counts up to track blending time when using the three manual speeds.”

Features include:

  • XL 72 oz. Total Crushing Blender pulverizes ice to snow in seconds for creamy frozen drinks and smoothies
  • Nutri Ninja Pro Extractor Blades break down whole fruits, vegetables, ice and seeds for maximum nutrient & vitamin extraction
  • Small, Regular, and Jumbo Multi-Serve Nutri Ninja Cups with Sip & Seal Lids for nutrient-rich Super Juices on-the-go
  • 1500 Watts/2 HP of Professional Performance Power

Additional Info:

  • 1500 Watt Motor Base
  • 72oz. Blender Pitcher with Lid
  • Total Crushing Blades
  • Small 18oz. Nutri Ninja Cup
  • Regular 24oz. Nutri Ninja Cup
  • Jumbo 32oz. Nutri Ninja Cup
  • Pro Extractor Blades
  • (3) Nutri Ninja Sip & Seal Lids

Green Smoothies for Dummies: The Book

The winner of this giveaway is getting more than 90 Green Smoothies recipes plus a complete guide to Green Smoothie making, from beginner to expert in my book: Green Smoothie for Dummies. You’ll get recipes for breakfast, lunch and dinner PLUS recipes for working out, pregnancy, kids, teens, immune boosting, home remedies and even a 3-day Green Smoothie detox you can do at home.

(If you already have a copy of the book, please remember to leave a review on amazon and thanks for your support!)

Win a FREE Blender

To enter to win, Answer this in the comments below:
What’s your favorite GREEN to add to your Green Smoothie?
(My answer: Watercress, because it’s SO good for the skin!)

Your comment will not appear immediately as all comments are moderated for spam before approval.

Congratulations Mr. Gary Hofer – you’re the WINNER of the Ninja Duo Blender Giveaway!! Wishing you many healthy smoothies ahead!! This giveaway is now CLOSED.

Win a FREE Omega Blender – $449 Value! Giveaway!

I’m SO excited to share this next blender giveaway with you! This is YOUR chance to win a FREE Professional Quality Blender and start making the best Green Smoothies ever! Special thanks to the folks at Omega for this gorgeous blender and to my team at John Wiley & Sons for gifting a copy of my new book to the WINNER!

Omega BL630R Blender Giveaway: Online Contest

Someone’s getting a sweet 3HP OMEGA blender, ready to make Green Smoothies for many years to come! This FREE giveaway is for you:

1 Omega Professional Blender + My NEW Book: Green Smoothies for Dummies
(Over $460+ total value)

How to Sign Up

The more tasks you complete in RaffleCopter, the greater your chances are to WIN!

There are 3 tasks in the Raffle which are mandatory in order to win:

1 and 2. Find us on Facebook  – /healthybliss and /omegajuicers

3. Leave a comment below – answering the question:

If you could choose one person to join you on your journey to eating new and healthy foods, who would it be and why?

Additional tasks are optional, but if you complete them, you increase your chance to win. Good Luck!

This blender will totally rock your world!!!

This blender will totally rock your world!!!

Start Date: 5 January 2015
End Date: 19 January 2015
Winner Announced: 19 January 2015
Open to: US and Canada Addresses ONLY
Prize: Omega 3HP Blender (110V) and Green Smoothies for Dummies Book

No purchase necessary. 
Contest closes at Midnight (EST), 19 January 2015.
Winner announced at 12pm noon (EST) 19 January 2015 EST.

Omega BL630R: The Blender

This blender is sleek, powerful and makes super size smoothies. I was amazed how much I loved it and I KNOW you will too!

“The 3 HP Omega BL600 Series Blender combines the power, durability, and capacity you need while turning out tantalizing combinations of delicious drink blends. Commercial construction coupled with its precision controls make the Omega blender the go to tool whether blending for business or pleasure.”

Features include:

  • Variable Speed with Timer, Pulse and Infinity Controls
  • Unbreakable 64 oz. Tritan Copolyester Container
  • Stainless Steel Blade Assembly
  • Automatic Shut Off for Overload Protection
  • Touch Pad & Variable Controls for Precision Blending
  • Innovate Infinity Function for the Perfect Blend
  • 120V/60Hz
  • No Plunger Needed
  • Removable Cap For adding Ingredients

Additional Info:

  • Dimensions 8”W x 8”D x 19”H (203mm W x 203mm D x 483mm H)
  • Weight: 11.5 pounds
  • 1400 Watts
  • 10-year warranty

Green Smoothies for Dummies: The Book

The winner of this giveaway is also going to get a FANTASTIC recipe book for making the best Green Smoothies ever….! In Green Smoothie for Dummies, I created a “bible” for the best green smoothie making, and it’s all based on what I learned from teaching Green Smoothie classes for years. Every question that any student has ever asked me is in this book! Combine this nice book with a brand new Omega sleek blender and you’ve got a recipe for success for a healthy year ahead!

You CAN win! It's free to enter. Good Luck!

You CAN win! It’s free to enter. Good Luck!

The WINNER of this giveaway will receive a FREE Omega Blender PLUS a copy of my Green Smoothies for Dummies Book (with over 90 recipes!).

Your comment will not appear immediately as all comments are moderated for spam before approval.

(closed) Answer this question in the comments below:
If you could choose one person to join your on your journey to eating new and healthy foods
who would it be and why?
(My answer: Oprah! Why? Because I would LOVE for her to see that there is a way to live this lifestyle in a positive and healthy way without yo-yo dieting or extreme exercise. And I’m sure she could help spread the message even more!)

Congratulations Brittany Boulware @beautiful_ashes – you’re the WINNER of @OmegaJuicers BL630R Blender!! Wishing you many healthy smoothies ahead!! This giveaway is now CLOSED.

Daily Green Smoothie to help Acid Reflux?

Did you know that one of the top selling over the counter (OTC) drugs in the world today is heartburn medication? Acid reflux and heartburn are seemingly minor and annoying conditions, but they can have a long-term effect on your health. To be chronically over-acid means that your body is too acidic. ‘The volcano effect’ as I call it, or heartburn, is your body’s way of trying to expel the excess acid. Many people have such bad heartburn that they have to sleep sitting up.

All information in this article is for educational purposes only.
It is not for the diagnosis, treatment, prescription or cure of any disease or health condition.
A Daily Green Smoothie for an Alkaline Diet

A Daily Green Smoothie for an Alkaline Diet

What most people don’t realize is that acidosis can be very much regulated and controlled by diet.

A typical breakfast for a chronic heartburn sufferer might be coffee with sugar and milk. Add a slice of toast and an egg or muffin and you have a 100% acid-forming meal. That means the stomach will have to produce a lot of acid in order to digest that meal. (The first rumblings of the volcano).

Later that morning, this person might start feeling tired so will reach for another coffee, or a bagel or maybe even a cigarette. At lunch, due to a busy schedule, the meal may be a burger, slice of pizza, sandwich or meat pie….and yes, all of those foods are acid-forming. Now the volcano is starting to spew some sparks of fire and by mid-afternoon this person may be reaching for an antacid tablet to get through the rest of the day.

Going home to a beer or glass of wine followed by a typical dinner of pasta and bread, and this person has just won the prize for a 100% acid-forming day. It’s no wonder that 5 or 6 more antacid pills are required after dinner. Start that whole cycle over again the next day and the next and you have an antacid customer for life.

The problem with being chronically acidic, though, is much more serious than just having a ‘symptom’ like acid reflux. Internally, an acidic terrain is a breeding ground for the first stage of every dis-ease, including cancer. I always say, ‘You don’t catch cancer on Wednesday and get diagnosed on Thursday.’ Something like cancer takes years to develop, and the first thing that starts the process is an over-acid environment.

Keeping the environment alkaline is one of the best forms of natural prevention. Acid-reflux should be looked at as a warning sign; the body is trying to tell you that it’s out of balance.

Benefits of an Alkaline Diet: Lower risk of dis-ease and no more acid reflux!

Benefits of an Alkaline Diet: Lower risk of dis-ease and no more acid reflux!

Taking antacid tablets on a daily basis may take away the symptom, but it doesn’t take away the problem: chronic acidosis.

This is where the Green Smoothie comes flying in wearing a green cape offering real relief to the poor victim of a Standard American Diet (SAD). Ok, it might not be as dramatic as that, but it may feel like a superhero rescued you when you finally stop suffering from acid reflux and start feeling good with your digestive health. Let’s go back to the old breakfast of the heartburn sufferer and let’s make the first food/drink/meal of the day a Green Smoothie instead. Now, you’ve got a 100% alkaline-forming food to gently wake up the stomach for work for the day and there is no volcano in sight. You feel good, satiated and ready to start the day. After the Green Smoothie, you can even add a coffee (preferably organic and with no milk or sugar) and you will not experience the same volcano effect as before.

So you can still have your coffee (hopefully organic), but only after the Green Smoothie.

At lunch, aim for a nice portion of salad or steamed vegetables, and even another Green Smoothie if desired. (The Green Smoothie can be made up to 2 days in advance). This give you another 100% alkaline-forming meal. At dinner, you can now enjoy a wine with pasta (preferably brown rice or quinoa with some fresh salad or vegetables) and you should be throwing out your antacid tablets for good. It can really be that simple. If you don’t give your body the right combinations of foods, you are not going to experience the right combination of results. Everything that goes into your body has an effect on your body. A daily Green Smoothie brings the chronic heartburn sufferer back into balance, naturally, with an alkaline diet.

Looking for Green Smoothie recipes to help with acid reflux?

Green Smoothie recipes for Acid Reflux and many other common ailments too!

Green Smoothie recipes for Acid Reflux and many other common ailments too!

Check out my NEW book Green Smoothies for Dummies – I’ve got a whole section on Cooling the Burn of Acid Reflux where I feature 5 amazing Green Smoothies for Heartburn. Find the book Green Smoothies for Dummies on iTunes or amazon.com!

More on Detox and pH Health:

More on Juicing and Smoothies:

Detox Soup to Make You Feel Awesome Recipe

This yummy Detox Soup is the perfect way to get through the holidays and start the New Year healthy. If you treat your body well with natural foods, you can immediately start to feel better – more energy, improved digestion, clearer skin, better sleep and yes, even weight loss. You can enjoy this recipe whether or not you are doing an actual “detox program.” But, if you are doing a detox, juice fast or cleanse…you can drink juices and smoothies until 5pm and have 2 bowls of Detox Soup at night for dinner. In the dead of winter, you may not feel so inspired to go 100% cold pressed juices or smoothies (key word: cold!). And that’s totally ok! Check out all the super detox ingredients and instructions below.

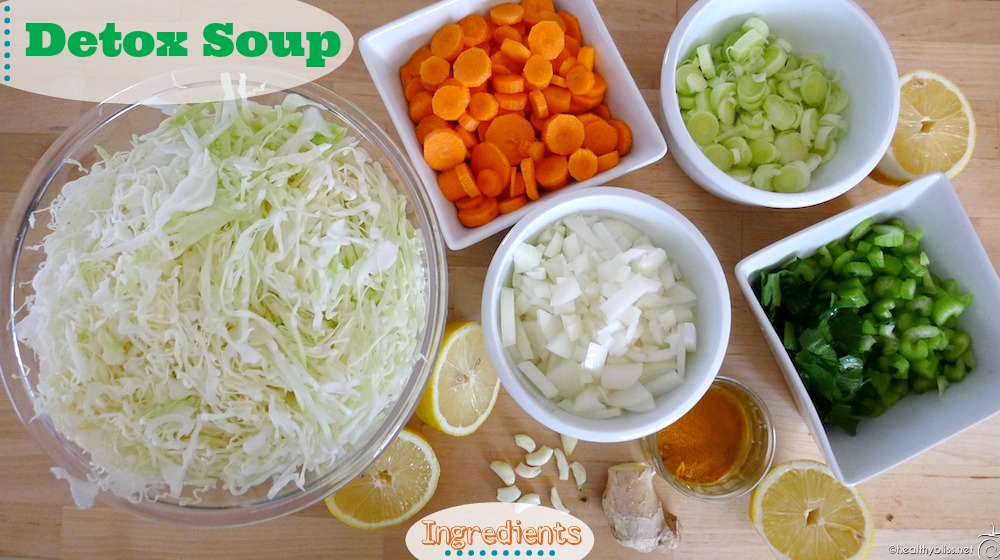
Detox Soup Ingredients

Detox Soup Ingredients

Detox Soup to Make You Feel Awesome Recipe

Ingredients:

  • 5 organic carrots, chopped
  • 1 head organic cabbage, grated
  • 2 white onions, chopped
  • 2 celery stalks, chopped
  • 2 Tbsp. celery greens, chopped
  • 1 leek, chopped
  • 2 lemons, squeezed
  • 4 Tbsp. extra virgin olive oil
  • 6-8 small garlic cloves
  • 2-3 inches of fresh ginger, juiced
  • 1 Tbsp. organic turmeric powder
  • Cayenne and/or organic black pepper to taste
  • Himalayan salt to taste (optional)
  • 2-3 liters of water
Prepare your soup ingredients in advance

Prepare your soup ingredients in advance


Directions:

1. Put olive oil in a large soup pot at high heat. Add garlic, onion, leek, salt and turmeric powder and let cook until the onions are soft. Note: If you are on a “no salt” detox, then omit the salt.

2. Add chopped carrots and celery; stirring occasionally. Add lemon juice and ginger juice. Note: If you don’t have a juicer, then grate the fresh ginger and squeeze the juice out by hand. Only add the juice; discard the pulp. (Ginger juice adds a mild flavor while adding the whole ginger can be over-powering in taste.)

3. Add grated cabbage. Fill the remainder of the pot with water; bring to a boil and let simmer for a minimum of 1 hour (up to 2 hours).

4. Pour serving into the blender and PULSE 3 TIMES at low speed, for 5 seconds each time. This keeps some of the texture in the soup but makes it soft and easy to digest.

5. Pour into serving bowl and add cayenne pepper or black pepper to taste.


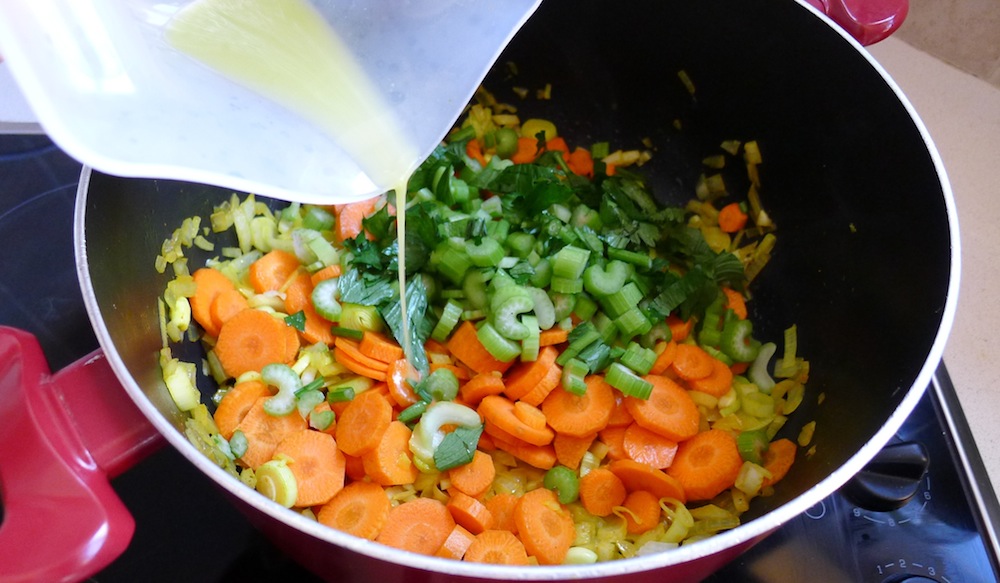
First add onion, leek, garlic and turmeric.

First add onion, leek, garlic and turmeric.


Leek, onion and garlic are very anti-parasitic.
Turmeric is a natural anti-inflammatory and liver cleanser.


Cooked onion. leek, garlic and turmeric.

Cooked onion. leek, garlic and turmeric.


1. Put olive oil in a large soup pot at high heat. Add garlic, onion, leek, salt and turmeric powder and let cook until the onions are soft. Note: If you are on a “no salt” detox, then omit the salt.

Once the onion, leek, garlic and turmeric are cooked until soft, you can add the other ingredients plus water.


Adding fresh ginger juice and lemon juice

Adding fresh ginger juice and lemon juice


2. Add chopped carrots and celery; stirring occasionally. Add lemon juice and ginger juice. Note: If you don’t have a juicer, then grate the fresh ginger and squeeze the juice out by hand. Only add the juice; discard the pulp.

You can add either grated ginger or ginger juice, but in my experience, the ginger juice makes for a much more pleasant taste and is not as strong.


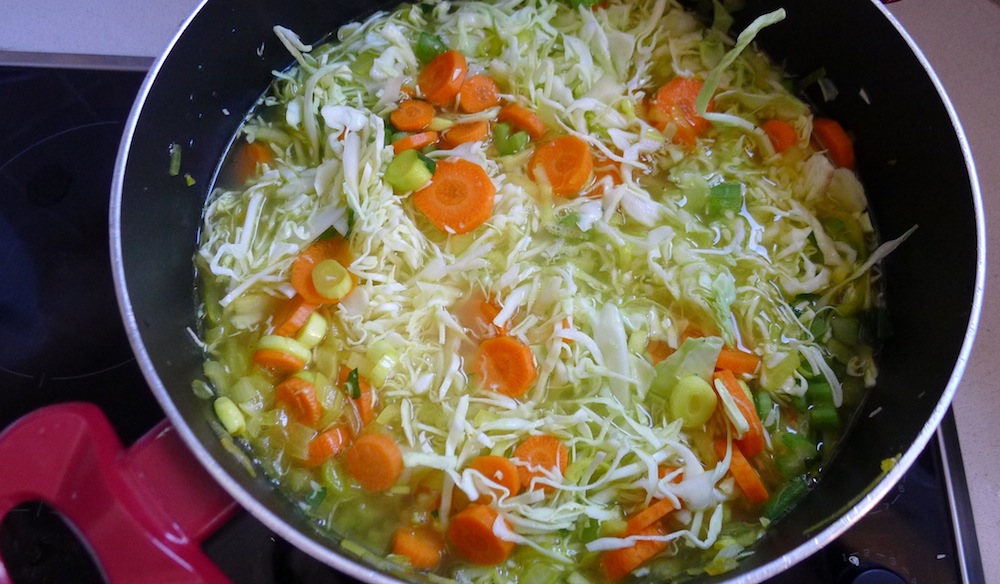
Finally, add the grated cabbage and water

Finally, add the grated cabbage and water


3. Add grated cabbage. Fill the remainder of the pot with water; bring to a boil and let simmer for a minimum of 1 hour (up to 2 hours).

Cabbage is naturally high in sulfur, making it a powerful detox food. It also adds a beautiful texture to any soup and is mild in taste.


Pulse the soup in an blender for an easy-to-digest consistency

Pulse the soup in an blender for an easy-to-digest consistency


4. Pour serving into the blender and PULSE 3 TIMES at low speed, for 5 seconds each time. This keeps some of the texture in the soup but makes it soft and easy to digest.

Note: Turmeric powder can turn the color of the blender container to yellow; but it will usually wash out after a few rinses.


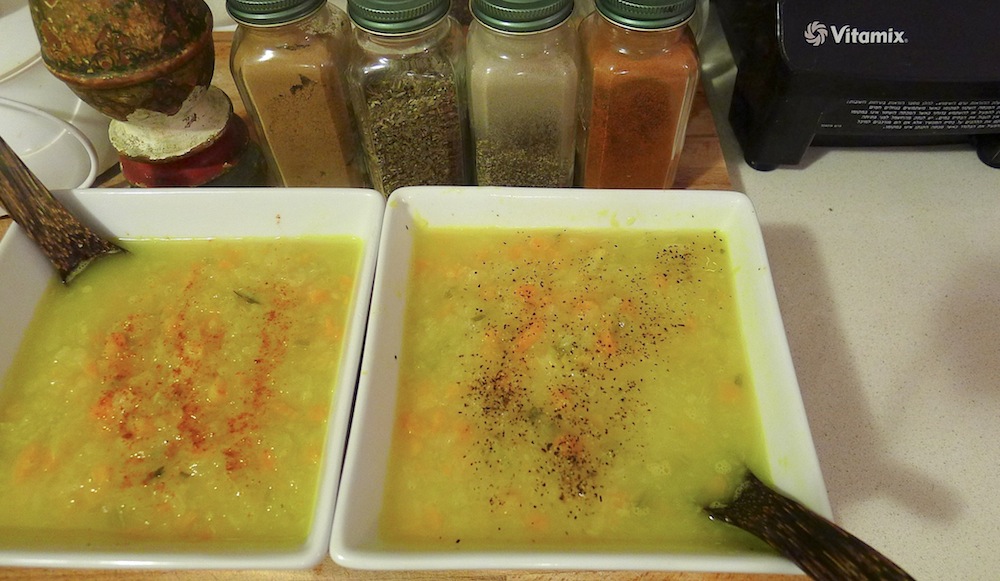
Finally, you're ready to serve!

Finally, you’re ready to serve!


5. Pour into serving bowl and add cayenne pepper or black pepper to taste.

Cayenne pepper is very cleansing for the liver and is excellent for blood and circulation. Black pepper is not a major detox food, but it’s a matter of taste…you can add either or and still enjoy a fantastic detox soup!

This recipe is gluten-free, vegan, non-GMO and contains NO food additives. It’s full of fiber, contains natural medicinal foods and is good recipe for an alkaline diet. And, it tastes delicious. Try it for yourself and see!

More on Detox and pH Health:

More Healthy Recipes:

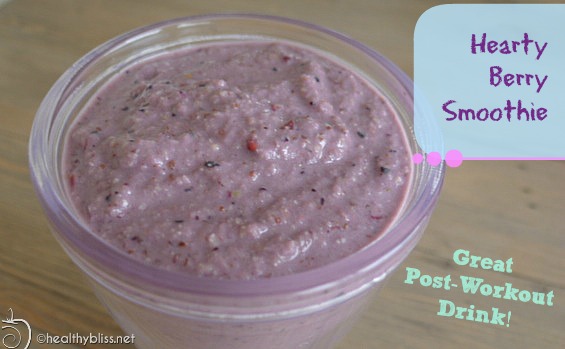
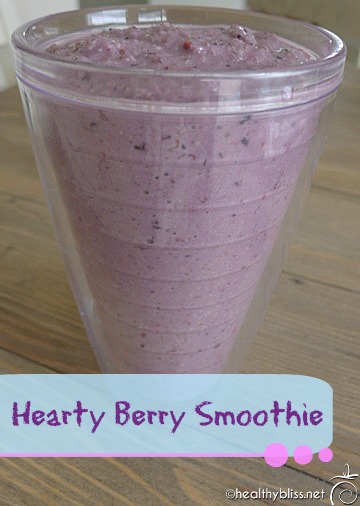
Hearty Berry Smoothie Recipe – Great for After Work-Out Recovery!

Choosing the right foods after a good workout is important to help your muscles recover and keep your energy levels high for the rest of the day. Think alkaline, high fiber, antioxidants and hydration when you want to power-up after a good sweat. This Hearty Berry Smoothie gives you all of that plus a great taste, and even better, it takes less than 5 minutes to make.

This yummy smoothie will fill you up after a good power workout!

This yummy smoothie will fill you up after a good power workout!

Hearty Berry Post-Workout Smoothie Recipe

Ingredients:

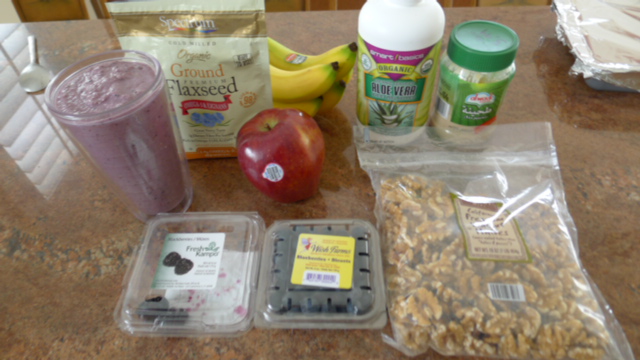
  • 1 ripe banana, peeled
  • 1 red apple
  • 1/2 cup fresh blueberries
  • 1/2 cup fresh raspberries
  • 1 Tbsp. tahini (sesame seed paste)
  • 4-6 walnut halves
  • 1 Tbsp. aloe vera juice
  • 2 Tbsp. ground flaxseed
  • 1 1/2 cups water


You can make many versions of this adding variety with chia or brazil nuts instead

You can make many versions of this adding variety with chia or brazil nuts instead

Directions:

Place all ingredients in a blender. Blend for 1 minute. Pour, and drink. Cheers to good health!

Need to buy the basic ingredients?
Aloe, flax, walnuts, and tahini: You can buy online here with fast shipping worldwide!

How it Works

During exercise, your body builds up acids from the muscle “burn” and cardio effects. After exercise, you need to release those built-up acids and create a more alkaline environment where muscles can safely recover and repair. More antioxidants help to break up the “internal rust.” The result: you’ll feel less stiff, more energized and have even more power for the next workout. That sounds like a good plan to me!

What you get

  • Berries give you a high boost of antioxidants. Blueberries are truly little blue bundles of health, packed with manganese, vitamin K, and antioxidants. Raspberries offer an ample supply of manganese, a mineral that helps to decrease premenstrual syndrome symptoms, improve bone health, and decrease pain associated with arthritis.
  • Bananas are great for sports endurance and recovery thanks to the combination of natural sugars, fiber, and potassium. Having a smoothie made with banana after your workout can give you more energy and improve your fitness performance.
  • Apples are packed with vitamins A and C, antioxidants, and potassium. High levels of boron in apples stimulate brain activity and increase mental alertness, making apples a real brain food. Boron also keeps your bones healthy and helps prevent osteoporosis by preserving calcium in the body.
  • Flaxseed is a great source of dietary fiber and helps your body intake the natural fruit sugars slowly which means you get more energy for longer and no “sugar crash” later. You can buy flax seed already ground or in whole form and grind at home.
  • Walnuts are a fantastic source of Omega 3, that’s a powerful antioxidant good for circulation and blood. Omega 3 is also a potent anti-inflammatory agent, helping to repair and heal faster from injuries.
  • Tahini (sesame) is high in zinc, the best mineral for your glandular system.
  • Aloe vera is amazing for skin and digestion.
  • Water is the best form of hydration there is!


For the love of smoothie! This is Raw Food Bliss!

For the love of smoothie! This is Raw Food Bliss!

Learn More

What blender should you use? Good question! Check out my article on Battle of the Blenders: Which one is Best.

Moving overseas? Find out if it’s ok to use a 110V blender in a 220V country.

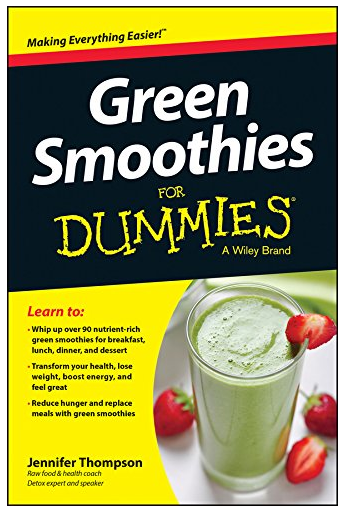
Like this recipe? Discover more awesome workout and recovery smoothies in my NEW book: Green Smoothies for Dummies. It has more than 90 recipes and an excellent 3-day Green Smoothie Detox Plan too! Available for sale on amazon, iTunes and Barnes and Noble.

Green Smoothies for Dummies by Jennifer Thompson for Wiley Publishers, NY NY

Green Smoothies for Dummies by Jennifer Thompson for Wiley Publishers, NY NY

More on Green Smoothies:

More on Prevention:

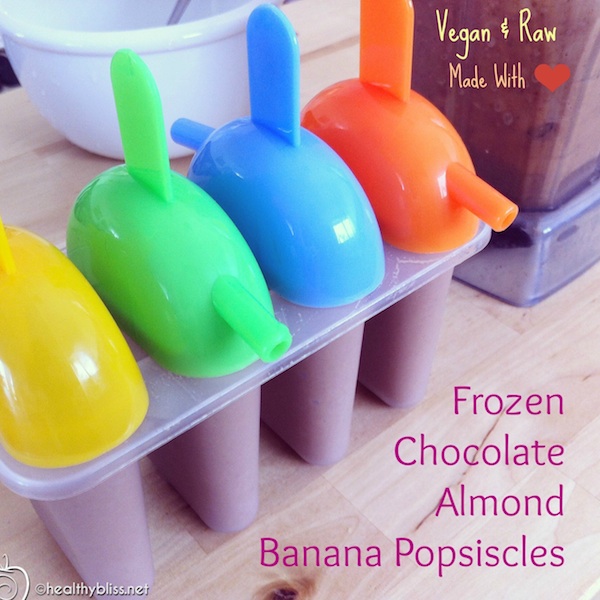
Healthy Frozen Treat: Raw Banana Chocolate Almond Popsicles Recipe

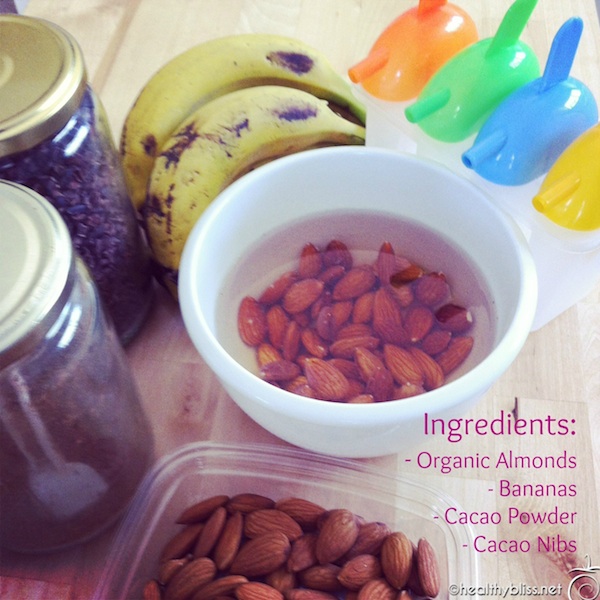
These yummy frozen treats are great after a hot day! If you’re looking for a healthy dessert for your kids, or are a former ice cream lover wanting a healthy upgrade, or even if you want a new raw food dessert recipe to try, then these popsicles are for you!

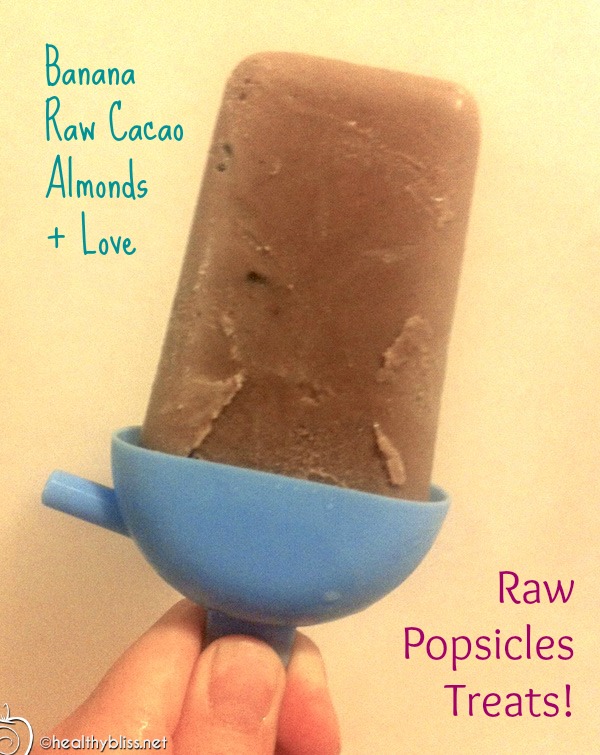
The perfect frozen summer treat, and it's healthy!

The perfect frozen summer treat, and it’s healthy!

The best part about this recipe is that it’s fast and easy and doesn’t have a lot of ingredients. Raw food for busy people? Totally possible! Affordable vegan and vegetarian food? Yes! Something healthy that actually tastes good? You bet! Scroll down to see how.

Blend just a few simple organic ingredients to make yummy frozen raw treats!

Blend just a few simple organic ingredients to make yummy frozen raw treats!

How to Make Raw Cacao, Banana & Almond Popsicles

One Day Before

1. Soak 2 cups of organic almonds overnight. Rinse and drain.

2. Peel 4 ripe organic bananas and cut bananas into pieces. Place in a ziplock bag and put in the freezer overnight.

Prep Day

3. Place the following into a high-speed blender:

– Soaked organic almonds (water drained)
– Frozen bananas (already peeled and frozen)
– 1/2 cup filtered water
– 2 Tablespoons organic raw cacao powder
– 2 Tablespoons organic raw cacao nibs
– 2 Tablespoons raw honey (optional) Note: For vegans, use 2 teaspoons of organic stevia powder instead.

Want to know where to buy the organic cacao powder, cacao nibs, raw honey or stevia powder? Check this link!

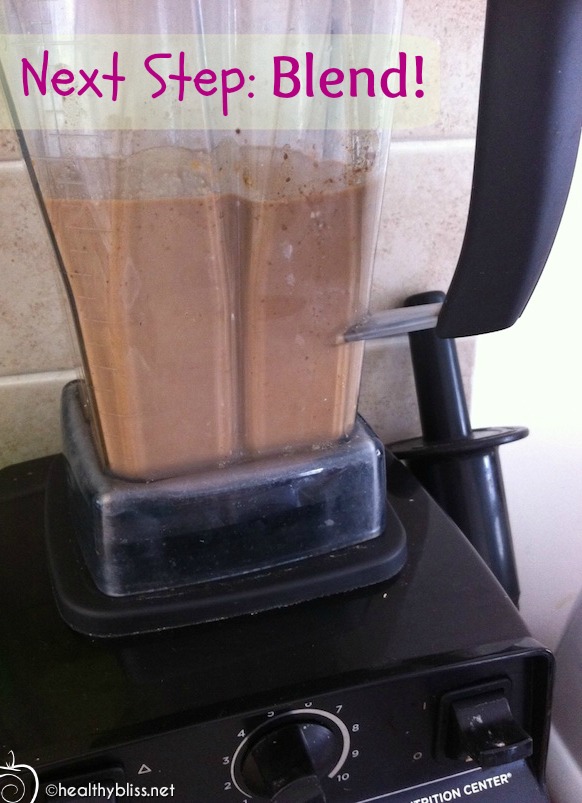
Blend all ingredients until creamy and smooth.

Blend all ingredients until creamy and smooth.

4. Blend until creamy and smooth.

(Note: I use a Vitamix blender but you can use any high power blender. If your blender is a bit old or not feeling its best, then use 1 cup of water instead of 1/2 cup and add the frozen bananas slowly.)

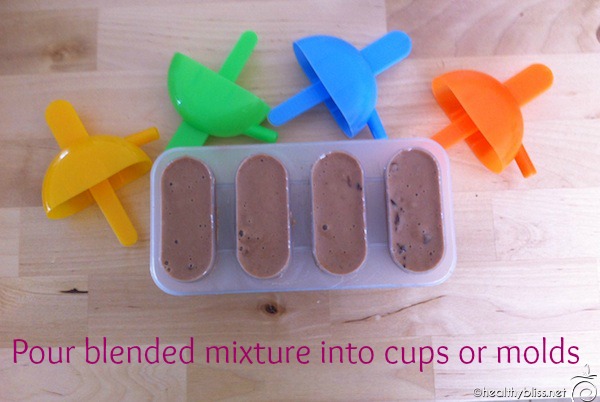
Place the blended mixture into molds then freeze for at least 6 hours or overnight.

Place the blended mixture into molds then freeze for at least 6 hours or overnight.

5. Pour blended mixture into cups or molds. Add a wooden stick or holder to make the popsicle easy to hold once it’s set.

(Note: I bought these molds at a Dollar store. I also use cups and non-chemically treated wooden spoons sometimes too.)

6. Once the molds are filled, place them into the freezer for at least 6 hours or overnight.

7. Now they’re ready to eat! Simply pop the frozen treat out of the mold and you’ve got your own homemade healthy popsicle!

(Note: If the popsicle doesn’t “pop” out easily, let it stand at room temperature for about 5 minutes and try again.)

The perfect frozen summer treat, and it's healthy!

The perfect frozen summer treat, and it’s healthy!

This is a fast and easy way to make the chocolate lover in your house happy with a healthy raw cacao frozen treat! Kids love them and believe me, adults love them too! This recipe is also gluten-free so it’s perfect for anyone looking for good wheat-free desserts. And, it’s a fun way to share the idea of raw food with family and friends. When they see for themselves how good it tastes, they might actually want to know more!

Using 100% certified organic ingredients gives you the best quality, flavor and nutrients!

Using 100% certified organic ingredients gives you the best quality, flavor and nutrients!

For more on how to start a raw food diet, how to do a detox at home or what minerals you may specifically be deficient in, book a private health consult with me via Skype.

How to Book Your Health & Nutritional Coaching Session:

1. Take photos of your eyes with a digital camera.
2. Email the photos to me for approval.
3. We schedule a time to meet via phone or Skype!
More on Nut Milk and Healthy Recipes:

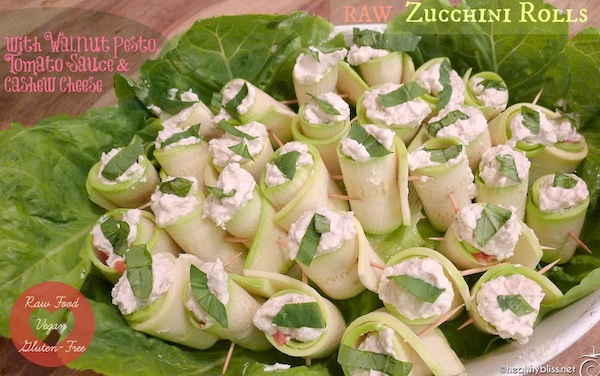
Raw Zucchini Rolls with Walnut Pesto and Cashew Cheese: Recipe

Are you looking for something different than another salad? Or looking to bring an eye-catching and mouth-watering dish to your next raw food potluck or healthy picnic? Try this recipe for Raw Zucchini Rolls and your friends and family will simply be amazed at how delicious healthy food can be. And of course, it’s gluten-free!

Raw Zucchini Rolls with Tomato Sauce, Cashew Cheese and Walnut Pesto – it’s easy to make!

I actually threw this dish together with what I had at home one day not using any recipe at all. That’s the beauty of learning how to cook – once you know the basics, you can use your creativity to make just about anything you want! My goal was to have a nice finger-food raw food platter. I saw that I had a lot of organic zucchini, so I said, hmmmm…I can make zucchini rolls, now what to put inside? First I made the tomato sauce and it was yummy, but I felt like it needed more texture. So, I made the walnut pesto. Then, I decided to top it off with some smooth and creamy raw cashew nut cheese and this gorgeous gourmet-looking raw pasta dish was born!

You can make this yourself at home. You will need either a blender or a mini-food processor, about 3-4 large organic zucchinis and the following ingredients:

Walnut Pesto Ingredients

  • 1 1/2 cup raw organic walnuts
  • 1 Tbsp. Extra Virgin Olive Oil
  • 1 cup organic fresh basil leaves (or cilantro)
  • 1/2 Tbsp. fresh lemon juice
  • Dash of Himalayan Salt

Raw Tomato Sauce Ingredients

  • 2 cups organic tomatoes, chopped
  • 1 Tbsp. Extra Virgin Olive Oil
  • 1-2 raw garlic cloves
  • 1/2 tsp. organic dried oregano leaves
  • 1/4 tsp. organic dried basil leaves
  • 1/4 tsp. organic cayenne pepper
  • 1 Tbsp. fresh lemon juice
  • 1/2 Tbsp. raw apple cider vinegar
  • 1 Tbsp. raw organic honey (optional)
  • Dash of Himalayan Salt

Raw Cashew Cheese Ingredients

  • 2 cups organic raw unsalted cashews
  • 1 Tbsp. fresh lemon juice
  • Dash of organic cumin powder
  • Dash of organic cayenne pepper
  • Dash of Himalayan Salt

How To Make a Raw Zucchini Rolls

1. Make the Walnut Pesto: Add the ingredients into a mini food processor or blender and pulse several times until the mixture is course but uniform in texture. Set aside in a glass container, covered and refrigerated for at least 2-3 hours to marinate.

2. Make the Tomato Sauce: Add the ingredients into a mini food processor or blender and pulse several times until the mixture is course but uniform in texture. Set aside in a glass container, covered and refrigerated for at least 2-3 hours to marinate.

3. Make the Cashew Cheese: Add the ingredients into a mini food processor or blender and blend for 1-2 minutes until smooth in texture. Set aside in a glass container, covered and refrigerated for at least 2-3 hours to marinate.

4. When you are ready to serve, prepare the zucchini strips: Peel the outer skin of each zucchini (the skin can have a bitter taste but also looks more like real “pasta” without the skin). Then use a peeler, mandolin or knife to cut the zucchini into flat strips.

5. Using one zucchini strip at a time, place 1 spoonful of tomato sauce and 1 spoonful of walnut pesto on the strip, then roll the strip, securing it with a toothpick. Top each zucchini roll with a dollop of cashew cheese and a small sliver of fresh basil leaf for decoration.

6. Serve on a plate of lettuce, with loving intention to share the gift of good health!

Note: If you are vegan, you can replace the raw organic honey with agave nectar or a dash of organic stevia powder.

For more on how to start a raw food diet, how to do a detox at home or what minerals you may specifically be deficient in, book a private health consult with me via Skype.

How to Book Your Health & Nutritional Coaching Session:

1. Take photos of your eyes with a digital camera.
2. Email the photos to me for approval.
3. We schedule a time to meet via phone or Skype!
More on Raw Food:

Do you need to juice, and should you be juicing?

With all the hype about green smoothies for fitness, health and detox, you might be wondering: do I need to be drinking green juice or fresh juice too? And, if I only have time for one, which is better: blending or juicing?

All information in this article is for educational purposes only.
It is not for the diagnosis, treatment, prescription or cure of any disease or health condition.

I personally make a green juice for breakfast and a green smoothie for lunch every day and I love them both! But there are some real differences between blending a smoothie in a blender and making a juice in a juicer. Find out how and why below.

What are the health benefits of drinking fresh juice?

Juicing FAQs

Why is juicing important?

Juicing is important because it gives you the opportunity to high-boost on vitamins and minerals. In one meal, you wouldn’t normally have the capacity to eat ½ bunch celery, 10 carrots, 8 large kale leaves, an entire handful of parsley, 2 apples, a lemon, and a cucumber. Take all of those ingredients, put them in the juicer, and you’ve just ingested all the same nutrients in a few easy sips.

What are the pros/ benefits of juicing? Any cons (to one’s health and otherwise)?

The reality of living a busy lifestyle and not having time to prepare food at home today means that most people are not eating enough fresh fruits and vegetables and are therefore nutritionally deficient. Juicing is a way to combat this, and so that’s definitely a pro. The con is that it takes time to prepare and it’s takes even more time to clean the juicer. Most people don’t own a juicer, so it’s also an added expense to have to buy another appliance. For those reasons, I usually recommend blending smoothies in a blender. In a blender, the fiber remains intact and so you just drink everything. Blending is definitely more practical and easier to continue doing long-term. Any new habit has to be a healthy habit for life.

Who should juice? Why? Who, if anyone, should not?

Just to be clear on terms, juice is made in a juicer. The juicer separates the fiber from the liquid and leaves only a liquid to drink (the juice). If you take those same ingredients and put them in a blender, the fiber will remain intact and you will have a smoothie, which is thicker and more filling than a juice. Traditionally people think of a smoothie having milk or yogurt, but you can easily make a healthy smoothie with fruits, greens and 1 cup of water. You may have heard of ‘Green Smoothies’…well, that’s what it is: fruits and greens blended in a blender. I think everyone should have 1 Green Smoothie per day.

So, who should juice? Anyone who is sick is already nutritionally out of balance and most likely deficient. Ideally they should be high-boosting with nutrient dense foods to try to get the body back into balance, so a daily juice would be great for them. For diabetics, fresh fruit juices are usually too high in sugar and in that case, make only green juices instead, like cucumber, kale, lemon, ginger and parsley.

Take the time to make a green juice – it’s an investment in your health!

Is there a limit to how much juicing one should do? Is there such thing as excessive juicing?

I usually recommend adding fresh leafy greens (like celery greens or boy choy) to any fruit juice just to balance the natural sugars with the greens. People can do 100% juice fasts, ie drinking only freshly made juice, for up to 60 days at a time with no ill effects. For the average person, having 1 fresh juice or smoothie per day is a great addition to their daily diet. Think of getting your vitamins fresh from Mother Earth and not a pill!

Should juicing replace entire meals or be a supplement?

It really depends on the individual, their energy levels and their goals. The average person can have a green smoothie for breakfast as a meal replacement because the fiber in the smoothie keeps them from being hungry and it’s a great way to start the day with fiber, alkalinity and minerals and chlorophyll from the greens. I work one-on-one with my clients to determine the best meal plan for them.

Is juicing the same as detoxing? If so, are the terms interchangeable?

Juicing is not the same as detoxing. One glass of fresh apple, ginger, lemon juice is not going to put you into detox mode (although it will high-boost your mineral and vitamin reserve). The process of detoxification starts when the body has been eating light raw fresh fruits or drinking only fresh juice for at least 36 hours. If you continue drinking only juice at the 36-hour mark, then you are going into ‘detox,’ and that means your body starts using the enzymes it would normally use to digest food and directs the energy inward to internal housekeeping. Think of your organs having extra paperwork and a backlog of work on their desks. Suddenly, no more papers are coming in so everyone has a chance to catch up on their jobs. That’s detox. If you are eating refined sugar, bread, fried foods or drinking coffee and alcohol, you are still adding more work for those organs and no detox will occur.

When and How to Juice

Initially you may enjoy having fresh juice on the weekends when you have more time to prep the ingredients and clean the juicer. You may also find yourself making juice when you’re ill as a natural recovery remedy. On a daily basis, making a green smoothie is faster and easier, and because of that, you’re much more likely to keep doing it every day. This article covers the key points in making juice and what equipment you need. For more information on making fruit smoothies or green smoothies in a blender, go to this link.

Experiment with different fresh & organic ingredients in your juice

Making juice is more labor intensive and a bigger commitment in terms of time and money for a few reasons:

  • You need a juicer. A juicer is a different appliance than a blender. It’s an added expense if you don’t have one already.
  • You need more ingredients to make one 16-ounce juice than you do for a 16-ounce smoothie.
  • You need to spend more money on the extra ingredients required. It takes time to cut up the extra ingredients too.
  • Cleaning a juicer takes more time than cleaning a blender because a juicer has several parts (unlike a blender that just has a pitcher and a lid).

On average, it may take 6-8 minutes to clean your juicer in addition to 5-6 minutes of prep plus 2-3 minutes of juicing, for a total of at least 17 minutes to make a juice. Compare that to a 5-minute green smoothie and the difference really adds up!

How long does a juice stay fresh?
Without any fiber, juice oxidizes very quickly and that means you need to drink it immediately after making it. If not, the juice will start to go off and in just a few hours, it can go bad. This is a major difference between green smoothies and green juices.

Making a green juice

Besides cutting up some extra ingredients and cleaning a few additional parts of the juicer, it’s really not difficult at all to make a green juice. One thing that is important for green juices is the type of juicer you have. (Note: If you’re interested in juicing your own wheatgrass at home, you need a masticating juicer. The Omega 8004 juicer is a great model for making fresh green juice and wheatgrass juice. Other options include the Champion juicer and the Hurom vertical slow-press juicer.) I explain more on that in my article about Choosing a Juicer.

A green juice is a high-boost of minerals, vitamins and chlorophyll

Green juice recipes are very similar to smoothie recipes with just a few exceptions. The following are ingredients not to use in a juice:

  • Banana, dates, nuts, seeds and avocado – Due to their high density, they don’t really have any liquid to juice.
  • Superfood powders – You can add your favorite superfood powder, ground flaxseed or chia seeds to your glass of juice and stir just before drinking, but you don’t want to add it to the juicer. With powders, there’s nothing to juice!

Fruits and greens with high water content, like cucumber, orange, lemon, apple, pear, pineapple, watermelon and celery are great options for juice ingredients. You can also add carrot, beet, daikon, ginger, fennel or leek. My favorite greens to add to juice are parsley, cilantro, basil, kale, Swiss chard or collard greens. Organic fruits and greens are best, but do the best you can with what you have when starting out. A non-organic juice is still better for you than a frozen dinner or fast-food lunch!

Tip
Save the stems from your large green leaves like kale, spinach, Swiss chard or collard greens after making a green smoothie. Store them wrapped in a plastic bag in the fridge. When you’re ready to make a juice, add the stems to the juicer. That way, the stems don’t go to waste and you’re getting the added nutritional benefit of the minerals, vitamins and antioxidants from them in your juice.

If you're ready for juicing, this is the juicer for you!

If you’re ready for juicing, this is the juicer for you!

For more on how to start a raw food diet, how to do a detox at home or what minerals you may specifically be deficient in, book a private health consult with me via Skype.

How to Book Your Health Coaching Session:

1. Take photos of your eyes with a digital camera.
2. Email the photos to me for approval.
3. We schedule a time to meet via phone or Skype!
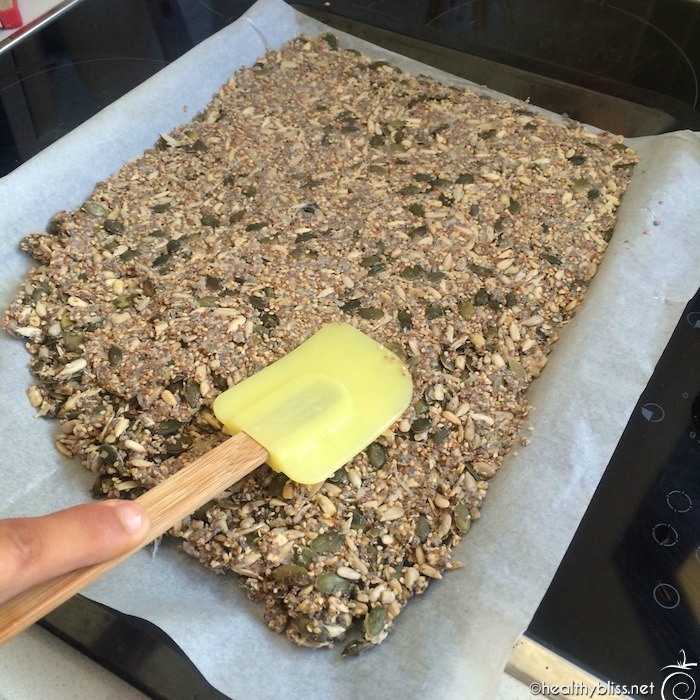
More on Colon Cleansing:

Cilantro Hot Sauce Recipe! For a Spicy Dip or Salad Dressing
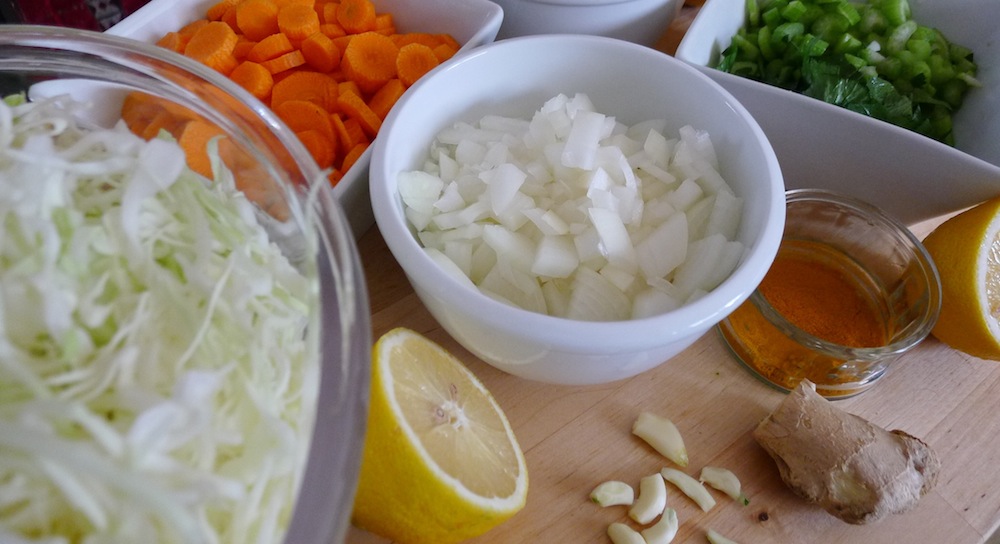
Check out this amazing raw hot sauce! If you’re a former tabasco and hot sauce lover but are looking for an upgrade in your ingredients and a 100% raw food version of your hot sauce, then you’ve come to the right place. In this recipe, there is NO added sugar, no monosodium glutamate (MSG), no added colors or preservatives – just an all-natural good-for-you safe food recipe. It takes only a few minutes to make, and this hot sauce will keep in the fridge for 4-5 days. We usually make it once a week as a treat to add to a salad or a a topping to a yummy vegan seed cheese or nut cheese.
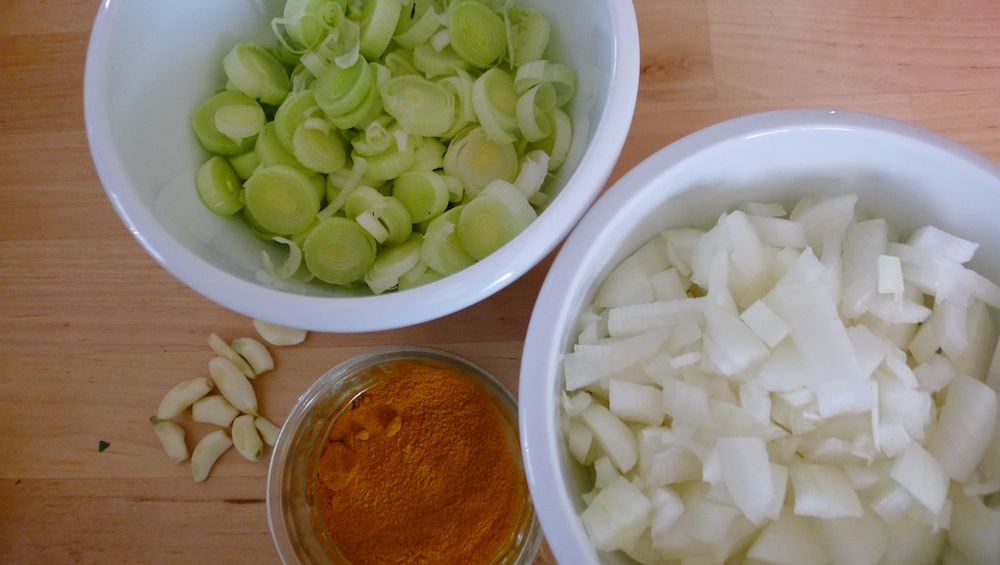
Delicious recipe for homemade hot sauce using hot peppers, coriander (cilantro) olive oil, salt and fresh garlic.

This is a very popular style of hot sauce in Middle Eastern food. Traditional Middle Eastern food has a lot of raw food dishes, and since I’m living in Tel Aviv, Israel, I get to play around with local, fresh ingredients and share some healthy recipes with you. In Hebrew, this sauce is called “skhug yarok” (green skhug). The Yemen people claim that this dish brings you health and longevity. The ingredients are: 1 whole bulb of garlic, 2 large hot peppers, 1 bunch fresh cilantro, 2 tablespoons olive oil + salt.

How To Make Homemade Hot Sauce

Place the following ingredients in a blender and blend until smooth:

– 1 bunch of fresh coriander (cilantro)
– 1 whole bulb of garlic, peeled (yes, the entire bulb, not just 1 clove)
– 2 large hot peppers (you can use 3 small raw jalapeño peppers)
– dash of Himalayan salt to taste (check your sea salt for no additional additives)

The key to making this hot sauce right is to add the olive oil at the very end, after you blend the other ingredients!
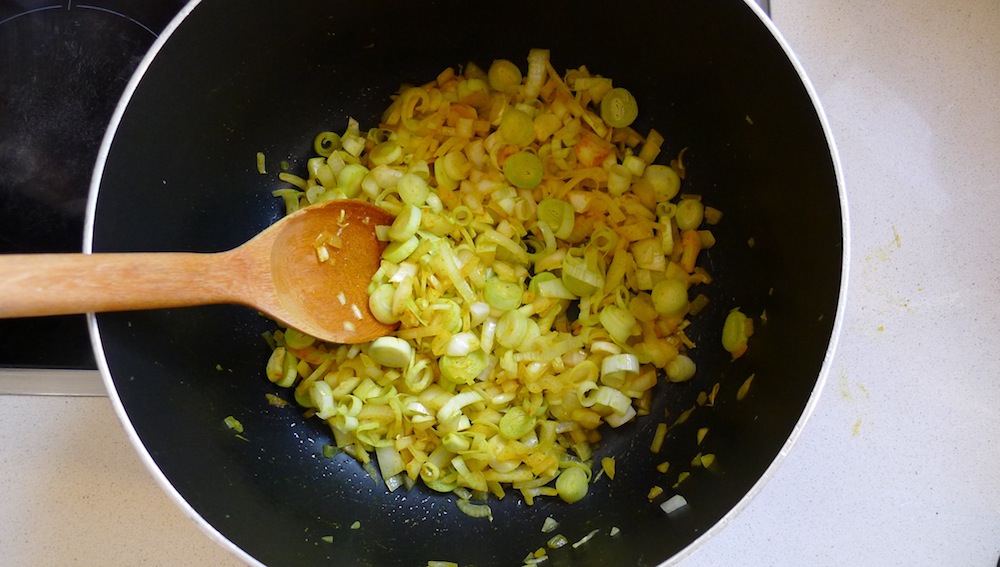
After everything is blended, add:

– 2 tablespoons extra virgin olive oil

and blend again. Store in a glass container in the fridge.

This sauce is hot! You only need to add 1 teaspoon to a salad to give it a real kick! Garlic is a powerful anti-inflammatory food and a known anti-cancer food. Cilantro is a fantastic natural chelator of heavy metals and is recommended to eat during a heavy metal detox. Hot peppers help to detox the liver, strengthen blood and boost your immune system. This recipe is vegan, vegetarian and gluten-free.

Can you see how much healing power you can get from your food?

Delicious recipe for homemade hot sauce using hot peppers, coriander (cilantro) olive oil, salt and fresh garlic.

For more on how to start a raw food diet, how to do a detox at home or what minerals you may specifically be deficient in, book a private health consult with me via Skype.

How to Book Your Health Coaching Session:

1. Take photos of your eyes with a digital camera.
2. Email the photos to me for approval.
3. We schedule a time to meet!

More Healthy Recipes:

How to Ferment Cabbage and Make Raw Sauerkraut

If you think that eating more fresh, natural raw food in your diet is too expensive, then this recipe is definitely for you! Making fermented foods at home is one of the most inexpensive ways to enjoy raw food. For optimal digestive health, we need to get good bacteria in gut on a regular basis. Antibiotics destroy all the bacteria in our system, both good and bad. Over time, this can lead to more imbalance in digestion function, absorption and elimination. Some experts even say that food allergies, autism and ADHD may be related to an imbalance of bacteria in the colon. Certainly many digestive diseases like colitis, diverticulitis and Crohn’s disease are caused in part by lack of good bacteria in the gut. Having the right balance of good bacteria helps to strengthen immune system, improve digestive health and long-term, can even prevent dis-ease. Probiotic, or good bacteria, literally means “for life.”

All information in this article is for educational purposes only.
It is not for the diagnosis, treatment, prescription or cure of any disease or health condition.

How to Make Raw Sauerkraut at home, a healthy naturally fermented food

How can we get good bacteria or “probiotics” back in the gut? The Western diet has virtually eliminated all traditionally fermented foods out of the diet, with the exception of yogurt. Store-bought yogurt is pasteurized, and usually contains added sugar, flavor and colorings. It’s also not a suitable option for vegans, and it’s expensive! Nowadays you will see Kombucha drink as a fermented raw food vegan option. Kombucha is fantastic, but it is also expensive at $6.00 per bottle. You may see sauerkraut for sale in supermarkets, but it’s already been pasteurized, so virtually all of the good bacteria has already been destroyed.

Not to worry! If you have just a few heads of cabbage, some salt and a few jars, you can easily make your own raw sauerkraut at home! It’s so easy to make that you will be wondering why you didn’t make it sooner! Cabbage is not expensive, and once the sauerkraut is made, you only need to add about 2 Tbsp. per day to your salad or veggies to get the good bacteria that your body needs. At that rate, 2 heads of cabbage could easily last up to 2 weeks for a family of 4. That’s some healthy savings!

What You Need: Raw cabbage, salt, a grater and jars

How to Make Homemade Raw Sauerkraut

Raw Sauerkraut: Ingredients

  • 2 medium-large organic green cabbage heads (or purple cabbage)
  • 1-1.5 Tablespoons Himalayan Salt or Pure Sea Salt
  • 1 Tablespoon caraway and/or mustard seeds (optional)
  • 2-3 sprigs fresh dill (optional)
  • 2 organic carrots (optional)

Raw Sauerkraut: Equipment

  • Grater or Mandolin
  • Cutting Board and Knife
  • Large Mixing bowl
  • Wooden Mallet (optional)
  • Large widemouth canning jar (or extra large mason jars)
  • Small glass baby-food jar or small glass cup to fit inside the larger jar
  • Clean rock or other weights to fit inside the small jar (to weigh down the cabbage)
  • Old t-shirt or towel for covering the jar
  • Large plate to catch any overspill

Instructions

Clean all materials before starting. Fermentation can be a sensitive process, and if there is any soap residue in your jars or hand cream chemicals on your hands, the fermenting might not work. I prefer to wash everything with a 50/50 mix of tap water and boiled water. For safety reasons, I do not recommend using 100% boiled water. Be careful not to rinse your jars with only boiling water because the glass can crack. Add tap water first, then some boiled water. Swish everything around and rinse. Wash your hands well with clean water and no soap.

Shred the Cabbage. Peel off the leaves of the cabbage and set them aside for later. Grate the cabbage on the large grate side of the grater or use a mandolin to shred the cabbage. Be sure to use the safety mechanism on the mandolin!

Combine Cabbage and Salt. Place the shredded cabbage to a large bowl and sprinkle some of the salt over top. If you have a wooden mallet, then start pounding the cabbage. If using only hands, then begin massaging and squeezing the cabbage with your hands. In just a few minutes, you should start to see the cabbage becoming watery and limp – this is a good sign! You can add some shredded carrot at this stage too (optional).

Making Raw Sauerkraut: Use a wooden mallet and pound away!

Add the salt. Then start squeezing by hand…

As you squeeze the cabbage, it will start to soften and you should see liquid/water. Put the liquid and cabbage in a glass jar for fermenting, pushing out any air bubbles. You can also add fresh dill, whole mustard seeds or caraway seeds for flavor.

Pack Cabbage and Liquid into Jar. Use your hands to pack the cabbage into the jar, pressing out any air bubbles each time you add more. At this stage, you can add some fresh dill, caraway seeds or mustard seeds for flavor. Pour any excess liquid from the cabbage into the jar. When the jar is nearly full, place a few of the larger outer leaves to cover the surface of the sauerkraut. This helps keep the cabbage submerged.

Gently press out air bubbles. Place some large cabbage leaves on top and be sure that your cabbage is all covered by the liquid. If necessary, add a small amount of water to cover the cabbage.

Cover the Jar. Place your filled jar on a dish, cover it with an old t-shirt or towel and put it in a quiet place to happily start fermenting. Ideally, your jar will be on top on a cabinet or on a table where it will not be disturbed. The best place is away from direct sunlight and at a cool room temperature — ideally 65°F to 75°F.

Place your sauerkraut on a dish or in a large bowl. Usually there will be liquid coming out of the jar as it ferments; this way any liquid escaping is caught and will not make a mess.

Finally, cover your sauerkraut with a towel or old t-shirt and keep it undisturbed. Check once a day, pushing out air bubbles and adding more water if needed. It should be ready in about 4 days.

Check Daily. Once a day, be sure to check your cabbage. Open the lid and push down the cabbage to release any air bubbles. If necessary, add a small amount of additional water and salt. By the 2nd day, the cabbage has usually been pressed down enough that there is some extra space in the jar. At that point, add the small baby-food jar or glass cup with rock inside to keep the cabbage submerged under water.

Taste after 4 days. Small batches of sauerkraut like this can be finished in as little as 4 days. On the 4th day, taste your cabbage. If you’re happy with the results, you can transfer your sauerkraut to the fridge where it will continue to ferment, although much more slowly. You can also keep it out to ferment for up to another 10 days, but you must check it every day, press out any air bubbles and add additional water and salt if necessary.

Note: It’s normal to see air bubbles coming through the cabbage during fermentation. When you press them down daily, you are eliminating the air space between the cabbage. In some cases if you forget a day, you may start to see mold, dark scum or smell a bad odor from the cabbage. If the scum can be skimmed off, then it’s ok to do so. If there is a bad smell or visible mold, I recommend to throw out the batch and start over.

When your sauerkraut is ready, put the large container in the fridge or transfer the sauerkraut to smaller jars and then refrigerate. Raw sauerkraut is a fermented product and will stay fresh for a few months. Once you open a jar and start eating it, it’s best to consume the sauerkraut within 30 days.

After 4 days, start tasting your batch. When you like the taste, you can transfer to smaller jars to put in fridge…or share with family and friends!

Making Large Batches of Sauerkraut

You can make much larger batches of sauerkraut in a ceramic fermentation crock, but the crocks are very expensive. It’s probably a good idea to try fermenting in glass mason jars first and see if you actually enjoy eating sauerkraut before making the investment in a crock. (One benefit of the large crock is that you don’t have to check it daily. The weights in the crock keep the air bubbles out.) Over time, if you find you want to make larger batches, then definitely consider making the leap.

How is Sauerkraut Fermented?

Raw sauerkraut is made by a process called lacto-fermentation. We can ferment cabbage thanks to the good bacteria that naturally exist on the surface of the cabbage leaves (and many other veggies too). Food becomes fermented when the “good” lactobacilli bacteria convert their sugars and starches into lactic acid. This is a natural preservative that inhibits the growth of harmful bacteria. The lactic acid also promotes the growth of healthy flora throughout the intestine. Sauerkraut contains high levels of glucosinolates. These compounds have been shown to have anti-cancer activity.

The diets of every traditional culture have included some kind of lacto-fermented food. Kimchi from Korea and cortido from Latin America are 2 examples of traditionally fermented vegetables made from lacto-fermentation. In Europe, people fermented sauerkraut, grape leaves, herbs, and root vegetables. Lacto-fermented veggies are nutrient-dense, enzyme rich, a raw food, vegan, vegetarian and gluten-free. And they taste yummy too! Fermented cabbage is one of my favorite foods for a mini-daily detox and a balanced raw food diet!

More on Fermented Foods: