International Directory of Detox, Juice Fast, Healing Centers and Retreats

From Food Matters

Detox, Juice Fasting Retreat and Healing Center Directory

World Destinations for Detox, Juice Fasting, Healing Clinics

USA and Canada

Gerson Institute – San Diego, California
Gerson Therapy is tailored to treat cancer, diabetes, cardiovascular disease and arthritis using natural treatment methods such as organic foods, juicing and detoxification.
www.gerson.org

Hippocrates Health Institute – Florida
The Hippocrates Health Institute provides a tranquil haven for peace and health restoration. Guests are treated with enzyme-rich vegan food, educational classes and exercise facilities.
www.hippocratesinst.org

An Oasis of Healing – Arizona
An Oasis of Healing offers natural options for treating cancer, whilst promoting immune strengthening and health restoration.
www.anoasisofhealing.com

The Kushi Institute – Massachusetts
The Kushi Institute is an international expert authority on the macrobiotic lifestyle for health and well-being, offering residential educational programs.
www.kushiinstitute.org

Creative Health Institute – Michigan
The Creative Health Institute is a learning facility designed to help people reclaim health through raw food nutrition and detoxification.
www.creativehealthinstitute.com

Holistic Medical Clinic of the Carolinas – North Carolina
This holistic medical facility uses combined conventional and natural therapies to provide integrated mind-body-spirit healing for a wide variety of diseases.
www.holisticmedclinic.com

Optimum Health Institute – San Diego; Austin
The Optimum Health Institute aims to rejuvenate physical, emotional and spiritual health through vegetarian raw food, juicing, lymphatic exercise, colon hydrotherapy and prayer.
www.optimumhealth.org

The Issels Foundation – Arizona
The Issels Foundation offers alternative therapies for cancer and chronic illnesses, with the dual aim of treating disease and preventing its recurrence.
www.issels.com

Tree of Life Rejuvenation Center – Arizona
Under the guidance of world-renowned health and spiritual practitioners, The Tree of Life Rejuvenation Center is a healing haven for a wide range of diseases. Expert teaching on raw food nutrition, spiritual growth and natural living is also available.
www.treeoflife.nu

Rudolf Steiner Health Center
- Ann Arbor, Michigan
This program is designed for ambulatory individuals with chronic illnesses, or anyone seeking a restorative regimen. The Health Center follows the Anthroposophic medical guidelines of Austrian scientist-philosopher Rudolf Steiner.
www.steinerhealth.org

Weimar Institute – Weimar, California
The Weimer Institute offers nutrition and lifestyle guidance, imbued with a strong spiritual focus, to remedy disease.
www.weimar.org

Oxygen Life Spa – Texas
The Oxygen Life Spa offers a spiritual space for healing through the use of Ozone saunas, Chi Tables and Tesla Coil Photon Generators.
www.oxygenlifespa.com

Rest Of Your Life Health Retreat – Texas
Under doctor guidance, guests may fast and detoxify in a remote country environment. Education about natural hygiene and raw-food healthy living is also provided.
www.roylretreat.com

Yoga Oasis – Hawaii
The Yoga Oasis offers intensive yoga and detoxification programs, with food preparation classes and nature excursions also available.
www.yogaoasis.org

Ann Wigmore Foundation – San Fidel, New Mexico
An educational and healing retreat, the Ann Wigmore foundation prescribes live, organic vegan foods and natural detoxification methods for health and recovery.
www.wigmore.org

Dr Gonzalez – New York
This clinic is headed by medical doctors who offer treatments for cancer, autoimmune diseases, allergies and chronic fatigue.
www.dr-gonzalez.com

The Center for the Improvement of Human Functioning – Kansas
This clinic founded by Dr Hugh Riordan uses the approach of finding the cause of illness and to correct it rather than just treating the symptoms.
www.brightspot.org

Canada

New Life Retreat – Ontario, Canada
Situated on a lush organic farm, New Life Retreat has an interactive, practical approach to teaching eco-friendly and healthy living. In addition to a fresh, organic vegetarian diet, guests will benefit from meditation, relaxation, juicing, fasting and exercise in nature.
www.newliferetreat.com

Nonpareil Natural Health Retreat – Stirling, Ontario
This natural haven provides a range of services for detoxification and health rejuvenation. Raw-juice cleansing, nutrition counselling, colon therapy, mud baths, yoga, relaxation in nature, reflexology, reiki and meditation are available in their programs.
www3.sympatico.ca/nonpareil/

Europe and the UK

Paracelsus Klinik – Switzerland
Paracelsus Klinik is an integrative conventional/complementary medicine clinic, treating a wide array of diseases.
www.paracelsus.ch

Vortex Vital – Spain
Vortox Vital is a resort-style health retreat providing fasting and numerous other detoxification programs.
www.vortexvital.com

Detox International – Spain, Portugal
Detox International provides 7 day holistic detox retreats supported by a team of nutritionists and therapists.
www.detox-international.com

Australia and New Zealand

The Vita Centre – Edgecliff, New South Wales
The Vita Centre offers a holistic, integrative blend of conventional and complementary therapies for a wide range of diseases.
www.vitacentre.com

Yarra Vallley Living Centre (home of The Gawler Cancer Foundation), Victoria
This clinic has a combined orthodox and mind/body medicine approach to treating disease, utilising treatment advice from medical doctors and natural health practitioners. Set in 40 acres of natural bushland at the foot of rolling hills, they host Wellbeing retreats in a nurturing and peaceful environment.
www.gawler.org

Fountainhead Organic Health Retreat – Maleny, Queensland
100% organic health retreat focusing on stress, detox and fitness programs.
www.fountainhead.com.au

Asia

The Farm – Phillipines
The Farm is a lush eco-friendly resort, with medical doctors that tailor individual detoxification and healing programs. Guests are luxuriously pampered during their program.
www.thefarm.com.ph

The Spa Resorts – Thailand
This Spa Resorts provide detoxification programs, fasting, massage and reflexology in the lush comfort of resort accommodation.
www.thesparesorts.net

Kamalaya – Thailand
Kamalaya is a luxury resort that offers detox and yoga retreats in Thailand. Their Wellness Sanctuary offers colonic irrigation and speciality detoxes including weight loss, sleep enhancement, optimal fitness and stress & burnout.
www.kamalaya.com

Atsumi Detox – Thailand
Atsumi Retreat Healing Center is a natural detox & therapy education facility in Phuket, Thailand where people come to fast and cleanse their systems of toxins.
www.atsumihealing.com

Atmanjai Detox – Thailand
Atmanjai Resort is a natural detox retreat center, based on the Dr. Bernard Jensen healing concepts. Each guest has their own colema room during their cleanse.
www.atmanjai.com

Julia Jus’ Innergetic Health Rejuvenation Retreat – Bali, Indonesia
This 7-day retreat provides a comprehensive detoxification program involving raw-food cuisine, pilates, meditation, colonic irrigation, detox baths, massage, ozone therapy, nutrition/lifestyle counselling and infra-red saunas.
www.juliajus.com

Central and South America

Gerson Plus Therapy – Tijuana, Mexico
Dr Dan Rogers is a trained Medical Doctor and Naturopath. He has been treating patients using integrative medicine since the late 1970’s. Dr Rogers believes in the use of the Gerson Plus therapy which is a nutrition based form of detoxification and healing from within.
www.gersonplus.com

An Oasis of Hope – Playas de Tijuana, Mexico
This is an integrative medical facility specializing in conventional and complementary cancer treatments.
www.oasisofhope.com

Sanoviv Medical Institute – Baja California, Mexico
This is a holistic medical facility offering integrative treatments for numerous chronic or general diseases.
www.sanoviv.com

Health For Humanity – Ecuador
Provides information and services for QHM technology and cancer treatment.
www.cancercuredresearch.com

Farm of Life (Finca de Vida) – Costa Rica
This remote eco-lodge is a natural sanctuary for the exploration of health-fulfilling activities such as yoga, raw food/vegetarian eating, eco-adventures and self-improvement. Farm of Life is a smoke-meat-alcohol-free environment.
www.fincadevida.com Read my article on Finca de Vida!

Pacha Mama – Costa Rica
This retreat offers numerous healing services such as yoga, detoxification, colonic irrigation, reflexology, acupuncture, nutritional consultation, meditation, spiritual teachings, juice fasting, massage and reiki.
www.pachamama.com Read my article on Pachamama!

Ann Wigmore Institute – Puerto Rico
This is an educational health retreat that practices Ann Wigmore’s methods of detoxification and raw-food health restoration.
www.annwigmore.org

Africa

Detox International – South Africa
Detox International provides 7 day holistic detox retreats supported by a team of nutritionists and therapists.
www.detox-international.co.za

Cancure.org
A valuable resource for investigating natural therapy clinics worldwide and considering treatment options.
www.cancure.org

More on Traveling Raw:

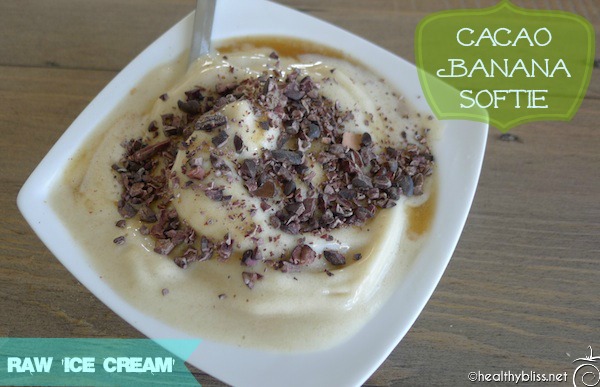
Recipe: Banana Softie with Cinnamon Sauce, A Raw Food Vegan ‘Ice-Cream’

100% Raw Food and Healthy Bliss!

This raw food vegan dessert is a favorite, even amongst cooked-food eaters! The banana makes this dish look and taste creamy, just like real ice cream, but there is no dairy or added sugar as you will soon see. I hope, with this recipe, you can see how much more there is to make with a blender than just smoothies! Personally, I found that my Ninja blender motor wasn’t strong enough to blend frozen bananas. Luckily, I borrowed a KitchenAid blender and used the Puree Button and it worked just fine. When you consider spending more money on an expensive blender like the Vitamix, it’s the high-power motor that makes the difference.

The main ingredient of the Banana Softie is frozen bananas. Organic is best if possible of course!

Buy bananas ripe before freezing

I like to buy organic bananas on sale, just before they are too ripe, and use them for this dish. You can keep a small stockpile of frozen bananas in the freezer ready to make a batch of softie for family and friends. The key to freezing the bananas is 1) peel each banana first and 2) chop into pieces before freezing.

Store frozen bananas peeled and chopped

If you’ve ever tried to freeze a banana whole with the skin on, you would have quickly learned how difficult it is to peel a frozen banana and how much harder it is to put whole frozen bananas in the blender! So, peel, chop and place your frozen banana pieces in a plastic bag or glass container in the freezer. Let freeze solid before making this recipes (at least 24 hours is best).

Banana Softie (100% Raw Vegan Ice Cream) Ingredients:

  • 6 organic bananas (peeled, chopped and frozen)

Banana Softie Sauce/Topping Ingredients:

  • 1/2 tsp organic cinnamon powder
  • 4 Tbsp. Raw Honey or 2 Organic Medjool Dates (pitted)
  • 2 Tbsp. filtered water
  • 1-2 Organic Medjool Dates, chopped for added topping (optional)
  • 2 Tbsp. Raw Cacao Nibs for added topping (optional)

Banana Softie Directions:

The lucky winner of the Vitamix Blender can use their new blender to make this recipe. You can also use a normal blender, but make sure it has a decent motor. For example, a Cuisinart brand should be ok but a Nutri-Bullet may not be able to blend the frozen banana.

Blend, and serve…so easy!

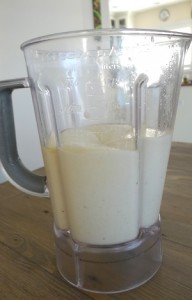
All you need to do is place the frozen chopped banana pieces in the blender and add about 1/4 cup filtered water. (The water just helps to puree the bananas into a creamy blend). If your blender doesn’t blend the bananas, let then sit out for about 10 minutes to thaw a bit and try again. (Of course, with a Vitamix…this will not be a problem!)

Once the bananas are blended in a yummy creamy softie form, you will be ready to serve! Be prepared to serve immediately because the softie will start to melt rather quickly. For that reason, it’s best to make fresh and serve fresh. If necessary, you can make the softie and store in the freezer prior to serving.

In that case, keep the sauce and topping separate and garnish later.

Optional: Cinnamon Sauce and Raw Toppings
The Cinnamon Sauce tastes amazing with Banana Softie! To make the sauce, stir raw honey (or pureed organic Medjool dates), cinnamon and water into a sauce. If your raw honey is quite thick, you can blend the sauce in a mini food processor.  Note: raw honey is not a vegan food; if you’re vegan, use organic Medjool dates in your Cinnamon sauce.

Banana Softie with Cinnamon Sauce

Drizzle the cinnamon sauce on top of each bowl of banana softie and suddenly your raw food dessert is looking very yummy! Additionally, you may add some raw cacao nibs and/or chopped dates on top.

Banana Softie with Chopped Dates

When I worked at the Spa Samui Detox Resort in Koh Samui, Thailand, this dish was very popular and all of the fasters wanted to know how soon after their fast could they eat the Banana Softie! At Spa Samui, they also offered Mango Softie (which is the same dish but uses fresh frozen mango instead). Personally, I never liked the Mango Softie because it was never creamy like the Banana Softie but you can certainly give it a try and decide for yourself. If you want to try Mango Softie, simply peel, chop and freeze about 4-5 mangoes and follow the instructions as per above. You can also experiment by preparing ‘2 scoops’ of ‘ice-cream,’ one banana and one mango.

A ‘normal’ ice-cream will contain added sugar, artificial colors and flavors, sometimes gluten and of course dairy. No wonder people get acne, bad skin, puffiness, port digestion and even acid-reflux after eating it. Choose the raw food vegan gluten-free version and you have no added chemicals. Instead, you get extra the healing power of real food! Cinnamon is known to help regulate blood sugars, bananas are a great source of potassium and mangoes are high in Vitamin C, and several trial studies suggest that polyphenolic anti-oxidant compounds in mango are known to offer protection against breast and colon cancers. See how much fun eating raw food can be! And it’s good for you too!

More Raw Food Desserts:

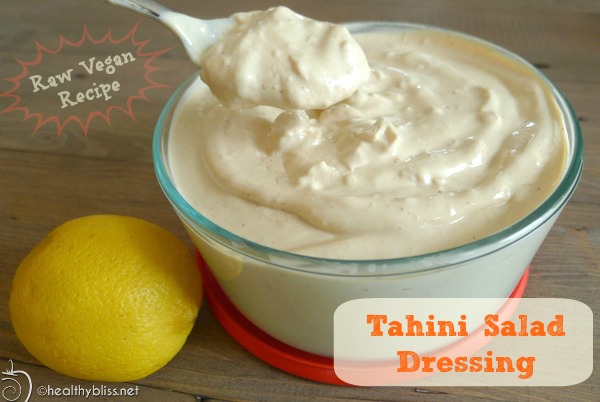
Recipe: Raw Tahini, Garlic and Lemon Salad Dressing or Veggie Dip…and it’s Amazing!

Raw Tahini Salad Dressing is one of my absolute favorites!

This recipe takes less than 10 minutes to make and gives you a great healthy homemade veggie dip or salad dressing to use all week long! I’ve decided to feature an easy-to-blend-and-create recipe this week to show you how many different things you can make in a blender…and not just smoothies!

Ingredients for Tahini Dressing

Raw tahini, or sesame paste (think peanut butter made with sesame seeds instead of peanuts), can be found in most supermarkets and health food stores. I bought the tahini for this blog post at a Greek supermarket and deli, but you can also find it in any type of Mediterreanean or Middle Eastern Supermarket as well.

In the US and North America, people tend to call sesame paste ‘tahini‘ but it the Middle East you will see it called ‘tahina.’ In Israel, there are countless brands of tahina for sale. They even have a sprouted raw tahini sesame paste from Ethiopia which is outstandingly delicious!!

What’s interesting to know is that in Israel, people rarely eat tahini straight from the jar. For them, it’s too thick and it’s not tasty without any spices or fresh lemon juice. It seems to me that in the USA, tahini is under-appreciated and under-utilized because people don’t know the traditional way to prepare it. In the recipe below, I will show you how!

Easy to make and tastes amazing!!

Typically I will use one whole jar of tahina or sesame seed paste to blend up my tahina dressing for the week. Here, I used one 16-oz. (or 454 gram) container of tahina to make a container of 32 oz. (or 950 ml) of dip or salad dressing. Making salads that taste good is a key to raw food success, and there is no faster way to kill a good salad than by adding a store-bought salad dressing full of sugar, preservatives, flavor enhancers (MSG), thickeners and emulsifiers.

I always make my own salad dressing and I am a happier, healthier person for it!

Sesame seeds are a great vegan source of calcium and they’re also naturally high in zinc. Fresh lemon is extremely alkalizing, good for pH health. Cumin is known to aid in digestion. Cayenne pepper is very good for the heart and blood (circulation). Garlic is a natural anti-inflammatory food and a great immune system booster.

*Can’t find tahini or sesame seed paste where you live? You can make it from scratch with organic sesame seeds! Check out the recipe for it here: How to Make Raw Tahini

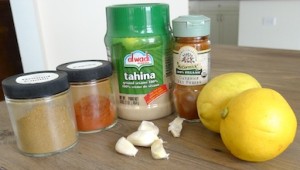
Tahini Salad Dressing/Dip Ingredients:


  • 2 – 3 large garlic cloves (optional)
  • 1 16 oz. container tahini (sesame seed paste)
  • Juice of 2 lemons (freshly squeezed is best)
  • 1 cup water (filtered is best)
  • 1 tsp. cumin powder
  • 1/2 tsp. cayenne pepper
  • 1/2 tsp. paprika (optional)
  • dash sea salt or Himalayan salt (to taste)


Tahini Salad Dressing Directions:

The lucky winner of the Vitamix Blender can use their new blender to make this recipe. For the commoners (like me!), you can use a normal blender. Peel the garlic and put garlic and water in the blender. Blend. Add the entire jar of tahini paste (with the oil which is usually separated on top), spices, fresh lemon juice and salt and blend again. Adjust spices to taste (you may need to add more cumin, salt or cayenne pepper) and blend again. If the result is too thick, add more water…slowly! Start with adding 1/4 cup water, blend and assess. If too thick, add another 1/4 cup water and blend again. The final result should be creamy, but not runny. (Each brand of tahina will give a slightly different thickness so you always have to experiment a little.)

Optional: You can also add 1/2 cup of fresh parsley and blend. Fresh parsley is highly recommended over dried parsley for this recipe (in the Middle East, no one uses dried parsley in tahina!). If you use dried parsley (which I do not recommend simply because fresh parsley tastes 1,000x better), add only 1 Tbsp. of dried parsley. The garlic and paprika are also optional, depending on your taste.

Tip: For garlic, try to find organic garlic which, not only is a normal size like you see in the photo and not GMO-ed gargantuan size, but organic garlic has a nice, mild fresh taste. The gigantic non-organic garlic from China (sold in most supermarkets) has an unnaturally strong taste (perhaps in relation to it’s unnaturally large size!). Choose organic garlic to really enjoy the subtle flavor of this healing food.

Note: The dressing should keep in the fridge for up to 7 days.

How to Eat

In Israel, this salad dressing is on the table with nearly every meal and most often eaten with a classic ‘Israeli Salad’ or ‘Arab Salad,’ consisting of finely chopped cucumber, fresh parsley and tomato. However, you can use it on any raw food salad as a tasty dressing. Try this combo: Peel 3 organic carrots and then grate with a normal size grater into a bowl. Add 1 celery stalk chopped, fresh romaine lettuce chopped, and 1 cucumber peeled and chopped. Mix all ingredients well and drizzle 4 Tbsp. of the Tahini Salad Dressing on top.

Share good health with family & friends!

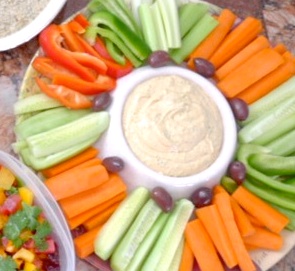
Another option is to serve this as a dip with freshly sliced cucumber and carrot sticks for a delicious 100% raw food gluten-free vegan snack. I recently brought that to a gathering with many cooked foods eaters, and they loved it!

This is certainly a healthier option than the ‘old-style’ spinach dip made with dairy (mucous-forming) and dried soup mix (containing MSG!) served in a bread bowl. Isn’t it time to start spreading the love and showing your family and friends how delicious raw food can be?!

Another popular Middle Eastern dish made with sesame seeds is called Halva, and it’s traditionally made as a dessert with ground sesame seeds and sugar. You can make a delicious raw food version of Halva using raw sesame seeds and raw honey (or agave). Click here to check out my Recipe for Raw Halva or Sesame Balls.

More Raw Food Dressings & Dips:

How to Clean the Lymphatic System & Detox the Skin in 5 Simple Steps

Clean skin from the inside out

All information in this article is for educational purposes only.
It is not for the diagnosis, treatment, prescription or cure of any disease or health condition.

The skin is an organ, and in fact it is the largest organ in the entire body. It is also an eliminative organ, meaning it assists the body in detoxification by pushing out toxins directly through the cells and membrane of the skin. If you do not have a natural, healthy glow, it means that your body inside is overloaded with toxins. Nothing that you try on the outside will give you long-term positive results as long as you continue to hold on to too much toxicity inside.

How does the lymph system affect healthy, clear skin and sparkling eyes?

The lymphatic fluid rests just below the skin; if it is toxic or sluggish (from processed foods, smoking, chemical body products, lack of exercise), the skin simply won’t look good. A healthy glow comes from the inside out. Even the fluid in the eyes is lymphatic fluid. The cleaner your are inside, the brighter and clearer your eyes will be – truly a window to your health!

What happens to the skin when lymphatic drainage becomes sluggish?

If the lymphatic system becomes sluggish, it will try to ‘off-gas’ through the skin. If someone is wearing nylon or ployester clothes or putting chemical creams on their skin, there is nowhere for those toxins to go (imagine wrapping yourself in plastic wrap). So those toxins get re-absorbed. That’s creates a back-log of internal work. This is where a detox can be a good idea to give all the organs a chance to catch up. From there, living a cleaner lifestyle, with natural foods, natural clothes, regular exercise and only natural chemical-free products on the skin (especially deodorant) keeps the lymph and skin happy.

What foods for improve or stimulate the function of the lymphatic system?

Remember, your body is ‘a community’ of organs. A natural whole and pure diet is always best. A simple rule for the skin is this: if you can’t eat it, it shouldn’t be put on the skin. If you have to use something, go for the baby product line (for sunblock or laundry detergent). They will always have less chemicals. A simple rule for lymph is this: Keep the lymph moving with movement (exercise). Drink plenty of water. Avoid foods with chemical coloring, flavoring, sugar replacements and preseratives which all add more internal housework to the body.

What lifestyle habits improve the function of natural lymphatic drainage?

Stretch, walk or swim to help clean the lymph

The lymphatic system is a cirulatory system in the body. It’s cleaning cells and dumping toxins into the blood all the time to keep the body clean. But, unlike the blood, the lymphatic system has no pump. If you don’t move, the lymph doesn’t move. It waits for movement to ‘surf’ from the contraction of muscles. So, in order to keep the lymph moving and clean, you have to move! Exercise is the best for lymphatic. Many people who sit all day long develop a sluggish lymphatic system simply because they do not move! Lymph like gentle exercise, like walking, stretching, swimming or yoga. Go for a walk during lunch, stretch throughout the day and develop a regular exercise routine. Dry skin brushing and wearing natural fiber clothes also allows the skin and lymph to breathe.

To keep your skin clean, you’ve gotta have a clean lymphatic system. You cannot get clear skin from the outside in; it has to happen from the inside out. Every organ in the body affects every other organ in the body. Treat your body as a whole and you will long-term results that last.

5 Steps to Keep your Lymphatic System & Skin Clean:

1. Avoid nylon and polyester clothes.

Opt for all natural fibers that allow the skin to breathe, such as cotton, hemp, wool, or silk (note that silk and wool are not technically ‘vegan’ fabrics).

2. Avoid skin creams and body lotions with chemicals that suffocate the skin.

Choose natural moisturizers such as virgin organic coconut oil. Coconut oil is non-greasy and very affordable when compared to the cost of multiple skin products. In winter months, try cold-pressed virgin organic olive oil. The olive oil is more moisturizing and works well against dry skin in cold months. Remember, if you can’t eat it, it shouldn’t be put on the skin. Be sure to use an aluminum-free deodorant.

3. If you have to choose a chemical product, always choose the baby version.

Buy organic baby sunblock, baby dish detergent, or baby washing detergent. The baby formulas will always have less chemicals and less sodium lauryl ethyl sulfate (SLS), the chemical agent that creates sudsy bubbles in cleaning products.

4. For face, look for products with natural essential oil combinations and fresh herbs for daytime use.

At night, use virgin organic coconut oil before bed as a wonderful non-greasy moisturizer. Argan Oil is a nice option for the face. Be sure to find 100% organic and only Argan Oil (without any other ingredients). I’ve seen 100% certified organic Argan Oil on iherb.com. If it’s your first time buying on iherb, you can receive $5-$10 off your first purchase by using this link: iherb rewards. I use iherb all the time for my fluoride-free toothpaste, organic soap, virgin organic coconut oil, hemp seed, spirulina powder, organic raw apple cider vinegar and so much more. They always have the lowest price!

Ready to get started? Check out my personal shopping cart with all of my favorite skin & body products, all natural and organic of course!

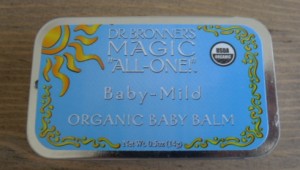
I use Dr. Bronners Balm for the lips

For lips, I recommend an Australian product called Paw Paw ointment – it’s a fermented papaya salve and is wonderful for the lips and also for cuts, scratches, burns and even diaper rash. There is a non-petroleum version available by PhytoCare. If you’re in the USA and looking for something more local, I recommend the Dr. Bronner’s Baby Mild Organic Baby Balm. This stuff works great for lips and is also good for any dry patches of skin.

5. Keep the lymph moving with movement (exercise).

Drink plenty of water. Avoid foods with chemcial coloring, flavoring, sugar replacements and preseratives which all add more internal housework to the body. Practice dry skin brushing. As a treat, book a lymphatic drainage massage every 3 months, and especially at the end of a detox or cleanse to help keep lymph clean.

(Yoga photo from sheknows.)

<strong>More on Skin Cleansing:</strong>

Is it safe to detox while pregnant or breastfeeding?

To detox or not when pregnant?

All information in this article is for educational purposes only.
It is not for the diagnosis, treatment, prescription or cure of any disease or health condition.

This is a question I get asked over and over by new and expecting mothers who are concerned with high-boosting their mineral reserve, detoxifying for a healthy baby and losing weight and getting in shape after giving birth. They think that if they do a detox while pregnant, they may start to feel better and gain energy during their pregnancy and maybe even increase the chance of having a healthier baby. While breastfeeding, many new mothers feel tired and toxic after having gained weight and given birth and hope that a detox will give them a reboot. This an important issue to discuss especially with all the over-the-counter at-home detox programs that people have access to do on their own with no guidance or support. My answer to this question is unequivocally without exception: NO.

It is not safe to detox while pregnant or breastfeeding under any circumstances in any country at any age for any woman.

When a woman is pregnant, her body needs to focus on doing one thing: making a new life. It does not need the distraction of splitting energy between detox (internal housekeeping) and creating new life. Pregnancy is a time for abundance in healthy, clean, vibrant foods and plenty of relaxation and rest. Most detoxes require cleansing supplements, something that should never be done during pregnancy because #1) some supplements are not safe to take while pregnant and #2) detox supplements split the body’s energy between detox and making baby. Additionally, during the process of detox, toxins are temporarily stirred up into the blood before they are broken down and carried out through the kidneys, colon, lungs and skin. Having toxins in the blood is the last thing a pregnant mother would want or need. Some detoxes include taking high amounts of Vitamin C. Vitamin C, when consumed in high doses, can stop the body from making progesterone, a vital hormone in pregnancy. (This is why doctors advise against eating too much pineapple while pregnant. Pineapple is particularly high in Vitamin C.) Please do not consider doing any type of detox while pregnant.

The same goes for breastfeeding for all the reasons listed above. Furthermore, if a woman does a detox while breastfeeding, she can actually still up toxins (including heavy metals) into her breast milk, and unknowingly feed those toxins directly to her newborn. While breastfeeding, the focus should not be on losing weight.

Eat foods rich in nutrients and high in vegan plant-based protein so your body has the power to make the healthiest milk ever for your baby.

When you are finished breastfeeding, you may consider doing a detox. Actually, the best time to do a detox is one year before you get pregnant. Yes – one year! That way, you have plenty of time to do multiple cleanses including kidney, colon, gallstone/liver and heavy metal detoxification and then have ample time to rebuild with a nutrient dense diet to best prepare your body for a safe, clean and healthy pregnancy. If you are thinking of having another baby, the time to start your detox is after you are finished breastfeeding and before you start trying to get pregnant again. Even if you only have 1-3 months, it’s worth it.

If you’re suffering from constipation during your pregnancy, please do not consider doing an enema. The main reasons why I do not recommend enemas during pregnancy are because #1) you can temporarily stir up toxins into the blood while disrupting the fecal matter before it is released, and #2) the inflow of water into the colon can put pressure on the uterus and fetus.

Rather, I suggest you increase high-fiber foods and reduce wheat and white breads as much as possible to relieve constipation due to pregnancy. Think of wheat as concrete in the colon and avoid it especially if you are feeling backed up. Try adding 2 Tbsp of ground flax seed to every meal (either a smoothie, fruit salad, veggie salad or even mix in with cooked veggies). This will significantly increase your fiber intake and should get things moving. If it is ‘too much’ movement, reduce to 2 Tbsp. of ground flax seed at 2 meals daily or even 2 Tbsp. at 1 meal per day (Note that the flax seed must be ground and not whole).

I’ve advised many female clients on preparing their body for pregnancy and also eating the right foods while pregnant and breastfeeding, all with great success. I’ve even seen cases of infertility and IVF with no success until they followed my specialized preparing for pregnancy detox plan. After 3 months, I had one client get pregnant after being on IVF for 8 years. I’ve also helped women to start menstruation again, even after years of not having any cycle. All of these things are possible with the right detox and follow-up diet, but timing is key to make sure it’s safe for baby, mother or mother-to-be.

More on Pregnancy:

After Your Detox: How to Eat, What to Do

Keep Your Results After Your Detox

All information in this article is for educational purposes only.
It is not for the diagnosis, treatment, prescription or cure of any disease or health condition.

How are the stress levels lately? Pretty bad, huh? Have the post-fast fruit platters been replaced with too many fast food fixes and late night binging? Are you secretly dreaming of going back for another detox, fast & cleanse, a chance to rest, recharge, reset and renew? Well you are not alone! If you’ve been to one of my Healthy Habits Detox talks in Koh Samui, you’ll remember my story and know that I have been down that path before myself. Long-term, the real challenge lies in making long-term positive change to your daily habits outside of the fasting times. You don’t have to wait until you can make it back to Thailand, or after the friend’s party, work project, holiday weekend, or after New Year’s to start. Remember, your health is your biggest asset! If you don’t spend money on your food, you will spend it on a doctor! You deserve only the very best in life, so start giving your body the very best too! You can start to make positive change today. Imagine starting your next detox, cleanse or fast being more healthy than when you left last time – you can do it! I believe in me, and I believe in you too!

Remember, the real work starts after your detox. Knowing what to eat and how to continue detoxing will ensure you keep the weight off and stay healthy. Going back to what you did before will only get you back to how you felt before: tired, bloated and toxic. You will have to implement some long-term changes to make sure your post cleanse results stay around for the long-term.

Here are 4 Healthy Habits you can Start Today:

Fresh fruit day, More raw foods


1. One day a week fruit day

Remember my recommendation to make Mondays your ‘Fruitday’? Just by eating one day a week of only fresh fruits, you can give all of your organs a rest and a cleanse, clean out the bowel, have a mini-detox, high-boost on vitamins and re-calibrate your mind for healthy food choices for the week.

If you do one day a week of fruit only for 7 years, you will have eaten a 100% fruit only diet for one full year of your life! Don’t underestimate the power of a one-day cleanse! If you are more advanced, you can consider doing a one day a week juice feast. I recommend green juices, such as cucumber, lemon, ginger, apple, parsley and celery.

2. Eat more raw foods

You don’t have to go 100% raw food vegan in order to reap the benefits of fresh, live, high-enzyme, nutritious raw foods. Try to eat one raw food meal a day, whether it be a yummy fruit salad for breakfast, a delicious salad for lunch or a Green Smoothie for dinner. Watch as your energy levels naturally increase. See how your skin clears, your eyes brighten and you begin to emit a nice, healthy glow. Feel your clothes loosen and enjoy receiving compliments from others who notice the positive difference in you!

3. Forgive, Love & Let Go

Yes, we have to go there too! The spirit needs healing just as much as the physical body. You can eat a perfect 100% raw food, organic diet and still manifest dis-ease if you do not start forgiving, loving and letting go in life! Always remember, nothing can hurt you unless you give it your consent! Happiness has to start within. We cannot depend on others for our happiness. The search for a happy man’s shirt found a happy man who did not own a shirt! Do you get it?? Start loving today! Smile!

4. Live More Natural, Whole & Pure!

This one is easy. What kind of deodorant are you using? Get an aluminum-free version that works. Replace your cleaning products with vinegar and sodium bicarbonate. Buy local and organic when possible. Save money and make your own fresh delicious sprouts and nut milks at home with reusable cotton sprout and nut milk bags! Replace your chemical makeup with healthy, natural, organic alternatives! A good website for chemical-free makeup is earthsbeauty.com.

Replace any old toxic body products with fluoride-free toothpaste, all natural soap and virgin organic coconut oil (a great moisturizer for the skin). I buy all that stuff online. Making better choices for your body products gives you better overall health. When you reduce the amount of ‘retox,’ you can keep the benefits of your detox!

More on Motivation:

Organic Raw Food, Vegan & Detox in Tokyo, Japan

Tokyo is an amazingly clean city and fairly easy to navigate despite the lack of signs in English. We found the Japanese people to be extremely kind in helping with directions, walking us to the correct subway or bus station and even helping to carry our bags. Summer is a great time to visit Japan, especially for enjoying the outdoors, nature, mountains and hot springs. Mt. Fuji is only 1.5 hours from Tokyo and well worth the visit!

Although admittedly everything is very expensive in Japan, it is still possible and relatively easy to eat raw foods in Tokyo. I arrived with bags of raw seeds, goji berries and raisins just to be safe because I did not know what to expect…yet I was pleasantly surprised with the availability of fruits and vegetables and ease of staying raw during my 1-week stay.

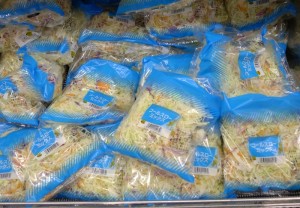
I loved these cabbage bags, at every 7-11 and supermarket!

Our first stop in Tokyo was at the b-sangenaya Hotel at the Sangenya Subway Station. This hotel turned out to be very convenient because directly across the street is a supermarket!

I was very happy to buy fresh peaches and cherries for my first raw food meal in Japan! The peaches were very expensive at 400 JY each ($5 USD) but they were well worth it! I was also happy to find bags of pre-cut cabbage and salad (with carrot and onion) for 100 JY each. I bought 3 small bags to make a nice breakfast salad for only 300 JY (about $4 USD).

Raw Food Talk at the Pink Cow in Tokyo

Our second day in Japan took us to the Pink Cow Restaurant where I hosted a Raw Food brunch and workshop on Detox and Raw foods. The turnout was amazing! We had 50 people and more than half of them were Japanese!

I was so happy to see such an interest in raw foods and healthy living in Japan. The Raw Food brunch consisted of a massive buffet thanks to the efforts of Traci from the Pink Cow.

After the talk, we were taken for a walking tour of the area by one of the participants, Katrine of www.rawfoodhomerecipes.com. What luck we had to turn the corner, literally 500m from the Pink Cow, to stumble upon a Farmer’s Market selling organic fruits and vegetables!! I was so happy!! The Farmer’s Market is every Saturday and Sunday from 10am – 6pm and has a fantastic selection of local vegetables such as sweet corn, tomatoes, purple bell peppers, organic cabbage, elephant garlic, fresh kale and lots of variety of greens for Green Smoothies! They also had huge peaches for 100 JY each, a much better price than 400 JY at the supermarket!

Best displays and lots of free tasting ok!

The vendors all generously offered free samples of everything, and just from the walk through the market, we were full!! There was also a nice selection of raw nuts, seeds, goji berries, dried mulberries, cranberries, sun dried raisins and sun dried tomatoes. I bought a local salt which contains natural sulfur…it’s meant to be very good for healing. The salt can be eaten, added to a bath or used as a face scrub. I highly recommend this market for a chance to meet local farmers of Japan friendly and to learn more about the availability of fresh fruit and vegetables – they are very open to talking about their farming practices and their crops.

Just at the end of the market, we found an Organic Restaurant and Shop called Daylesford Organic. Wow, things just kept getting better and better! I would recommend this restaurant as a nice treat in Tokyo…because it’s expensive, it may not appeal to everyone’s budget. But it’s good to know that there are organic restaurants in Japan! They had a lot of nice organic products as well, including organic pear juice and organic tomato and spinach sauce.

Natural House Aoyama in Tokyo, Japan

Continuing just a few hundred meters down the street, we found the Organic Store called Natural House, a very nice store with a large selection of organic product, products, pre-prepared meals and even a salad and juice bar. Tokyo is a place for healthy, vegan raw food! I was very pleasantly surprised after hearing so many bad things before I arrived. I honestly say it much much easier to eat raw food in Japan than I ever imagined! And the peaches in the summer are amazing!

Delicious Japanese peaches

Here are a few other good travel tips for Japan:

You can get a mobile phone for free at the Narita airport when you arrive to Tokyo. Just look for the signs near the Rental Car and Bus counters. There is one place called Mobal at mobalnarita.com when you can get a Japanese cell phone for free, really! All incoming calls and text messages are free; you will only pay if you send an SMS or make an outgoing call. I used this phone a lot and paid nothing! Simply leave a credit card number as a deposit, and as long as you return the phone and charger at the end of your stay, you will pay nothing! Don’t lose the phone though…the fee is about $1,000 if you lose it! As I said, I had no problem and I highly recommend this service for anyone who needs a phone for a short stay in Tokyo.

Definitely get out of the city to Mt. Fuji and Hakone for the hot springs. The buses are easy to take from Tokyo to Fuji, and from Fuji to Hakone. The nature and scenery outside of Tokyo are really fantastic. Mt. Fuji can only be climbed in the summer from late June – August so try to plan your trip to be there during that time. There is more fresh fruit in season during summertime too, an added bonus for a raw foodist in Japan!

Sunrise from Mt. Fuji

Finally, try not to worry too much about radiation during your stay in Japan. I had a few people make comments to me saying ‘bring a geiger counter’ and such, which I felt was unsympathetic and a bit cruel considering how many Japanese people suffered from the earthquakes there. Since I don’t eat fish anyway, I wasn’t too worried about the food. The Japanese people explained to me that the growing of vegetables moved to other islands in the south after the earthquake, and truth be told, we have no idea how much radiation damage exists all over the entire planet so why live in a state of fear? I advise to take chlorella tablets as a precaution but not to worry too much because what can we really do? I enjoyed every minute of my stay in Japan – the Japanese people are absolutely the kindest and most helpful people and I think everyone should go to Japan and experience the Japanese culture at least once in their lives. I hope to visit again, without the geiger counter and full of love!

At Natural House Aoyama Organic Store

<strong>More on Traveling Raw:</strong>

How to Do a Coffee Enema at Home

And a Normal Water Enema too!

All information in this article is for educational purposes only.
It is not for the diagnosis, treatment, prescription or cure of any disease or health condition.

I’ve had a lot of requests from people asking how to do an enema at home and especially how to do a coffee enema. Even if you never do an enema at home, it’s always good to know how it’s done! Personally I always travel with an enema bag just in case…it’s a great thing to have for any unexpected constipation or even food poisoning while on the road. You can set it up in minutes as long as you have a towel rack to hang the bag from and a toilet of course!

An enema is done while laying on the floor, as opposed to a colema which is done on a colema board. Both use gravity-fed water, but with the colema board, when you feel the urge to release, you can simply ‘let go.’ With an enema, you have to first clamp the line shut, remove the tip, stand up to sit on the toilet, and then release. So there are a few extra steps involved. It seems complicated but it’s actually very easy! The key is to use the clamp and always be ready to stop the flow of water when you feel full.

How to Do a Plain Water Enema

Before doing a coffee enema, you should always do a plain water enema and wash everything out until the water runs clear. Then you are ready for the coffee. If doing a cleanse at home, you should also do at least one water enema per day during the fasting or juicing phase of your cleanse.

1. Prepare the Water.

Buy distilled water in advance and have it ready for your enema. You can heat up some of the water to body temperature. If the water seems too hot to touch, then it is too hot for the enema! In that case, add room temperature water to bring down the temperature of the water.

2. Set up Enema Bag.

There are a few different types of enema bags out there. My favorite is the type that looks like a hot water bottle – it has a wide top to add the water easily and clean afterwards. This type of enema bag comes with 2 different tips – one is smaller and is for rectal insertion. The other is larger with several holes and it is for vaginal insertion. For an enema, you only need the smaller tip. You can screw the tip onto the end of the water line. Then, be sure the clamp is shutting the line so no water can pass through the hose. Next, hang you enema bag on a towel rack. You want to be sure that the tip can still be inserted comfortably. If the bag is hanging too high, you won’t have any extra hose line to be able to insert the tip. The towel rack is usually more stable than trying to hang on a door knob. When you have the bag clipped and hanging, you are ready to add the water. Fill up the bag with distilled water warmed to body temperature. (If the water is cold, the colon will contract and things will not flow out so easily. If the water is too warm, the colon can relax too much and may become a bit ‘floppy’ after the enema. Body temperature keeps things just right.)

3. Prepare towels for Comfort.

Enema at Home Set-Up

Lay one towel flat on the floor and use another for a pillow so you are comfortable during the enema.

4. Place plastic colander in toilet (optional).

This is an option for the hard-core cleansers who like to check out their mucoid plaque or look for worms during their enema. You can have a pair of plastic gloves on hand as well as a pair of chopsticks to thoroughly investigate all. It’s best to buy the colander and chopsticks at a Dollar Store, and clean with hot water and vinegar every day during your cleanse.

5. Use olive oil or coconut oil for lubricant.

Have this ready in the bathroom so when you lie down, you have everything you need.

6. Play some music, turn the phone off and take a final pee.

Before you lie down to start your enema, empty your bladder by having a pee. Having any extra pressure in the bladder can make it harder to retain the water.

7. Fill the hose with water to remove air pocket.

Before you begin, it’s a good idea to clear the enema line from air. If you forget this step, the worst thing that will happen is you will get a big air pocket in your colon and have a nice release of gas with your exit water. When the bag is full of water, take the tip and aim it over the toilet. Release the clamp, allowing the water to flow. As soon as you see the water come out, clamp the line again. Now the line is full of water instead or air and you are ready to begin!

8. Relax!

Yes, your colon is now ready to be a 2-way street.. so don’t think about it being 1-way only! The water helps rinse out old, undigested, fermented, rotting fecal matter. Once that gunk it out of your system, your whole body works better. This is a great thing, so rejoice and be grateful for all the good you are about to do for your body! Take a deep breath and relax…it’s going to be ok!

9. Ready for Insertion!

Enema Clamp

Lie down on the floor, either on your right side or your back, whatever feels more comfortable (I prefer lying on my right side). Gently add some lubricant to the plastic tip and also to the rectal area. Take a breath, and on the exhale, insert the tip just enough (about 1 inch) so it rests comfortably inside the rectum. When you feel comfortable, release the clamp on the water line and let the water start to enter. Keep one hand on the clip so you can stop the flow at any time. As soon as you feel any pressure, stop the flow by clamping the line. Take a few deeps breaths and as you feel the water move deeper inside, release the line again to let more water flow inside. Repeat this as many times as you can. As soon as you feel the urge to release, clamp the line and remove the tip. Then stand up and sit on the toilet, releasing the water into the toilet.

10. Repeat until the Water Runs Clear.

Initially you may find it very difficult to retain any water. This is completely normal. As you become more comfortable with the process and as you go further into your cleanse, you will naturally find that you are able to retain more water before releasing. It is very normal to have to repeat this process a few times before you even go through one full enema bag (between 1 and 2 liters). It is recommended to repeat the process until the water runs clear. This may take 2 or 3 times of filling the enema bag, for a total of 2 to 6 liters of water.

How to Do a Coffee Enema

Before doing a coffee enema, you should always do a plain water enema and wash everything out until the water runs clear. Then you are ready for the coffee. It is absolute imperative that you use 100% certified organic coffee. Do not use anything less! Commercial grade coffee can damage the liver.

A coffee enema is an excellent way to clean the liver, but should only be done when the colon is clear. During a normal cleanse or at the end of a cleanse is a good time to do a coffee enema. Just doing one in the middle of eating a Standard American Diet (SAD) will not have a positive effect on the body. Please do not use this as a “magic pill” to try to clean your liver quickly. You can actually draw toxins into the liver if the colon is toxic, and then you will be doing more harm than good!

1. Prepare the Coffee.

Add 3 Tablespoons of ground organic coffee to 1 quart of distilled water. Let it boil for 3 minutes, then simmer for 20 minutes. Strain and cool until the water is at body temperature.

2. Retain for 12-15 minutes.

Use the same set-up as above, insert the 1 quart (strained) coffee and retain for 12-15 minutes. Lay on the right side during this time. Breathe deeply. Dr. Max Gerson found that all of the caffeine is absorbed from the fluid within 12 minutes.

3. Release.

That’s it! The coffee enema is an easy way to get the liver to dump bile and toxins quickly. It should be done only about 2 times per week during a cleanse, and definitely not any more than that if feeling unwell after the enema. Replenish your electrolytes after a coffee enema by drinking a fresh juice. Carrot, beet and celery juice is especially good after a coffee enema.

Read more information on the liver and liver cleansing here:

Liver Flush Detox Drink – Recipe for a Daily Liver Cleanse

Gallstone Liver Flush – Recipe & Cleanse Info

How to Do a Castor Oil Pack for Liver Cleansing

How to Do Onion Socks for Healing


More on Healing Crisis:

More on pH health:

More on Health Food:

10 Ways to Make Your Raw Food Kitchen Healthier

Create a Healthy Living Space for a Healthy You!

Making a plan for healthy habits has to include a healthy space to make your creations. Your kitchen should be a comfortable clean inviting place. When the energy is good, you feel happier. The food picks up that vibration and actually becomes healthier for you. It’s true!

Take some time this week to get your kitchen ready for all those yummy Green Smoothies and real Healthy Bliss!

1. Clean out your pantry of expired foods.

Old foods have a dead energy. Get rid of them! Check the dates on everything periodically. If there is no date, get rid of it if you have not used it in more than 1 year.

2. Check foods for mold.

Look in any jars or powders in your fridge. If you see mold, get rid of it! Mold can spread through spores in the air; if one food is infected, others will be soon too!


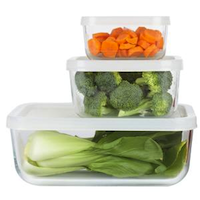
3. Switch to glass containers.

Although glass storage is more expensive than plastic, it’s an investment in your health. Especially when storing salads with vinegar, the plastic can be leached into the food. Store dry goods in glass jars. For glass containers, look for store coupons, buy on sale, or check discount stores.

4. Get sharp knives.

Having a good set of sharp knives makes preparing food so much more enjoyable and easier! Is it time to replace a knife, can it be sharpened? Get your kitchen ready for chopping bliss!

5. Store cutting boards dry.

When you rinse your cutting boards, be sure they are totally dry before putting away. Stacking wet cutting boards makes a breeding ground for bacteria and mold.


6. Create healthy counter space!

Keep your kitchen in order by only keeping healthy essentials on the counter, like a blender or juicer. When those items are looking at you every day, you are much more likely to use them!

7. Clean out the fridge and defrost the freezer.

It’s easy to wipe the refrigerator shelves with white vinegar and baking soda. Old remnants of food on shelves is not only unsanitary and but has a stale energy. Your food should be treated and stored like valuable jewelry, in a beautiful clean container!

8. Play music, make the kitchen fun!

The happier you are when preparing food, the more likely you are to do it again and again. Take time to be grateful, feel happy, appreciate your health, and give thanks to your food while you prepare your creation. Sing out loud, the more fun the better!

9. Decorate with fresh food.

There’s nothing more inviting to a healthy kitchen than a bowl of fresh colorful fruit, a line of tomatoes on the window or a few fresh herbs growing in small containers. As you rotate foods with the season, your kitchen changes too!

10. Get inspired with new recipes & cookbooks!

Clean out any old cookbooks from your unhealthy past and make way for new recipes and inspiration for the New You! Experimenting with raw food salads, smoothies and recipes keeps life interesting. When your food tastes good and is good for you, healthy bliss comes naturally!

If you're ready for juicing, this is the juicer for you!

If you’re ready for juicing, this is the juicer for you!

More on Healthy Living:

Aloe Vera: Nature’s Alternative to Botox!

There are countless new products and procedures out there promoting healthy, age-defying, clear and beautiful skin. You can spend anywhere from $10 to $1,000 or even more for that ‘youthful’ glow. Even women in their 20’s are spending money on Botox, fillers and dermal abrasion procedures to avoid getting wrinkles later in life. It all seems a bit crazy to me, especially when Mother Nature provides an inexpensive, nutrient-filled natural alternative – right in front of our very eyes – Aloe Vera!

All information in this article is for educational purposes only.
It is not for the diagnosis, treatment, prescription or cure of any disease or health condition.

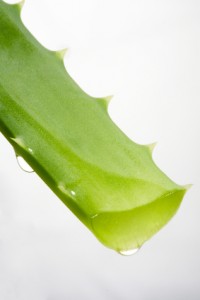
Look for Fresh Aloe Leaf in your local supermarket or organic veggie store

It’s true. Aloe Vera really is Mother Nature’s alternative to Botox. Did you know that ingesting the natural, clear interior gel of the Aloe Vera Leaf can increase the body’s natural collagen production? Rubbing pure Aloe Vera gel on the skin at night provides a natural tightening agent for the skin to keep it fresh and give a ‘natural face lift’ look. Use what nature has provided, and over time you will see and feel the difference for yourself!

Aloe Vera – Cleans from the Inside Out

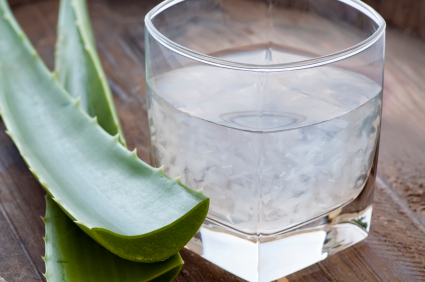
Aloe contains many minerals, amino acids and vitamins and is a natural anti-inflammatory food. It’s known to help with absorption, digestion and elimination for anyone suffering from bowel conditions, especially inflammation of the colon. It can help with constipation and provide a mini daily detox effect when taken on a regular basis. You can easily add the fresh inner gel to a morning smoothie or stir into a juice for a real superfood boost.

Aloe is best eaten and applied when fresh. Try to buy a large Aloe Vera Leaf from your local health food store or gourmet supermarket and store it in the fridge. Every day, cut out a piece of fresh gel about 1 inch x 1 inch. Do not ingest the green skin – you can throw that part away or add it to your compost bin. Take the fresh gel and add it to a fruit smoothie for a delicious and healthy breakfast blend.

Try apple, banana, fresh Aloe Vera, 1 cup water, 2 Tbsp. ground flax seed blended into a fantastic healing drink. Sweet fruits combine well with the Aloe Vera to hide it’s naturally bitter taste.

If you can’t find the fresh Aloe Leaf, look for 100% organic Aloe Vera Juice sold at your local health food store and add 1-2 capfuls to your smoothie. Do not use any normal store-bought aloe vera gel in a tube as there may be added chemicals or other ingredients that are not edible. Fresh is always best. A fresh Aloe Vera Leaf should remain fresh when stored in the fridge for about 2-3 weeks.

Fresh aloe in a smoothie is great for digestion too!

You can also apply the fresh cut inner gel of Aloe Vera directly to your skin for a 100% natural skin cleanser, toner and beautifying treatment. Place on the skin at night before bed or apply for 10 minutes in the morning prior to showering. Combine the Aloe Vera skin treatment with an Aloe Vera smoothie or juice every day and you’ll be investing in good health and great skin from the inside out, naturally!

Where to Buy

If you can’t get fresh aloe vera, then go for the 100% certified organic aloe vera juice, available for sale online.

More on Liver Cleansing:

What are Irradiated Foods? What you don’t know CAN hurt you!

Consumers Beware! This symbol means your food is IRRADIATED!

All information in this article is for educational purposes only.
It is not for the diagnosis, treatment, prescription or cure of any disease or health condition.

The things they do to food these days! Now there’s food irradiation as a form of preserving food. That means zapping it with gamma rays, very much like X-raying food. It’s purpose: to extend the shelf life by killing insects, bacteria and other micro-organisms.

So what’s wrong, you ask, with that? After all, we X-ray ourselves. We don’t turn radioactive. But remember that low radiation is not exactly the same. The doses here are extremely high, up to an equivalent of 300 million chest X-rays.

Don’t you wonder what happens to the food’s cells at that level of radiation?

Food is passed into a shielded room where it is bombarded with gamma radiation from a radioactive source. The dose depends on the type of food:

  • Fruits and vegetables – up to 100,000 rads
  • Poultry – up to 300,000 rads (or 30 million chest X-rays)
  • Spices – up to 3,000,000 rads (or 300 million chest X-rays)


Does it work to preserve food?

Depending on the dose, the rays can kill bacteria that cause food to spoil. But, it can still get reinfected again. Also, some bacteria can’t be killed at lower doses of radiation. Those that survive are free to breed quickly, since they no longer have competitors.

Is Irradiated Food wholesome?

Irradiation destroys most vitamins – especially vitamins A, C, E and thiamine. Fruit juices lose more vitamins than fruits, which lose more than vegetables and grains, which in turn, lose more than meat.

Is Irradiated Food safe?

In irradiation, the chemical structure of food is altered. Unstable molecules or ‘free radicals’ are created that are unlike any created by other types of cooking. These can damage the body cells and promote cancer. They may also cause premature ageing of the skin and body.

Why do Manufacturers love it?

Irradiated foods look fresh even though they may be several months or years old. There’s no way to tell them apart from really fresh food. So, consumers can be easily deceived.

How do you know it’s been Irradiated?

DON’T BUY if you see this!

Look for the deceptively eco-friendly looking symbol for Irradiation on your foods. It has such a ‘clean and green’ healthy look that you might not even notice it! But now you know the truth!

Consumers beware!! This is an important label that you will want to recognize for what it is. If you see it on a package, that food has been IRRADIATED. Consumers should also know that the FDA has said the word “pasteurization” is an acceptable substitute for “irradiation”.

What can you do?

Write to your local politicians, supermarkets and food manufacturers and demand that these Frankenfoods be banned. Do everything in your power to educate others on the importance of eating natural, whole and pure!

Source: the book Danger Foods: A CAP guide to Hidden Dangers in Foods.

<strong>More on Colon Cleansing:</strong>

Raw Food Dessert Recipe: Cacao, Hazelnut & Banana Bliss

Raw Hazelnut Cacao Bliss

This recipe is fast and easy for a delicious raw food dessert. Have you ever tasted a fudgesicle pop? Well, if you freeze this chocolate-like creation, it actually tastes like a fudgesicle! But this is a healthy version, full of anti-oxidants and other nutrients.

Make this tasty gluten-free vegan treat to share with family and friends…they will not even know it’s a raw food! It’s also great for kids, and with this dessert…they are getting valuable nutrients in addition to a great taste.

Raw Food Recipe: Cacao, Hazelnut & Banana Bliss

Ingredients:

  • 1 cup raw hazelnuts, ground (can also use raw almonds)
  • 3 ripe bananas
  • 3 Tbsp. raw cacao powder
  • 1 Tbsp. raw maca powder
  • Water from 1 young green coconut plus coconut flesh (can replace with 1.5 cups cold water + 3 Tbsp. coconut oil)
  • 2 Tbsp. raw honey (optional)
  • 2 Tbsp. raw ginger, grated (optional)
  • 6 raw dried organic apricots, chopped (optional)

Healthy Bliss…yes!

Grind the hazelnuts or almonds with maca and cacao powder. There is no need to soak the nuts. Use a mini-food processor to grind the nuts to a fine powder. (You could also add 1-2 Tbsp. of other superfoods, such as acai powder, pomegranate powder or goji berries.)

In a blender, blend the coconut water and bananas. Add the ground nuts and powders and blend again. Add the raw honey and/or fresh ginger (optional) and blend again.

Pour mixture into a container. Top with chopped hazelnuts or almonds and chopped apricots. Place in freezer and let sit for 6-8 hours. Serve with love, and enjoy!

More on Superfoods: