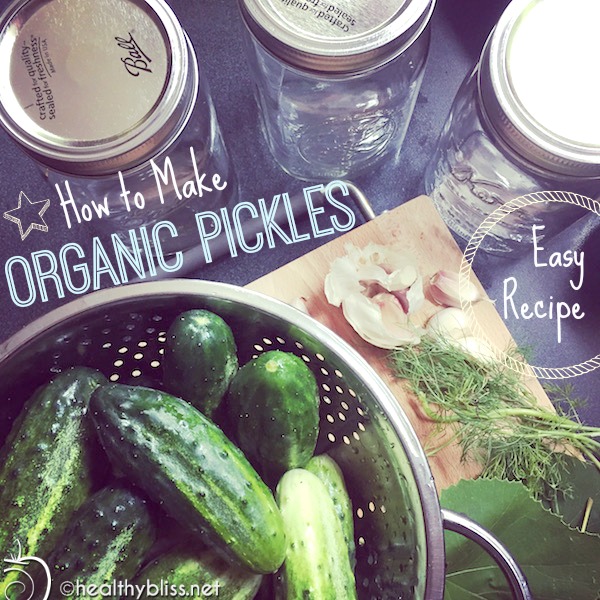
Easy Recipe: Make organic pickles at home!
Are you ready to make your own fermented foods at home? (Answer: Yes!) Pickling cucumbers is a great start to build up your confidence with fermentation. And who doesn’t love a crisp tasty pickle on a hot summer day? You can have your pickles ready to eat in as little as 7 days with the easy recipe below.
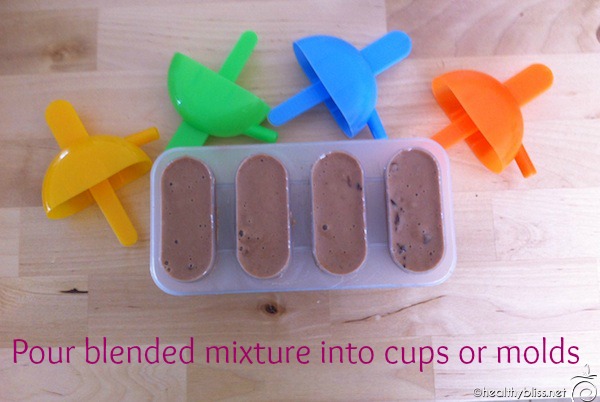
Use this fast and easy recipe to make delicious pickles at home
Health benefits of Fermented Foods
For optimal digestive health, we need to get good bacteria in the gut on a regular basis. Antibiotics destroy all the bacteria in our system, both good and bad. Over time, this can lead to more imbalance in digestion function, absorption and elimination. Some experts even say that food allergies, autism and ADHD may be related to an imbalance of bacteria in the colon. Certainly many digestive diseases like colitis, diverticulitis and Crohn’s disease are caused in part by lack of good bacteria in the gut. Having the right balance of good bacteria helps to strengthen immune system, improve digestive health and long-term, can even prevent dis-ease. Probiotic, or good bacteria, literally means “for life.”
You may think that fermented foods are only made with yeast (like beer or wine), but there are other cultures used for fermentation. Other types of natural bacteria are used as well as SCOBY’s (Symbiotic Culture of Bacteria and Yeast). With pickles, the natural bacteria on the skin of the cucumber itself is what’s used to start the “lacto fermentation” process.
Pickles are perfect to try if you’ve never done any type of fermentation before. You get relatively fast results (in 7 days), unlike kombucha, for example, that can take a few weeks. And there isn’t a lot of hard work involved or checking required, like in making raw sauerkraut. You should see bubbles rising in the pickle jars when you flip them every day, and when you eventually open the jar to eat them, the jar should make a “pop.” Then you know you’ve done everything correctly and can enjoy the fruits of your fermentation labor. Scroll down to get the recipe below.
Homemade pickles have no food additives!
There are other great reasons to eat homemade pickles instead of store-bought, besides the obvious better taste. Commercially sold pickles are pasteurized, which means all those beneficial natural probiotics are destroyed. Homemade pickles keep all the good bacteria intact, making for good gut health when eaten. A healthy microbiome is the basis for a strong and healthy immune system.
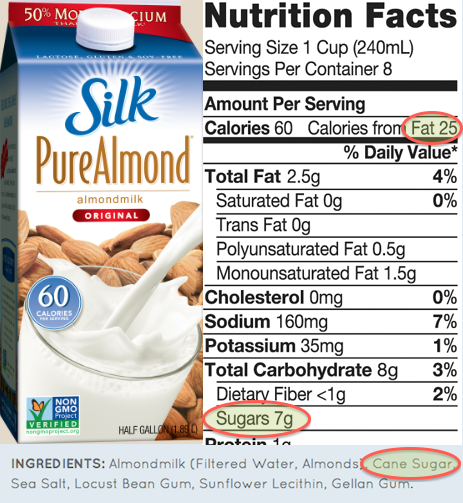
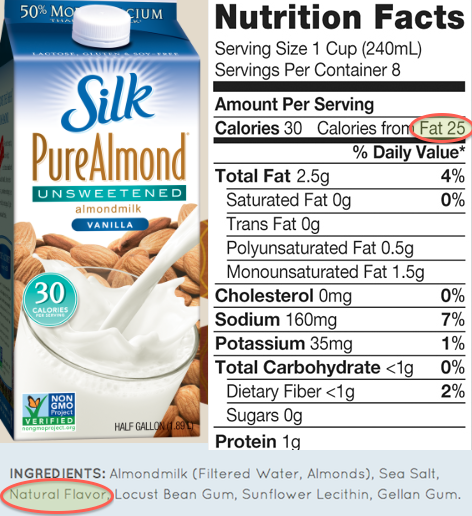
Store-bought pickles can also contain nasty food additives, the worst offender being Yellow #5. Banned in many countries (including all of Europe) since it was shown to be a carcinogen, Yellow #5, or tartrazine, is a coal-tar derivative. It is currently still allowed in foods in the USA. Yellow #5 is frequently used in your favorite brands of pickles for added color to make the pickles look brighter and fresher. Most store-bought pickles also contain preservatives, the most common one being sodium benzoate (not good).
Examples of Yellow #5 in pickles:
Vlasic: Hamburger Dill Chips Pickles – Cucumbers, Water, Distilled Vinegar, Salt, Sodium Benzoate (Preservatives), Calcium Chloride, Natural Flavor, Polysorbate 80, Yellow 5. “Great taste & crunch. Classic dill taste.” (No thanks!)
Vlasic Bread & Butter Spears No Sugar Added Pickles – Cucumbers, Water, Distilled Vinegar, Salt, Spice, Calcium Chloride, Sucralose, Yellow 5. “No sugar added!” (But you kept the carcinogens, great work.)
Mt. Olive Sweet Gherkins No Sugar Added Pickles – Cucumbers, Water, Vinegar, Salt, Calcium Chloride, 0.1% Sodium Benzoate (Preservative), Alum, Sucralose (Splenda Brand), Natural Flavors, Xanthan Gum, Polysorbate 80, & Yellow 5. “Mt. Olive Pickles are Picklicious!” (Don’t think so…)
Heinz Dill Spear Pickles – Fresh cucumbers, water, distilled white vinegar, salt, sodium benzoate, garlic extract, gum acacia, calcium chloride, natural flavoring, polysorbate 80, fd&c yellow 5. “Classic dill taste and crunch Heinz pickles are 100% fat free, Gluten free.” (But they contain chemical crap, hmmm…)
Organic brands of pickles are often no better. I’ve seen xantham gum, natural flavors, spices and agave syrup…all of which are suspect ingredients that I avoid as much as possible.
The bottom line is this: YOU deserve the very best in life and you are worth having only the very best ingredients in your food. Taking the time to make your own food is one of the best investments in yourself, your health and your family’s health.
High-five some hashtags to health!! #homemade #homegrown #farmtotable #organic #cleanfood #cleaneating
Choosing organic ingredients
The best part about making cucumbers at home is that you can use all 100% certified organic and whole food ingredients. Look for smaller sized pickling cucumbers at your local farmer’s market. You can also grow your own pickling cucumbers in your backyard garden at home – they’re actually very easy to grow! Choose fresh organic dill. And definitely use organic garlic. (Non-organic garlic is mostly all grown in China, so the quality is a big unknown. But I find that non-organic garlic has a too strong and overpowering taste; whereas organic garlic has a soft yet flavorful and more delicate taste. Organic garlic also doesn’t leave a bad taste in your mouth or a bad smell on your skin.)
The water you add to your pickle jars should not contain any chlorine, because chlorine can stop the natural fermentation process. The best option is to use natural spring water or clean well water. If you are using tap water, then be sure to pour your water into a big pot or glass bowl and let it sit out on the counter overnight before using. This should off-gas the chlorine so it’s no longer in the water by the next morning. (If you’ve ever had pet fish, then you’re familiar with doing this when changing their tank water.)
Remember to cut off the blossom ends!
When you’re pickling cucumbers yourself, you must cut off the blossom ends. There’s an enzyme in the blossom that can make the pickle soft and unsafe to eat. The blossom end also tastes bitter when you eat a raw cucumber. That bitter taste can make an entire juice or smoothie taste bitter too, so it’s generally just a good practice to always cut off about 1/16-inch on the blossom end of all your cucumbers. In fermentation, cutting the blossom ends will help your pickles get more crisp and crunchy.
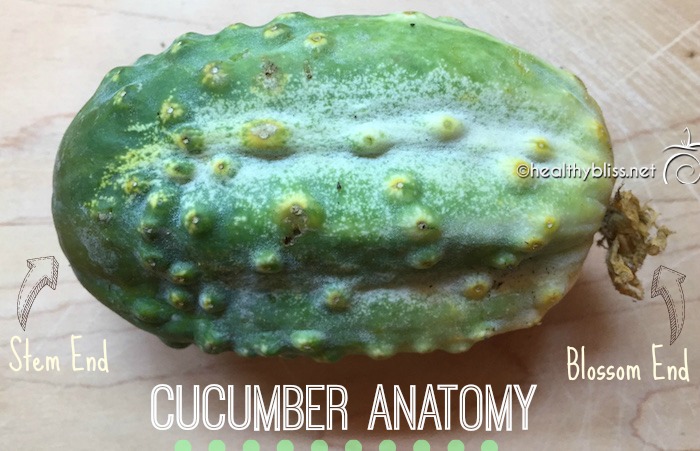
Every cucumber has 2 ends: A Blossom end and a Stem end
The blossom end of the cucumber is the end that grew the flower. The opposite side is where you will find the stem that connected the cucumber to the vine. Sometimes it’s easier to identify the stem end first. Then, you know that the other side is the blossom end.
Which end is the blossom end of the cucumber? To identify the blossom end, check both sides of your cucumber.
The picture below shows the stem end of the cucumbers. Do you see the smooth, indented dot? That’s where the cucumber was picked off the stem.
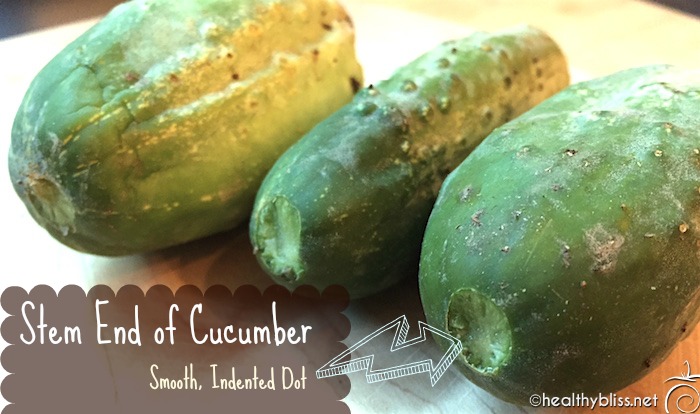
The stem end has a smooth, indented dot
The next picture shows the blossom end of the cucumbers. Even though the flower is gone, you can see that there is no indentation. This is the side that you want to cut about 1/16-inch off.

Note there is no indentation in the Blossom end of the cucumber
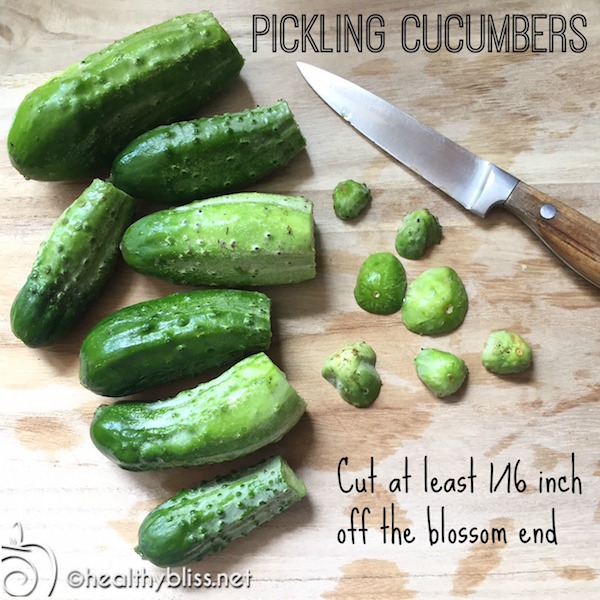
Don’t forget to cut those blossom ends for a crunchy, crispy pickle
Recipe for Organic Pickles
With this recipe, the pickles take 7 days to ferment and then you’ve got the best tastiest pickles ever! No sugar, no honey, no preservatives and no cancer-causing Yellow #5. Oh yeah, and these are 100% organic farm-to-table and made with love!
Pickling Ingredients
- Pickling cucumbers (approx. 6-8 small cucumbers needed for each jar)
- 1 1/2 cups (or 360ml) filtered water
- 1/2 cup (or 120ml) organic raw apple cider vinegar
- 1 tsp. – 1 Tbsp. fine Himalayan salt (as desired)
- 1/2 tsp. organic crushed red pepper flakes
- 1/4 tsp. organic mustard seeds
- 1/2 tsp. organic back peppercorns
- 1 sprig fresh organic dill
- 2 organic garlic cloves (peeled)
- 2 organic fresh grape leaves* (optional)
You can buy the organic dried ingredients listed above on iherb.comAlso will need:- Wide mouth clean Mason jars with canning lids
– 1 permanent marker
You can buy Mason jars plus organic raw apple cider vinegar on amazon.com
Pickling Instructions
1. In a glass bowl, mix 1/2 cup organic raw apple cider vinegar + 1.5 cups water.
Add peppercorns, red pepper flakes, mustard seed, and up to 1T Himalayan salt.
2. Rinse your cucumbers but don’t scrub them. You want them to ferment from natural bacteria in the skins. Make sure you cut 1/16-inch from the blossom ends of each cucumber, then slice the cucumbers in spears. You want to keep the skins intact (do NOT peel the cucumbers), so the good bacteria in the skins can kick off the lacto-fermentation process.
3. Add 2 organic garlic cloves, fresh dill, and 1 grape leaf to the bottom of the Mason jar. Stack in chopped cucs and pack tightly. Add liquid and spices. Add another grape leaf to the top before closing. Secure the lid tight by hand. Write the date on the lid with a permanent marker.
4. Place the jar on a tray or plate on a shelf or counter-top. Flip the jar once daily for 7 days. Sometimes liquid may seep out of the jar, which is why having a tray or plate underneath is a good idea. You should see small bubbles rising in the pickle juice when you flip the jar. And that’s the fermentation happening right there!
5. After one week, put the jar in the fridge. Now, you can open, eat and enjoy!
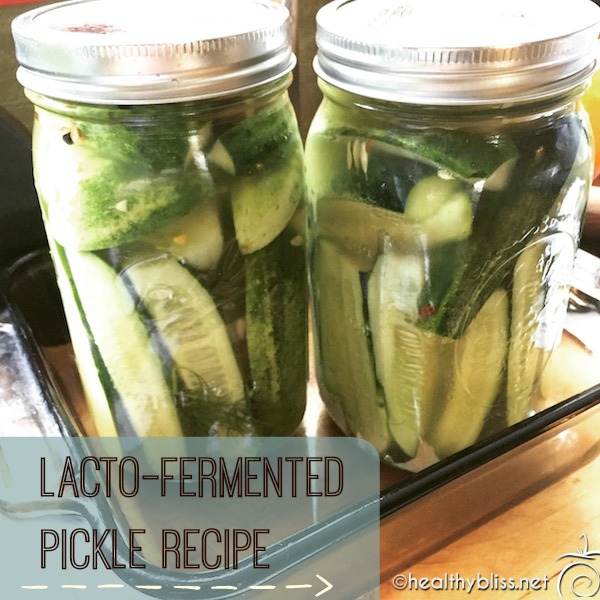
Store pickles in a tray or glass container to prevent spillage during 7 days of flipping once daily
*Fresh grapes leaves are recommended because they’re supposed to help keep the pickles more crisp and crunchy. I don’t know if they are totally necessary or not, but because we have plenty of wild organic muscadine grape vines growing all over our land, it’s no problem for me to pick a few leaves and add them to each jar. Sometimes in summer, you can find fresh grapes leaves for sale at local farmer markets. If you don’t have access to fresh grape leaves, don’t be discouraged. You can still make this recipe without them!
Homemade Pickle Eat-by Date
Using the above recipe, there is no canning or heating required. That’s nice because it keeps the cucs as a raw food, with all the enzymes intact. But, because they are not totally sealed the way canning or heating will do, these pickles should be eaten with 3 months of making them. Just keep that in mind if you give them to family or friends. After 3 months the pickles may turn soft or watery. If you see that, then it’s best to toss them in the compost bin. Writing the date on the lid of each jar helps to know how long to keep them.


My Pickle Detox/Cleanse
Last summer, we had so many cucumbers from our organic veggie garden that I was making 2 jars of pickles per day! By mid-August, we were up to our ears in pickles and the fridge was almost full. I had been planning to do a 7-10 day green juice fast as a nice transition from the end of summer into fall. But when I looked at all the pickles, I said to my husband, “Why don’t we just do a pickle detox and eat only organic pickles for 10 days?” So we did!
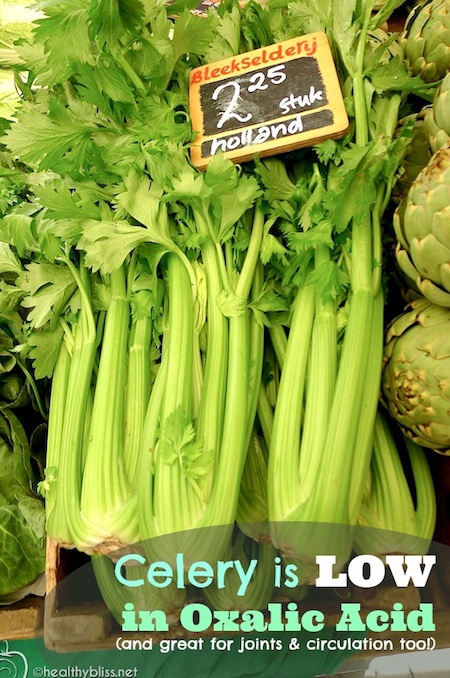
On average, we each ate about 1.5 jars of pickles per day and we drank all the pickle juice too. We also drank plenty of water in between. It was totally unplanned and un-researched. But it turned out great. We both felt energized. Our guts got a major boost of probiotics from the lacto fermentation and the organic raw apple cider vinegar. We had a mini-parasite cleanse from eating so many fermented garlic cloves. The pickles were cold and refreshing during the hot summer days. We had high energy and slept great. The was no juicer to clean! And we used organic clean food fresh from our garden. This year, we may do a 3-day pickle cleanse and go into green juices after that. I’ve got plenty of organic dandelion, celery and parsley that I’d love to use in juices or smoothies so we’ll see….!
For more on how to do a detox at home or how to navigate through your detox symptoms and start feeling great, book a personalized health consult with me via Skype.
How to Book Your Health & Nutritional Consultation:
1. Take photos of your eyes with a smart phone or digital camera.
2. Email the photos to me for approval.
3. We schedule a time to meet via phone or Skype!