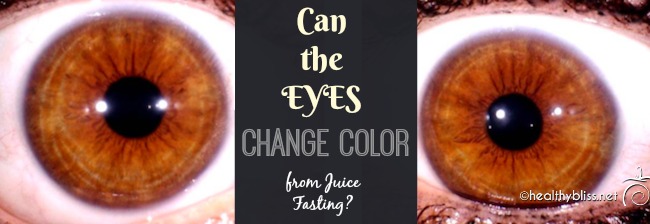
Can your eyes change colors on a juice fast?

This is a question that I’ve been asked a lot over the years: “Can my eyes change colors from doing a detox, juice fast, master cleanse or even from becoming vegan/vegetarian?”

The other question that a lot of people have is: “Should my eyes change colors if I am doing a lot of detox, and if they are not changing, does that mean the cleanse or master fast isn’t working?”

All information in this article is for educational purposes only. 
It is not for the diagnosis, treatment, prescription or cure of any disease or health condition. 

Iridology and Detox/Fasting/Cleansing

First, let me address the first question; that is, can the eyes change? The short answer is: Yes. (The long answer is: No.) Keep reading to find out why!

What can happen in certain eye colors is that layers of coloration can dissipate after the body gets cleaner, whether it’s from a detox or positive change in diet. The most common color changes you may experience are:

  • Green eye turning blue
  • Grey eye turning blue
  • Brown eye turning green

Let me explain each one.

1. Green eye turning blue. The green hue usually occurs from a buildup of uric acid in the body. In Iridology, we would call this a “uric acid subtype by color.” During cleansing or a significant change in diet, old, accumulated uric acid waste may be released through the kidneys and skin. Often times this person had a history of skin problems before. The skin is sometimes called the “3rd kidney,” because when the kidneys are overworked, they will often give their excess work to the skin. The real problem behind the scenes is the kidneys and poor elimination of metabolic wastes. Once the uric acid is released, the yellow hue on the eye may lessen, making a green eye appear more blue in color. (It was always a blue eye actually, which is why the long answer is: No. More on that below….)

2.  Grey eye turning blue. A grey eye may have an over acid condition in the body. In Iridology, we would call this an “over acid subtype by color.” From a distance, the eye looks grey but when you look up close, you can see more white fibers on top of the blue fibers. This may indicate an imbalance of pH in the body. Usually it comes from too many acid-forming foods in the diet (such as coffee, wheat, refined sugar, processed foods), and not enough alkaline-forming foods (fresh fruits and vegetables). Prescription medication can also make the body acidic. A chronic over-acid condition in the body creates a tendency to be more stiff in the joints and a higher risk for a weakened immune system. Many people will suffer from chronic acid reflux or GERD for years, not knowing that the acid problem they have is actually a huge red warning flag for their health. The body is trying to expel the excess acid waste on its own! Eventually you may be more likely to have another health problem down the road, whether it be arthritis, gastritis, diverticulitis, auto-immune disease or even cancer. When a person switches to an alkaline diet (more fruits and vegetables) or does any type of detox that flushes out acid waste, those white fibers in the eyes may start to fade. The end result is that the blue fibers underneath start showing more, and the eye appears to have changed in color, from grey to blue.

3.  Brown eye turning green. This is probably the most profound change you may see, and that’s a brown eye changing color to green, or even in some cases blue. How is it even possible? The “brown” eye is a “mixed eye color” in Iridology, or a Biliary constitution. It’s not actually a true brown eye. While from a distance it can appear more brown in color, when you look up close you will see yellow, orange, brown and sometimes even blue fibers in the eye. In a true brown eye, you will see only brown up close. The “mixed eye” is what I call a “mood ring eye” or a “cat eye.” It’s very changeable in color, depending on the lighting and background colors. Different conditions in lighting may pick up different colors in the eye, making it appear more or less yellow, orange, etc. My clients with this eye color will sometimes tell me they have a “honey colored eye.” During the process of cleansing, as the kidneys strengthen and the overall toxicity lessens, these darker colors may start to break up in the eye. The yellow and blue fibers remaining may make the eye appear green. In some cases, the yellow fibers may also lessen in color, leaving more blue fibers and giving the look of a blue eye.

You may be wondering, “Why is the long answer “No”?” In Iridology, there is no such thing as a green eye, a grey eye or an amber, light brown or honey-colored eye. There are only 2 natural eye colors: blue (Lymphatic constitution) and true brown (Hematogenic constitution). Those honey eyes are known are the “mixed eye” color, or Biliary constitution. Biliary eyes can also be brown, darker brown, green or orange in color. (Note: it’s not always easy to identify the difference between a Lymphatic and Biliary person and always better to consult with a Certified Iridologist.) In Iridology, a “green eye” is a blue eye with a yellow hue (it could be uric acid but may also be other things as well/uric acid is the most common). The “grey eye” is a blue eye that may have toxicity in the colon or an over-acid subtype by color (it may also be other things as well). A “brown eye” may be a blue eye with several other subtypes by structure or color, making the eye appear brown in color from a distance. So, you can see how the eyes don’t really change in color after all; they just start showing their original, dominant color more. Of course, healing occurred still, and that’s what is most important!

As an experienced Iridologist, I can tell you many stories about eyes I’ve seen change over the years and health conditions that improved for people after fasting. Could it just be a coincidence? Maybe or maybe not!

  • Stomach enzymes may improve
  • Overall pH can may more alkaline
  • Uric acid may be released
  • Skin may show healing
  • Lymphatic system may clear
  • Blood may become cleaner and more active (more “chi energy in the body”)
  • Kidneys may strengthen
  • Colon may clear toxins/mucous
  • Liver may improve
  • Layers of toxic accumulation may release
  • Stress and old tension may be released
  • Even molecules of emotion may release!

Note: Iridology does NOT diagnose disease.

Many changes that may appear in the eye are too subtle for an untrained eye to see. Usually it will take at least 10 days of cleansing (and preferably more, up to 21 days is better) to see real changes in the iris. Don’t try to identify markers yourself, unless you are working with a qualified Iridologist. The reason why is that you may not catch all the important points to consider, and you may not understand how certain markers affect other markers in the eye. And of course, you probably won’t know which things should change first and which marks may take longer to change, if at all. That can set you up for unnecessary disappointment and/or unrealistic expectations in your healing.

That leads me to the final question: “Should my eyes change colors if I am doing a lot of detox, and if they are not changing, does that mean the cleanse or master fast isn’t working?”

Not everyone is going to experience a dramatic eye color change with their healing journey. That said, an Iridologist should be able to see some positive change still, even if it’s not a full change in eye color. Some markings in Iridology are inherent, meaning they will not change. Most important is to pay attention to how you feel and what your body is showing you. Are your energy levels better, has your sleep improved, are your eyes brighter in the whites (or sclera), is your mind sharper, has your body odor lessened, has your elimination improved? Are you feeling happier and more at peace with yourself? If you’ve answered yes to most of those questions, then your detox program has worked and you should consider it a success, regardless of your eye color!

One more important point, not to be underestimated. There are 2 parts to healing, don’t forget: 1/2 is elimination and the other 1/2 is rebuilding. Too often people get locked into the detox-detox-detox phase and they forget to stop and rebuild. Too much elimination leads to a low vitamin, mineral and alkaline reserve. Other people swing back and forth from detox to retox. And the retox never involves clean eating or a consistently healthy diet. That can set a person up for deficiencies too. Those deficiencies will show up in the eyes. That person may expect their eyes to be perfect in an Iridology reading because they’ve done so much fasting, but I will see right away that the body is out of balance still. As the saying goes, “The eyes never lie.” In all my years of working with Iridology, I can definitely say that is very true!

Remember: Balance is the key to success in life. Good luck and happy detoxing!


For more on how to do a detox at home, plan a successful post-detox or to get your Iridology reading, book a personalized health consult with me via Skype.

How to Book Your Health & Nutritional Consultation:

1. Take photos of your eyes with a smart phone or digital camera.
2. Email the photos to me for approval.
3. We schedule a time to meet via phone or Skype!


More on Gut Health:

More on Motivation:

Easy Recipe: Make organic pickles at home!

Are you ready to make your own fermented foods at home? (Answer: Yes!) Pickling cucumbers is a great start to build up your confidence with fermentation. And who doesn’t love a crisp tasty pickle on a hot summer day? You can have your pickles ready to eat in as little as 7 days with the easy recipe below.

Use this fast and easy recipe to make delicious pickles at home

Health benefits of Fermented Foods

For optimal digestive health, we need to get good bacteria in the gut on a regular basis. Antibiotics destroy all the bacteria in our system, both good and bad. Over time, this can lead to more imbalance in digestion function, absorption and elimination. Some experts even say that food allergies, autism and ADHD may be related to an imbalance of bacteria in the colon. Certainly many digestive diseases like colitis, diverticulitis and Crohn’s disease are caused in part by lack of good bacteria in the gut. Having the right balance of good bacteria helps to strengthen immune system, improve digestive health and long-term, can even prevent dis-ease. Probiotic, or good bacteria, literally means “for life.”

You may think that fermented foods are only made with yeast (like beer or wine), but there are other cultures used for fermentation. Other types of natural bacteria are used as well as SCOBY’s (Symbiotic Culture of Bacteria and Yeast). With pickles, the natural bacteria on the skin of the cucumber itself is what’s used to start the “lacto fermentation” process.

Pickles are perfect to try if you’ve never done any type of fermentation before. You get relatively fast results (in 7 days), unlike kombucha, for example, that can take a few weeks. And there isn’t a lot of hard work involved or checking required, like in making raw sauerkraut. You should see bubbles rising in the pickle jars when you flip them every day, and when you eventually open the jar to eat them, the jar should make a “pop.” Then you know you’ve done everything correctly and can enjoy the fruits of your fermentation labor. Scroll down to get the recipe below.

Homemade pickles have no food additives!

There are other great reasons to eat homemade pickles instead of store-bought, besides the obvious better taste. Commercially sold pickles are pasteurized, which means all those beneficial natural probiotics are destroyed. Homemade pickles keep all the good bacteria intact, making for good gut health when eaten. A healthy microbiome is the basis for a strong and healthy immune system.

Store-bought pickles can also contain nasty food additives, the worst offender being Yellow #5. Banned in many countries (including all of Europe) since it was shown to be a carcinogen, Yellow #5, or tartrazine, is a coal-tar derivative. It is currently still allowed in foods in the USA. Yellow #5 is frequently used in your favorite brands of pickles for added color to make the pickles look brighter and fresher. Most store-bought pickles also contain preservatives, the most common one being sodium benzoate (not good).

Examples of Yellow #5 in pickles:

Vlasic: Hamburger Dill Chips Pickles – Cucumbers, Water, Distilled Vinegar, Salt, Sodium Benzoate (Preservatives), Calcium Chloride, Natural Flavor, Polysorbate 80, Yellow 5. “Great taste & crunch. Classic dill taste.” (No thanks!)

Vlasic Bread & Butter Spears No Sugar Added Pickles – Cucumbers, Water, Distilled Vinegar, Salt, Spice, Calcium Chloride, Sucralose, Yellow 5. “No sugar added!” (But you kept the carcinogens, great work.)

Mt. Olive Sweet Gherkins No Sugar Added Pickles – Cucumbers, Water, Vinegar, Salt, Calcium Chloride, 0.1% Sodium Benzoate (Preservative), Alum, Sucralose (Splenda Brand), Natural Flavors, Xanthan Gum, Polysorbate 80, & Yellow 5. “Mt. Olive Pickles are Picklicious!” (Don’t think so…)

Heinz Dill Spear Pickles – Fresh cucumbers, water, distilled white vinegar, salt, sodium benzoate, garlic extract, gum acacia, calcium chloride, natural flavoring, polysorbate 80, fd&c yellow 5. “Classic dill taste and crunch Heinz pickles are 100% fat free, Gluten free.” (But they contain chemical crap, hmmm…)

Organic brands of pickles are often no better. I’ve seen xantham gum, natural flavors, spices and agave syrup…all of which are suspect ingredients that I avoid as much as possible.

The bottom line is this: YOU deserve the very best in life and you are worth having only the very best ingredients in your food. Taking the time to make your own food is one of the best investments in yourself, your health and your family’s health.

High-five some hashtags to health!! #homemade #homegrown #farmtotable #organic #cleanfood #cleaneating

Choosing organic ingredients

The best part about making cucumbers at home is that you can use all 100% certified organic and whole food ingredients. Look for smaller sized pickling cucumbers at your local farmer’s market. You can also grow your own pickling cucumbers in your backyard garden at home – they’re actually very easy to grow! Choose fresh organic dill. And definitely use organic garlic. (Non-organic garlic is mostly all grown in China, so the quality is a big unknown. But I find that non-organic garlic has a too strong and overpowering taste; whereas organic garlic has a soft yet flavorful and more delicate taste. Organic garlic also doesn’t leave a bad taste in your mouth or a bad smell on your skin.)

The water you add to your pickle jars should not contain any chlorine, because chlorine can stop the natural fermentation process. The best option is to use natural spring water or clean well water. If you are using tap water, then be sure to pour your water into a big pot or glass bowl and let it sit out on the counter overnight before using. This should off-gas the chlorine so it’s no longer in the water by the next morning. (If you’ve ever had pet fish, then you’re familiar with doing this when changing their tank water.)

Remember to cut off the blossom ends!

When you’re pickling cucumbers yourself, you must cut off the blossom ends. There’s an enzyme in the blossom that can make the pickle soft and unsafe to eat. The blossom end also tastes bitter when you eat a raw cucumber. That bitter taste can make an entire juice or smoothie taste bitter too, so it’s generally just a good practice to always cut off about 1/16-inch on the blossom end of all your cucumbers. In fermentation, cutting the blossom ends will help your pickles get more crisp and crunchy.

Every cucumber has 2 ends: A Blossom end and a Stem end

The blossom end of the cucumber is the end that grew the flower. The opposite side is where you will find the stem that connected the cucumber to the vine. Sometimes it’s easier to identify the stem end first. Then, you know that the other side is the blossom end.

Which end is the blossom end of the cucumber? To identify the blossom end, check both sides of your cucumber.

The picture below shows the stem end of the cucumbers. Do you see the smooth, indented dot? That’s where the cucumber was picked off the stem.

The stem end has a smooth, indented dot

The next picture shows the blossom end of the cucumbers. Even though the flower is gone, you can see that there is no indentation. This is the side that you want to cut about 1/16-inch off.

Note there is no indentation in the Blossom end of the cucumber

Don’t forget to cut those blossom ends for a crunchy, crispy pickle

Recipe for Organic Pickles

With this recipe, the pickles take 7 days to ferment and then you’ve got the best tastiest pickles ever! No sugar, no honey, no preservatives and no cancer-causing Yellow #5. Oh yeah, and these are 100% organic farm-to-table and made with love!

Pickling Ingredients

  • Pickling cucumbers (approx. 6-8 small cucumbers needed for each jar)
  • 1 1/2 cups (or 360ml) filtered water
  • 1/2 cup (or 120ml) organic raw apple cider vinegar
  • 1 tsp. – 1 Tbsp. fine Himalayan salt (as desired)
  • 1/2 tsp. organic crushed red pepper flakes
  • 1/4 tsp. organic mustard seeds
  • 1/2 tsp. organic back peppercorns
  • 1 sprig fresh organic dill
  • 2 organic garlic cloves (peeled)
  • 2 organic fresh grape leaves* (optional)
    You can buy the organic dried ingredients listed above on iherb.comAlso will need:- Wide mouth clean Mason jars with canning lids
    – 1 permanent marker
    You can buy Mason jars plus organic raw apple cider vinegar on amazon.com

Pickling Instructions

1. In a glass bowl, mix 1/2 cup organic raw apple cider vinegar + 1.5 cups water.
Add peppercorns, red pepper flakes, mustard seed, and up to 1T Himalayan salt.

2. Rinse your cucumbers but don’t scrub them. You want them to ferment from natural bacteria in the skins. Make sure you cut 1/16-inch from the blossom ends of each cucumber, then slice the cucumbers in spears. You want to keep the skins intact (do NOT peel the cucumbers), so the good bacteria in the skins can kick off the lacto-fermentation process.

3. Add 2 organic garlic cloves, fresh dill, and 1 grape leaf to the bottom of the Mason jar. Stack in chopped cucs and pack tightly. Add liquid and spices. Add another grape leaf to the top before closing. Secure the lid tight by hand. Write the date on the lid with a permanent marker.

4. Place the jar on a tray or plate on a shelf or counter-top. Flip the jar once daily for 7 days. Sometimes liquid may seep out of the jar, which is why having a tray or plate underneath is a good idea. You should see small bubbles rising in the pickle juice when you flip the jar. And that’s the fermentation happening right there!

5. After one week, put the jar in the fridge. Now, you can open, eat and enjoy!

Store pickles in a tray or glass container to prevent spillage during 7 days of flipping once daily

*Fresh grapes leaves are recommended because they’re supposed to help keep the pickles more crisp and crunchy. I don’t know if they are totally necessary or not, but because we have plenty of wild organic muscadine grape vines growing all over our land, it’s no problem for me to pick a few leaves and add them to each jar. Sometimes in summer, you can find fresh grapes leaves for sale at local farmer markets. If you don’t have access to fresh grape leaves, don’t be discouraged. You can still make this recipe without them!

Homemade Pickle Eat-by Date

Using the above recipe, there is no canning or heating required. That’s nice because it keeps the cucs as a raw food, with all the enzymes intact. But, because they are not totally sealed the way canning or heating will do, these pickles should be eaten with 3 months of making them. Just keep that in mind if you give them to family or friends. After 3 months the pickles may turn soft or watery. If you see that, then it’s best to toss them in the compost bin. Writing the date on the lid of each jar helps to know how long to keep them.

My Pickle Detox/Cleanse

Last summer, we had so many cucumbers from our organic veggie garden that I was making 2 jars of pickles per day! By mid-August, we were up to our ears in pickles and the fridge was almost full. I had been planning to do a 7-10 day green juice fast as a nice transition from the end of summer into fall. But when I looked at all the pickles, I said to my husband, “Why don’t we just do a pickle detox and eat only organic pickles for 10 days?” So we did!

On average, we each ate about 1.5 jars of pickles per day and we drank all the pickle juice too. We also drank plenty of water in between. It was totally unplanned and un-researched. But it turned out great. We both felt energized. Our guts got a major boost of probiotics from the lacto fermentation and the organic raw apple cider vinegar. We had a mini-parasite cleanse from eating so many fermented garlic cloves. The pickles were cold and refreshing during the hot summer days. We had high energy and slept great. The was no juicer to clean! And we used organic clean food fresh from our garden. This year, we may do a 3-day pickle cleanse and go into green juices after that. I’ve got plenty of organic dandelion, celery and parsley that I’d love to use in juices or smoothies so we’ll see….!


For more on how to do a detox at home or how to navigate through your detox symptoms and start feeling great, book a personalized health consult with me via Skype.

How to Book Your Health & Nutritional Consultation:

1. Take photos of your eyes with a smart phone or digital camera.
2. Email the photos to me for approval.
3. We schedule a time to meet via phone or Skype!

What your Poop and Pee can tell you about Your Health

With all this talk about detox and fasting, it’s inevitable that I would eventually cross onto the topic of eh-em, bodily excrements. Actually, your poop and pee can tell A LOT about your health and should always be the first thing to check when you’re not feeling your best. If you notice any sudden changes in your bowel movements, it’s also a good idea to ask yourself – has my diet changed recently or have I added a new supplement or something different? Often times the answer is yes.

All information in this article is for educational purposes only. 
It is not for the diagnosis, treatment, prescription or cure of any disease or health condition. 

Your poop: What is a healthy Poop?

On a daily basis, your bowel movements or poops should be easy to pass, formed and should sink in the toilet (not float). The color should be a normal healthy brown color.

Many people say that you should go to the toilet as many times as you eat in a day. That means someone eating 3 meals a day should have 3 movements per day. Anything less than that would be considered constipation.

Types 1 and 2 on the Bristol Stool Chart (see below) are indicative of constipation and types 5, 6 or 7 can indicate loose stool or diarrhea.  Types 3 and 4 are considered the ideal, healthy stools (especially type 4), as they are easy to pass while not containing excess liquid.

What does a different color poo mean?

Red stool can be an indicator of blood, inflammation, diverticulitis or blockage in the colon. Just remember to note what you’ve eaten before, because in some cases red stool is just a normal passage of coloring in the food, like after you eat red or purple beets.

Sometimes if taking an iron supplement, your stool can turn a very dark red, almost black color. Eating a lot of meat in the diet can always make your poop look black. Taking charcoal capsules will most definitely turn your stool black. Don’t worry if you see black poo after taking charcoal; it’s the normal passage of the charcoal through your intestinal tract.

Green or yellow stool can be a sign of liver or gallbladder problems. If you’ve just done the liver/gallstone flush though, that doesn’t count! A liver flush is a temporary detox reaction and should not be used to compare your stool color on a daily basis.

What do different sizes or shapes of poop mean?

If you are pushing hard to pass your stool, or if it’s small pellets and very dry, then you’re most likely dehydrated and not drinking enough water on a daily basis. You may also need more fiber in your diet. A first good step would be to drink more water and see if anything changes for the better.

Long and thin poo can be a sign of bowel constriction, inflammation or other conditions in the colon. With that, you can try to eat more fiber, adding 2 Tbsp. ground organic flaxseed to a Green Smoothie daily. You can also try taking 1 tsp. black seed oil daily and see if the condition improves.

Runny or liquid poo can be an indicator of parasites, infection, food allergy or food intolerance. There can also be a lack of fiber in the diet. In some cases, doing a colon cleanse can really help.

If your poo floats, it may be a sign that your body is not digesting fats properly. Always look at the diet and see what the person is eating (or not eating). Sometimes doing a small intestine cleanse can help, especially if this is a recurring problem.

Your urine: What does normal urine look like?

Remember, the goal for healthy urine is: Clear and Copious!

Normal, healthy urine should be clear, not cloudy or turbid. There may be more of a yellow color if taking certain supplements like B Vitamins; however the liquid itself should not be cloudy. Turbid urine can be a sign of bacteria in the urinary tract or kidneys, or crystallization of the urine or even kidney stones.

By copious, I mean that the amount of urine flow should be steady and have decent volume. Want you don’t want is a small, leaky trickle. If you don’t have a good flow of urine, it’s a sign that you may be dehydrated.

If your urine is clear and copious on a daily basis, then most likely you’re doing ok!

Keep in mind that thirst is not a good indicator of whether or not you’re dehydrated. Many times, you will pass the thirst marker and remain dehydrated for hours without any additional feeling of thirst. Always look at your urine as a more accurate indicator.

How much water should you drink?

This is something I get asked all the time, and really there is no simple one-size-fits-all answer.

If someone speaks a lot in their job, they will lose more water through respiration. Living in a warm climate or doing more exercise will create more loss of water from perspiration. People who eat more high-water content fresh fruits and veggies usually need less water than people who eat more dried foods like bread, cereal or dried snacks.

At the end of the day, your best bet is to just check your urine. Is it clear and copious? If yes, then you’re ok. If not, then drink more water!

What kind of water is best to drink?

Having fresh, clean spring-fed mountain water would be great, although not many people have that luxury. At home, you want to at least avoid chlorine, fluoride and heavy metals in your drinking water. Probably your best bet in catching the worst of those is to get a reverse osmosis filter on your drinking water tap in the kitchen. You can buy a reverse osmosis filter online and have a plumber install it for you.

During a detox, depending on the case, distilled water is usually best.

When doing a detox: How your poop and pee can change

Bodily functions can change when you’re doing a cleanse. It’s actually a good sign when your body is eliminating more toxins and taking advantage of the opportunity to catch up on internal housework. You gut health and overall microbiome can finally rebuild, recharge, rebalance and renew.

Many people will poo much more often during a detox, and they can also feel like they need to pee all the time. Often times, a person will get up several times through the night to pee during their cleanse. This is all considered normal, as long as the urine is clear and copious and there is no pain with urination. In fact, most fasters will comment on how clear their urine is after just a few days on a cleanse. That’s always a good indicator that the body is more clean than before.

In some cases, I’ve had fasters comment that they smelled ammonia in their urine when doing a detox. Perhaps this is from old, built-up toxins that were released from the tissue, liver or fat during the cleanse and then eliminated through the urine. Usually it will happen 1-2 times and then stop. Just an extraordinary example of how amazing and active the body can be in its own healing!

During a cleanse, ALL of your elimination organs – the colon, kidneys, lungs, skin and liver – get an opportunity to catch up on their backlog of work. After a cleanse, the most common thing I hear is, “Wow, my bowel movements are so much better now….and my eyes are brighter, skin is clearer and overall I FEEL younger!”

If all that didn’t clear things up for you (literally!), then check out this infographic below from The Daily Infographic which explains the various things your poo and pee are telling you.

Current global poop situation: Not Good

Approximately 70 MILLION Americans have digestive disorders, prompting nearly 60 MILLION visits to the doctor’s offices and hospitals each YEAR. With the rise in digestive problems and even colon cancer all over the world, I have to wonder….why aren’t more people talking about their poop? If it wasn’t such a taboo topic, then someone having poo problems might feel more comfortable to seek out help and get the answers they need.

If you know anyone having digestive problems, please share this article!


For more on how to do a detox at home or how to navigate through your detox symptoms and start feeling great, book a personalized health consult with me via Skype.

How to Book Your Health & Nutritional Consultation:

1. Take photos of your eyes with a smart phone or digital camera.
2. Email the photos to me for approval.
3. We schedule a time to meet via phone or Skype!


More on Gut Health:

More on Motivation:

How to make a Castor Oil Pack for Healing, Pain Relief or Detox

Castor oil has been making a huge comeback recently with the rise of young Instagrammers applying it to their hair (and even eyelashes) for shinier, thicker and longer locks. But did you know there are many other ways to use castor oil for natural healing? Once you start using castor oil, you will seriously be amazed and wonder, “How did I not know about this before?”!

All information in this article is for educational purposes only. 
It is not for the diagnosis, treatment, prescription or cure of any disease or health condition. 

Discover the ancient medicinal properties of Castor Oil

What is Castor Oil

Castor oil comes from the castor plant that grows castor beans. The castor bean plant originated in Egypt and was used for medicinal purposes in the Middle East as much as 5,000 years ago! In the old days, many people used castor oil to help promote a bowel movement and prevent constipation. You may remember your grandmother having 1 spoonful of castor oil a day for good gut health. But way before that, castor oil was commonly applied topically for healing cuts, wounds, injuries, muscle pain, body pain, menstrual pain, and in many cases even healing internal infections, disease and imbalance. So much so that in the Middle Ages, castor oil was actually known as “Palma Christi,” perhaps because people believed that anywhere you applied the oil was like having the “Palm of Christ” applied to that area, often offering instant and miraculous healing.

What can Castor Oil do

Edgar Cayce was a medical intuitive who used castor oil for healing hundreds of patients. Dr. William McGarey, MD eventually picked up where Casey left off, helping thousands of patients using castor oil for various ailments over the course of 20 years. In his book, The Oil that Heals: A Physician’s Success with Castor Oil Treatments , he lists many cases of castor oil working very well for healing. Open festering wounds that would not heal started to miraculously dry and close after applying castor oil daily. Ringworm and other fungal infections on the skin were healed after applying castor oil to the affected area. And amazingly, people who complained of gallbladder pain often had zero reoccurrence after several rounds of applying castor oil directly to the skin on the right side of the abdomen with a heating pad, otherwise known as a “castor oil pack.” Knee pain, shoulder pain, joint pain, muscle pain, sports injuries, sprained ankles, wrist pain, hernias, bowel obstructions, pain after surgery, arthritic pain, even skin cancers – all seemed to improve after applying a castor oil pack topically to the affected area. Some people say that castor oil can also be taken to help induce labor ( but remember: always check with your doctor first).

In his book, Dr. McGarey wrote, “The most obvious effect I found in treating the body using a castor oil pack was the enhancement of the immune system. As a portion of their duties, the lymphatics – part of the immune system – drain all parts of the body. When the tissues in any area of the body are cleansed by the eliminatory process, the cells are in much better condition to work normally – and the activity of the immune bodies and substances are able better to do their job in defending the body or rebuilding it.”

Wow! With nothing to lose and possibly so much to gain, why not give the old school castor oil pack a try?!

How to Apply a Castor Oil Pack

To make your own Castor Oil Pack at home, you need these 4 items:

  • Castor Oil (preferably organic castor oil)
  • Wool Cloth
  • Heating Pad
  • Old towel (either hand towel or bath towel size)

To make things as easy as possible, look for the Heritage brand “Castor Oil Kit” for sale on amazon or iherb. The kit contains both a wool cloth and castor oil, so it’s a great starter for making castor oil packs at home. The only thing is that the kit has regular castor oil and not organic castor oil. If you want to start with organic castor oil from the get-go, you can buy the wool cloth and the organic castor oil separately. What I did was I bought the kit first, and then upgraded to organic castor oil when I ran out of the oil in the kit. Either way will work! (Each person should have their own flannel so if you’re planning to do castor oil packs with your partner, friend or family member, then every person ideally has their own wool cloth. Best not to share your wool cloth with other people.)

With castor oil, you always want to choose a high quality cold-pressed oil. Don’t go for cheap, low-quality alternatives that may have been heated to a high temperature in processing.

Next item you will need is a heating pad. I bought my heating pad on amazon. (Note: If you live in a 220V country, you will need a heating pad for 220V voltage outlets.) Alternatively, if you don’t like or don’t have a heating pad, you can use a good old-fashioned hot water bottle.

I also use an old towel to keep the oil away from sheets or clothing. Castor oil is sometimes known to stain material, so having a towel to catch any oil can help to keep things white and bright.

Apply the Castor Oil Pack

  1. Lay down and get comfortable with whatever you may need for 40-60 minutes (book, water, phone, TV remote (to watch a health DVD of course), iPad (to read my book on Green Smoothies – hint, hint!).  I will usually do a castor oil pack before bed so I can just fall asleep with the heating pad on (I use a heating pad with a 2-hour timer).
  2. Plug the heating pad in and have it ready to apply.
  3. Apply a generous amount of castor oil topically to the affected area. I will usually add a palm-sized area of oil. The goal is to cover the skin area you are working on with a layer of castor oil.
  4. Immediately put the wool cloth on top of the oil.
  5. On top of the wool cloth, add your old towel.
  6. On top of the towel, place the heating pad. Turn the heating pad on. Heat helps the skin (and body) absorb the castor oil more quickly and efficiently.
  7. You’ve now made a Castor Oil Pack! It’s a “sandwich” of 4 layers directly on the skin: castor oil, wool cloth, old towel and heating pad on top.
  8. Now, relax and think of all the good you are doing for your body!
  9. Keep the heating pad on for at least 40 minutes, up to 60 minutes.
  10. Then, remove the heating pad and turn it off. Wipe the skin dry with a clean towel. You can store the wool cloth in a clean ziplock bag for future use (I simply wrap my wool flannel cloth in the old towel and store them together).

Congratulations! You can now use castor oil to help heal the body or promote detoxification.

If you’re interested in knowing more about healing power of castor oil, I highly recommend the book called The Oil that Heals: A Physician’s Success with Castor Oil Treatments by William McGarey.

My experience with Castor Oil

I’ve personally seen some pretty amazing results with castor oil. I’ve done many castor oil packs on my liver (abdomen right side area) during colon cleanses, after a liver/gallstone flush or even if I’m just feeling tired or sluggish, after a long-haul flight for example if I’ve got a bit of jet lag. I’ve also personally had menstrual pain go away completely in 30 minutes or less after applying a castor oil pack to my lower abdomen (I’ve never experienced heavier bleeding as a result). I always feel better after a castor oil pack.  I’ve used castor oil to eradicate ringworm, both on myself and on our dogs and cats, with outstanding success. (For more info on fungal infections, check out my article – What is Ringworm and How to Treat it Naturally.) Castor oil is definitely a staple item in our house and I seem to continue to find more uses for it all the time.

Often I recommend Castor Oil to my Iridology and Health Coaching clients, for anything from liver/gallstone pain to skin rashes to arthritis to Fibromyalgia, in addition to what their medical doctor recommended and after seeking approval from their doctor first, of course.

My husband was sold on castor oil after he healed a neck and shoulder injury in less than 24 hours. Several months ago, he fell while going up the stairs at home. At the time, he was holding things in both arms (and going up the stars too fast, in a hurry) so when he tripped on a stair, he didn’t have a free hand to catch the fall. He wound up stumbling hard into the stair with his shoulder/neck. Yes, ouch! Poor fella was in a lot of pain and could barely move his head from side to side. I immediately applied castor oil directly on his neck, with a wool cloth and heating pad and had him lie down for 45 minutes. Afterwards, he was feeling better but the neck was still stiff. That night, we applied another castor oil pack on his neck and he went to sleep with it on. The next morning, he was 100% back to normal with no pain, no stiffness and full range of motion in the neck. He was totally amazed! He commented that had it happened a few years ago, he would’ve been feeling bad for a week!

Read more information on the liver and liver cleansing here:

Liver Flush Detox Drink – Recipe for a Daily Liver Cleanse

Gallstone Liver Flush – Recipe & Cleanse Info

How to Do a Coffee Enema at Home

How to Do Onion Socks for Healing


What’s your success story with Castor Oil? Having natural tools for healing is truly a blessing. I love to hear new ways to use castor oil, so please share your experience in the comments below!


More on Detox:

More on Skin Cleansing:

More on Liver Cleansing: