How to Ferment Cabbage and Make Raw Sauerkraut
If you think that eating more fresh, natural raw food in your diet is too expensive, then this recipe is definitely for you! Making fermented foods at home is one of the most inexpensive ways to enjoy raw food. For optimal digestive health, we need to get good bacteria in gut on a regular basis. Antibiotics destroy all the bacteria in our system, both good and bad. Over time, this can lead to more imbalance in digestion function, absorption and elimination. Some experts even say that food allergies, autism and ADHD may be related to an imbalance of bacteria in the colon. Certainly many digestive diseases like colitis, diverticulitis and Crohn’s disease are caused in part by lack of good bacteria in the gut. Having the right balance of good bacteria helps to strengthen immune system, improve digestive health and long-term, can even prevent dis-ease. Probiotic, or good bacteria, literally means “for life.”
All information in this article is for educational purposes only.
It is not for the diagnosis, treatment, prescription or cure of any disease or health condition.
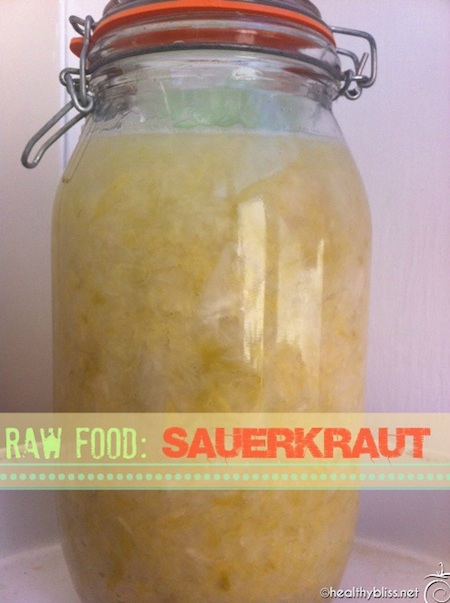
How to Make Raw Sauerkraut at home, a healthy naturally fermented food
How can we get good bacteria or “probiotics” back in the gut? The Western diet has virtually eliminated all traditionally fermented foods out of the diet, with the exception of yogurt. Store-bought yogurt is pasteurized, and usually contains added sugar, flavor and colorings. It’s also not a suitable option for vegans, and it’s expensive! Nowadays you will see Kombucha drink as a fermented raw food vegan option. Kombucha is fantastic, but it is also expensive at $6.00 per bottle. You may see sauerkraut for sale in supermarkets, but it’s already been pasteurized, so virtually all of the good bacteria has already been destroyed.
Not to worry! If you have just a few heads of cabbage, some salt and a few jars, you can easily make your own raw sauerkraut at home! It’s so easy to make that you will be wondering why you didn’t make it sooner! Cabbage is not expensive, and once the sauerkraut is made, you only need to add about 2 Tbsp. per day to your salad or veggies to get the good bacteria that your body needs. At that rate, 2 heads of cabbage could easily last up to 2 weeks for a family of 4. That’s some healthy savings!

What You Need: Raw cabbage, salt, a grater and jars
How to Make Homemade Raw Sauerkraut
Raw Sauerkraut: Ingredients
- 2 medium-large organic green cabbage heads (or purple cabbage)
- 1-1.5 Tablespoons Himalayan Salt or Pure Sea Salt
- 1 Tablespoon caraway and/or mustard seeds (optional)
- 2-3 sprigs fresh dill (optional)
- 2 organic carrots (optional)
Raw Sauerkraut: Equipment
- Grater or Mandolin
- Cutting Board and Knife
- Large Mixing bowl
- Wooden Mallet (optional)
- Large widemouth canning jar (or extra large mason jars)
- Small glass baby-food jar or small glass cup to fit inside the larger jar
- Clean rock or other weights to fit inside the small jar (to weigh down the cabbage)
- Old t-shirt or towel for covering the jar
- Large plate to catch any overspill
Instructions
Clean all materials before starting. Fermentation can be a sensitive process, and if there is any soap residue in your jars or hand cream chemicals on your hands, the fermenting might not work. I prefer to wash everything with a 50/50 mix of tap water and boiled water. For safety reasons, I do not recommend using 100% boiled water. Be careful not to rinse your jars with only boiling water because the glass can crack. Add tap water first, then some boiled water. Swish everything around and rinse. Wash your hands well with clean water and no soap.
Shred the Cabbage. Peel off the leaves of the cabbage and set them aside for later. Grate the cabbage on the large grate side of the grater or use a mandolin to shred the cabbage. Be sure to use the safety mechanism on the mandolin!
Combine Cabbage and Salt. Place the shredded cabbage to a large bowl and sprinkle some of the salt over top. If you have a wooden mallet, then start pounding the cabbage. If using only hands, then begin massaging and squeezing the cabbage with your hands. In just a few minutes, you should start to see the cabbage becoming watery and limp – this is a good sign! You can add some shredded carrot at this stage too (optional).
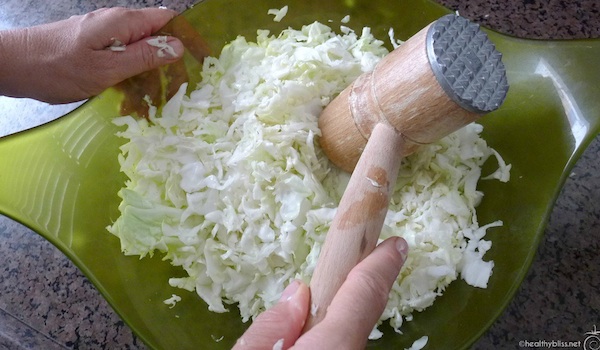
Making Raw Sauerkraut: Use a wooden mallet and pound away!

Add the salt. Then start squeezing by hand…
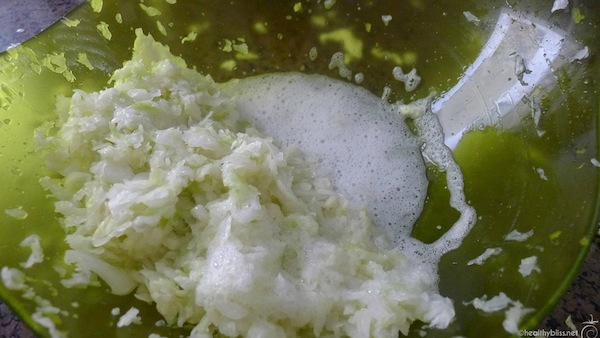
As you squeeze the cabbage, it will start to soften and you should see liquid/water. Put the liquid and cabbage in a glass jar for fermenting, pushing out any air bubbles. You can also add fresh dill, whole mustard seeds or caraway seeds for flavor.
Pack Cabbage and Liquid into Jar. Use your hands to pack the cabbage into the jar, pressing out any air bubbles each time you add more. At this stage, you can add some fresh dill, caraway seeds or mustard seeds for flavor. Pour any excess liquid from the cabbage into the jar. When the jar is nearly full, place a few of the larger outer leaves to cover the surface of the sauerkraut. This helps keep the cabbage submerged.
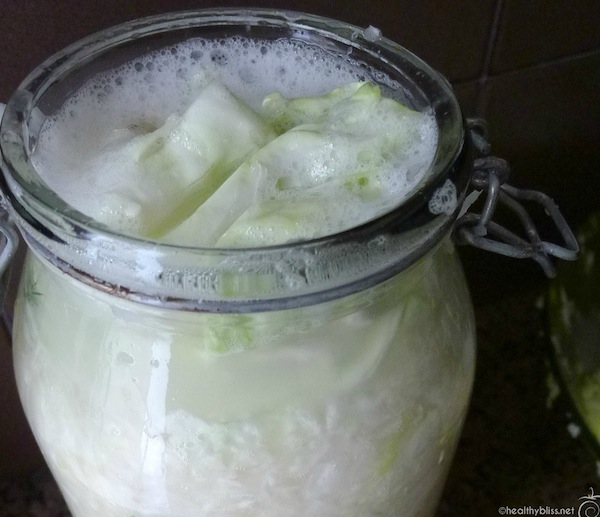
Gently press out air bubbles. Place some large cabbage leaves on top and be sure that your cabbage is all covered by the liquid. If necessary, add a small amount of water to cover the cabbage.
Cover the Jar. Place your filled jar on a dish, cover it with an old t-shirt or towel and put it in a quiet place to happily start fermenting. Ideally, your jar will be on top on a cabinet or on a table where it will not be disturbed. The best place is away from direct sunlight and at a cool room temperature — ideally 65°F to 75°F.
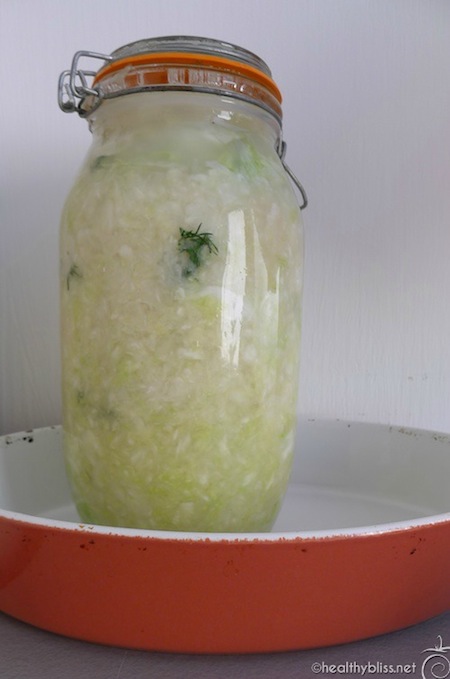
Place your sauerkraut on a dish or in a large bowl. Usually there will be liquid coming out of the jar as it ferments; this way any liquid escaping is caught and will not make a mess.
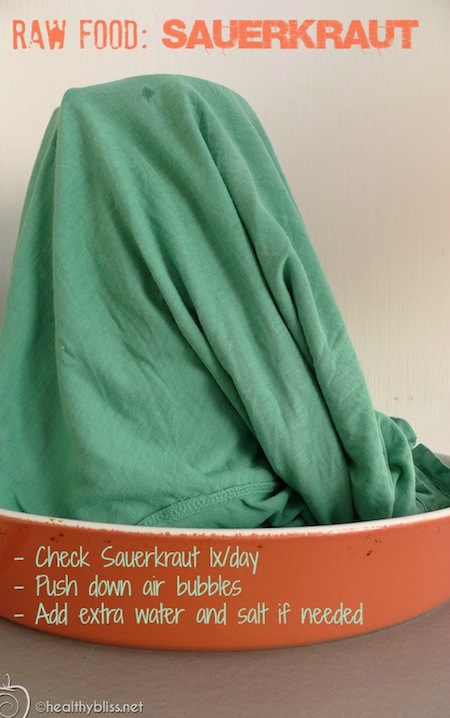
Finally, cover your sauerkraut with a towel or old t-shirt and keep it undisturbed. Check once a day, pushing out air bubbles and adding more water if needed. It should be ready in about 4 days.
Check Daily. Once a day, be sure to check your cabbage. Open the lid and push down the cabbage to release any air bubbles. If necessary, add a small amount of additional water and salt. By the 2nd day, the cabbage has usually been pressed down enough that there is some extra space in the jar. At that point, add the small baby-food jar or glass cup with rock inside to keep the cabbage submerged under water.
Taste after 4 days. Small batches of sauerkraut like this can be finished in as little as 4 days. On the 4th day, taste your cabbage. If you’re happy with the results, you can transfer your sauerkraut to the fridge where it will continue to ferment, although much more slowly. You can also keep it out to ferment for up to another 10 days, but you must check it every day, press out any air bubbles and add additional water and salt if necessary.
Note: It’s normal to see air bubbles coming through the cabbage during fermentation. When you press them down daily, you are eliminating the air space between the cabbage. In some cases if you forget a day, you may start to see mold, dark scum or smell a bad odor from the cabbage. If the scum can be skimmed off, then it’s ok to do so. If there is a bad smell or visible mold, I recommend to throw out the batch and start over.
When your sauerkraut is ready, put the large container in the fridge or transfer the sauerkraut to smaller jars and then refrigerate. Raw sauerkraut is a fermented product and will stay fresh for a few months. Once you open a jar and start eating it, it’s best to consume the sauerkraut within 30 days.

After 4 days, start tasting your batch. When you like the taste, you can transfer to smaller jars to put in fridge…or share with family and friends!
Making Large Batches of Sauerkraut
You can make much larger batches of sauerkraut in a ceramic fermentation crock, but the crocks are very expensive. It’s probably a good idea to try fermenting in glass mason jars first and see if you actually enjoy eating sauerkraut before making the investment in a crock. (One benefit of the large crock is that you don’t have to check it daily. The weights in the crock keep the air bubbles out.) Over time, if you find you want to make larger batches, then definitely consider making the leap.


How is Sauerkraut Fermented?
Raw sauerkraut is made by a process called lacto-fermentation. We can ferment cabbage thanks to the good bacteria that naturally exist on the surface of the cabbage leaves (and many other veggies too). Food becomes fermented when the “good” lactobacilli bacteria convert their sugars and starches into lactic acid. This is a natural preservative that inhibits the growth of harmful bacteria. The lactic acid also promotes the growth of healthy flora throughout the intestine. Sauerkraut contains high levels of glucosinolates. These compounds have been shown to have anti-cancer activity.
The diets of every traditional culture have included some kind of lacto-fermented food. Kimchi from Korea and cortido from Latin America are 2 examples of traditionally fermented vegetables made from lacto-fermentation. In Europe, people fermented sauerkraut, grape leaves, herbs, and root vegetables. Lacto-fermented veggies are nutrient-dense, enzyme rich, a raw food, vegan, vegetarian and gluten-free. And they taste yummy too! Fermented cabbage is one of my favorite foods for a mini-daily detox and a balanced raw food diet!
More on Fermented Foods:

Follow Jennifer