Healthy Frozen Treat: Raw Banana Chocolate Almond Popsicles Recipe
These yummy frozen treats are great after a hot day! If you’re looking for a healthy dessert for your kids, or are a former ice cream lover wanting a healthy upgrade, or even if you want a new raw food dessert recipe to try, then these popsicles are for you!
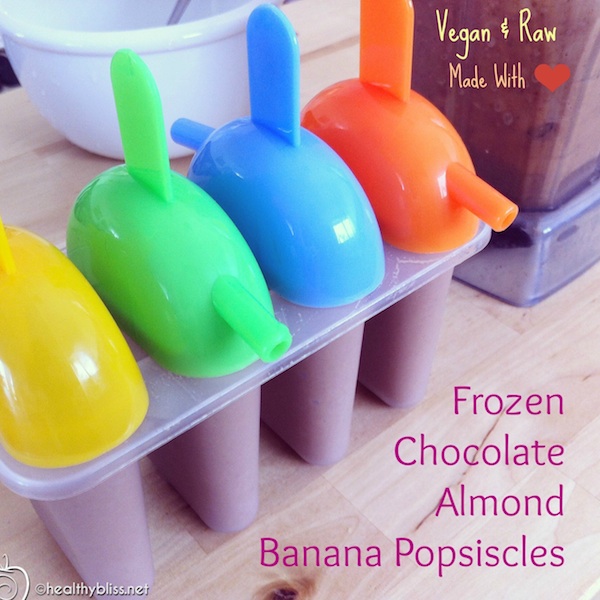
The perfect frozen summer treat, and it’s healthy!
The best part about this recipe is that it’s fast and easy and doesn’t have a lot of ingredients. Raw food for busy people? Totally possible! Affordable vegan and vegetarian food? Yes! Something healthy that actually tastes good? You bet! Scroll down to see how.
Blend just a few simple organic ingredients to make yummy frozen raw treats!
How to Make Raw Cacao, Banana & Almond Popsicles
One Day Before
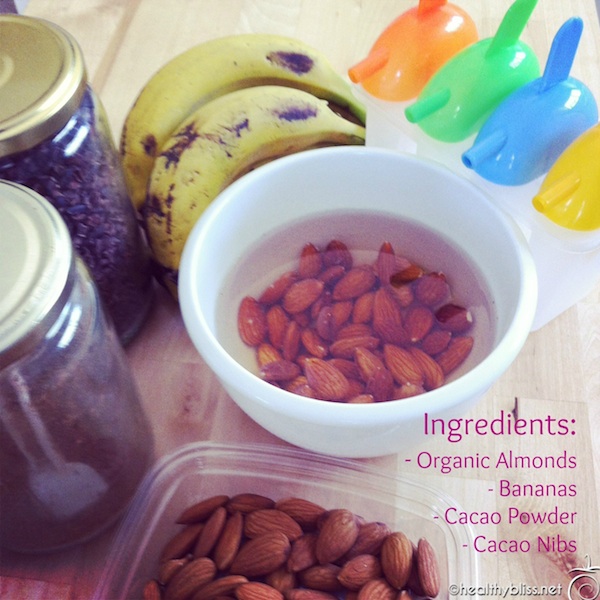
1. Soak 2 cups of organic almonds overnight. Rinse and drain.
2. Peel 4 ripe organic bananas and cut bananas into pieces. Place in a ziplock bag and put in the freezer overnight.
Prep Day
3. Place the following into a high-speed blender:
– Soaked organic almonds (water drained)
– Frozen bananas (already peeled and frozen)
– 1/2 cup filtered water
– 2 Tablespoons organic raw cacao powder
– 2 Tablespoons organic raw cacao nibs
– 2 Tablespoons raw honey (optional) Note: For vegans, use 2 teaspoons of organic stevia powder instead.
Want to know where to buy the organic cacao powder, cacao nibs, raw honey or stevia powder? Check this link!
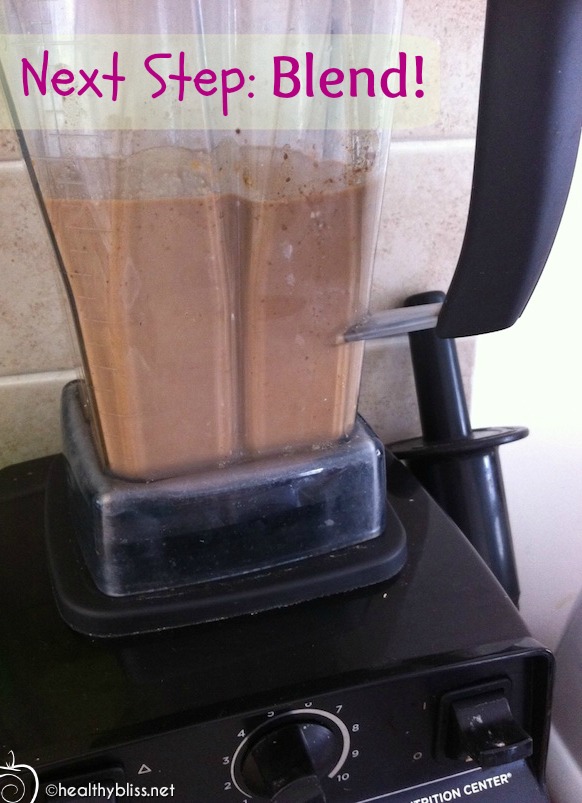
Blend all ingredients until creamy and smooth.
4. Blend until creamy and smooth.
(Note: I use a Vitamix blender but you can use any high power blender. If your blender is a bit old or not feeling its best, then use 1 cup of water instead of 1/2 cup and add the frozen bananas slowly.)
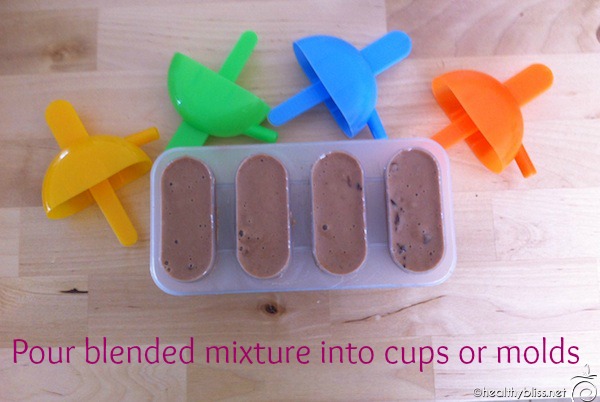
Place the blended mixture into molds then freeze for at least 6 hours or overnight.
5. Pour blended mixture into cups or molds. Add a wooden stick or holder to make the popsicle easy to hold once it’s set.
(Note: I bought these molds at a Dollar store. I also use cups and non-chemically treated wooden spoons sometimes too.)
6. Once the molds are filled, place them into the freezer for at least 6 hours or overnight.
7. Now they’re ready to eat! Simply pop the frozen treat out of the mold and you’ve got your own homemade healthy popsicle!
(Note: If the popsicle doesn’t “pop” out easily, let it stand at room temperature for about 5 minutes and try again.)
The perfect frozen summer treat, and it’s healthy!
This is a fast and easy way to make the chocolate lover in your house happy with a healthy raw cacao frozen treat! Kids love them and believe me, adults love them too! This recipe is also gluten-free so it’s perfect for anyone looking for good wheat-free desserts. And, it’s a fun way to share the idea of raw food with family and friends. When they see for themselves how good it tastes, they might actually want to know more!

Using 100% certified organic ingredients gives you the best quality, flavor and nutrients!
For more on how to start a raw food diet, how to do a detox at home or what minerals you may specifically be deficient in, book a private health consult with me via Skype.
How to Book Your Health & Nutritional Coaching Session:
1. Take photos of your eyes with a digital camera.
2. Email the photos to me for approval.
3. We schedule a time to meet via phone or Skype!
More on Nut Milk and Healthy Recipes:


