Are you ready to buy a blender but feeling confused over which features you need and overwhelmed from all the choices out there? Do you really need the most expensive blender in order to make a great green smoothie? If so, which one is best and if not, which of the less expensive blenders can do the job? I’ve tested the most popular blenders with the exact same green smoothie ingredients, so yes, it was a real Battle of the Blenders! Check out my results below and get started on your smoothie making (and smoothie drinking) skills!
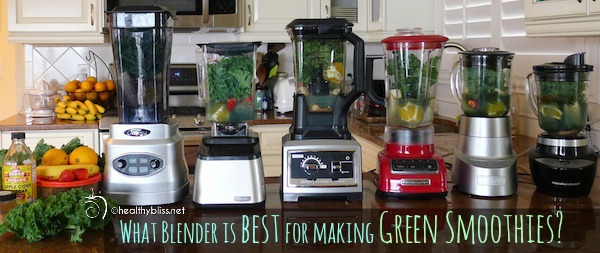
With so many blenders out there – which one should you choose?!
Blender Buying Guide
Before you head to the store, think about where and how you’ll be using your blender:
1. What’s your budget?
2. How many people are you making smoothies for (1, 2, 4…or more)?
3. Where will you put your blender (on the counter or under/in a cabinet)?
Blender Basics: Motor and Size
Blenders have 2 main features: The size of the motor and the size of the blender container.
Size of the motor
The fastest blenders are the 3HP professional/commercial use blenders. Then, you have the 2HP which are still professional and heavy-duty. And finally, you have the more common kitchen blenders whose motors are usually listed in watts. You’ll see 600W, 700W or 800W, and they give you just under 1HP of blade speed. The 2HP and 3HP blenders are more expensive because of the better motor. A a better motor gives you a more finely blender smoothie. The green leaves in a green smoothie made in a 2HP or 3HP blender will be completely pulverized, and in a cheaper blender, you will see larger pieces, but still completely drinkable (see the example below).
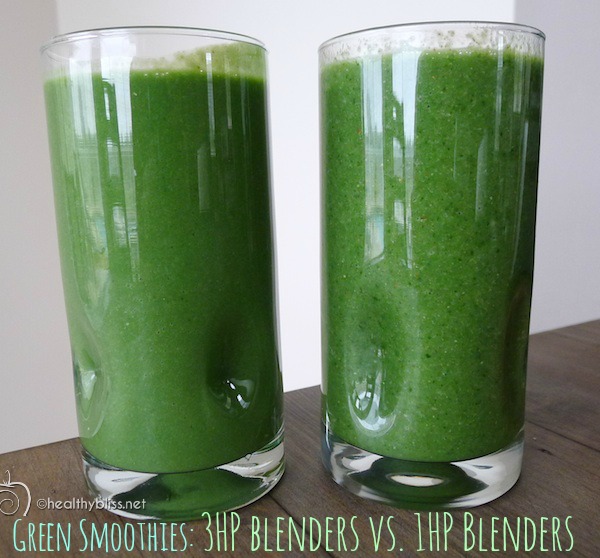
Smoothie on the left: Made with 3HP. Smoothie on the right: 1HP. See the difference?
Size of the blender container
If you’re making smoothies for a whole family every morning, then you’re going to need a big blender container! Blender container sizes range anywhere from 32 ounces to 64 ounces. (Because the Magic Bullet and Nutri Bullet have such a small blender container, I don’t recommend them for making green smoothies. I also don’t recommend the immersion blenders because it’s just to hard to immerse a stick into a pile of greens.) Check out the table below to see the different size containers in each model that was tested.
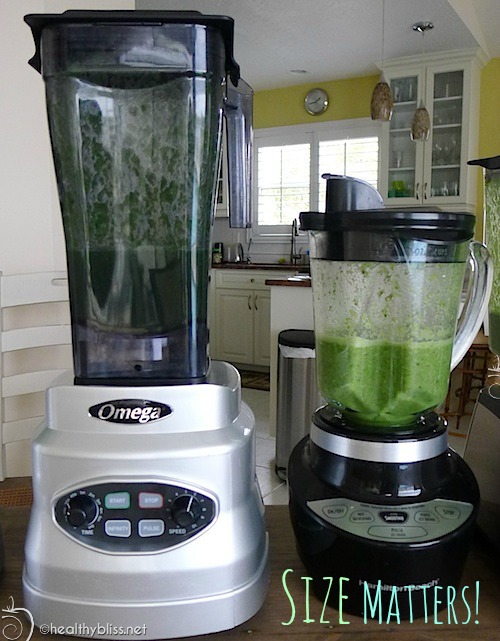
Think about where you have room in your kitchen for your blender before you buy!
Size of your kitchen
Will you be keeping your blender on the counter in between use, or will you put it in a cabinet? Blenders like the Blendtec, Hamilton Beach and Cuisinart will easily fit tucked away on your counter-top and under a cabinet, but other models won’t. Taking measurements before you head to the store can save you valuable time later.
Other Features to look for
Some blenders have a timer function, which I personally really like. That means you can set the blender to blend for 30, 45 or 60 seconds and start cleaning up while you wait. Also, it’s a good idea to check the warranty (if any) before you buy. Spending more on a 2HP or 3HP usually gives you a better warranty, in some cases up to 10 years, which is awesome.
Comparing Blender Models
Now that you know what to look for, it’s time to compare few models.
High Speed Blenders (2HP and above)
| Blender Model |
Peak HP (horsepower) |
Size (ounces) |
Pitcher Construction |
| Vitamix 5200 |
2 HP |
64 |
BPA-free plastic |
| Blendtec Wildside |
3 HP |
90 |
BPA-free plastic |
| Omega 630 |
3 HP |
64 |
BPA-free plastic |
| Ninja Ultima |
2.5 HP |
72 |
BPA-free plastic |
Normal Speed Blenders (1HP and below)
| Blender Model |
Peak HP(horsepower) |
Size (ounces) |
Pitcher Construction |
| Kitchen Aid Diamond Vortex |
0.9 HP |
60 |
BPA-free plastic |
| Cuisinart Smart Power Deluxe |
0.8 HP |
48 |
Glass |
| Hamilton Beach Smoothie Smart |
0.9 HP |
40 |
Glass |
Battle of the Blenders results
As I mentioned above, I’ve actually tested all of theses models, and I have to say that they ALL make a good green smoothie! For sure, the higher power models blender a smoother, creamier and more finely blended green smoothie. With the 1HP machines, I had to add the water and fruit first, blend, then add the greens and blend again.
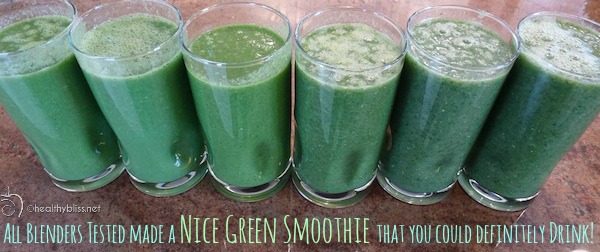
All of the blenders worked, however the 2HP-3HP blenders made a smoother smoothie than the 1HP blenders.
Here’s what I found in my field test:
Vitamix 5200
The Vitamix 5200 was excellent! It has a toggle switch to change the speed, although no timer function. This model is for you if you prefer a classic, tried and true brand like Vitamix. A nice feature with the Vitamix is that you can also buy an additional pitcher with a special blade for blending dried foods like nuts, seeds, and even flour. Price: $400+.
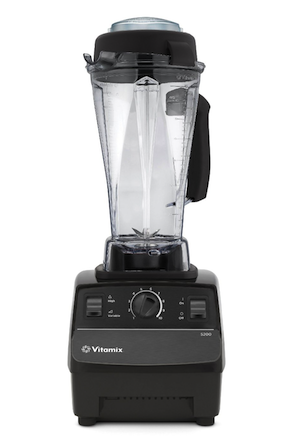
Vitamix 5200 blender
Blendec Designer Series
The Blendec Designer Series takes the prize for sleekest and most modern design. Also, it has a timer and a smoothie preset button, which I loved. It has a unique design in that the entire blender can fit easily under your kitchen cabinet. This blender is a great choice for a brand new stylish kitchen. The 3HP motor is incredible! Best color: champagne. Note: If you’re looking for smart ways to save, you can actually find factory refurbished Blendtec models for $100 less than the retail price. Price: $400+.
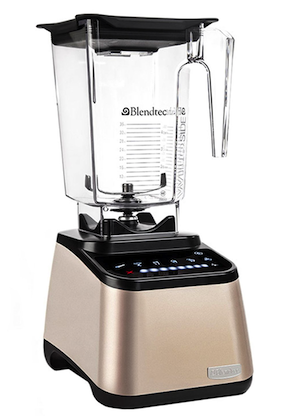
Blendtec Designer Series blender in champagne color
Omega 630
The Omega 630 is HUGE and I loved this machine. Although the base is large in size, it’s not heavy. Still, this is a blender that will need to be on the counter, so check where you can put it before you buy! This model has a dial timer where you can pick an exact time for blending. And, you just gotta love the 3HP motor. It’s great for a large family! Because this blender has every feature I would want (larger container, high speed motor, timer feature, nice design) and the price is very reasonable, I would have to declare the Omega 630 blender as the Winner of the Battle of the Blenders. Price: $250+.
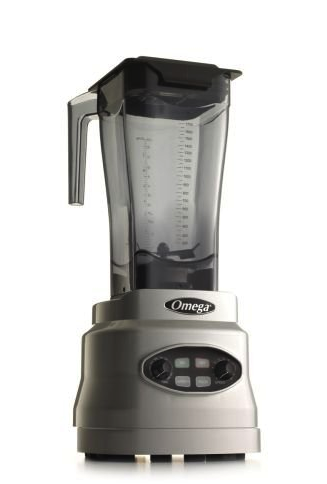
Omega 630 blender
Ninja Ultima
The Ninja Ultima was a real surprise for me. This machine has a 2.5HP motor, yet is almost half the price of its competitors. Admittedly, I thought the blender lacked a bit of style in its outer design but it definitely blends well. And, it has the unique Ninja double blade. If you’re somewhere between a standard blender and a super blender, this could be the one for you. Price: $200+.
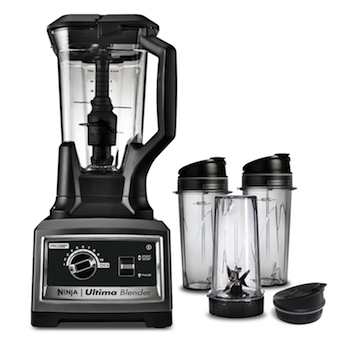
Ninja Ultima blender
Buying on a BudgetTip: If your budget is less but you want a more expensive model, you can always look for a used blender on ebay, craigslist or amazon. You can also put on posting on Facebook in a health focus group or on your local health food store’s page.
Kitchen Aid Diamond Vortex
The Kitchen Aid Diamond Vortex has a great look with a classic design, and you can order it in just about any color you can think of, from gorgeous red to lime green! The blender itself is good; it’s reliable and has a nice large size container for being in the low motor (less than 1HP) range. I’d call this a nice choice as a starter blender if you’re on a budget. Price: $150+.
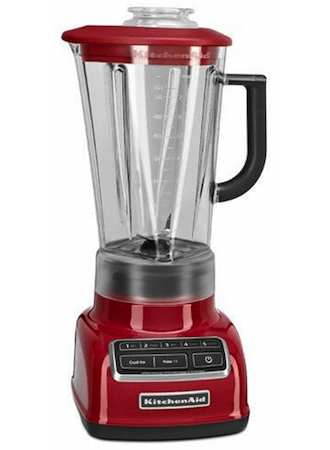
Kitchenaid Diamond Vortex blender in empire red color
Cuisinart Smart Power Deluxe
Having BPA-free plastic in mostly all new blenders makes choosing a plastic pitcher more comfortable these days, but some people do still prefer glass. The Cuisinart Smart Power Deluxe has a glass pitcher and the size of the pitcher is probably good for 1-2 people, but not more. This is a very good starter blender for a single person, couple or small family. Price: $70+.
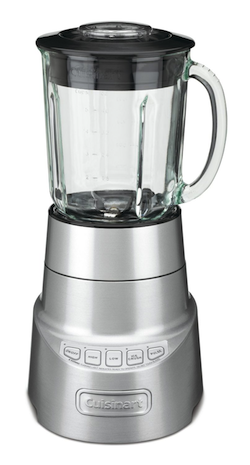
Cuisinart SmartPower Deluxe blender
Hamilton Beach Smoothie Smart
This blender was actually the most inexpensive one in the battle at less than $40, and yet I thought it did a really good job! The Hamilton Beach Smoothie Smart also has a glass container and the pitcher size is smaller. This is really the perfect blender for a college student on a budget who is looking for a reliable blender to start making green smoothies. Price: $40+.
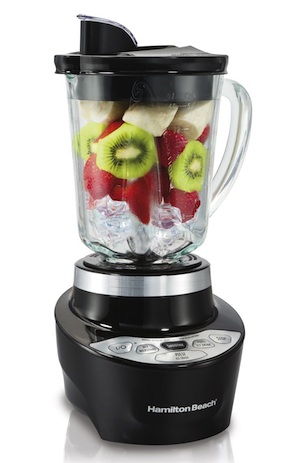
Hamilton Beach Smoothie Smart blender
Conclusion:
Any of the above blenders is a good pick for green smoothie making in my book. The most important thing is that you actually make smoothies in it, and hopefully every day! If you have the money for an expensive blender, that’s great! If not, don’t stress out. You can always upgrade later and remember, making green smoothies is a new healthy habit for life!


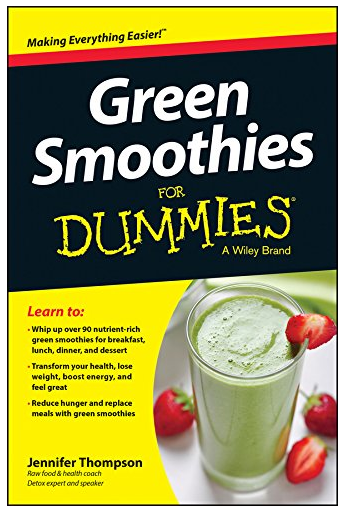
I’ve got lots more information on green smoothies, blenders, how to wash your produce, green smoothie recipes, and even a green smoothie detox in my new book: Green Smoothies for Dummies (Wiley Publisher, NY):

Available on amazon in both hard copy and eBook format!
Whether you’re a beginner to green smoothies or a pro looking for new recipe ideas and ways to share with family and friends, this book will help! Check it out, and happy blending!
Looking for a new juicer too? Check out my post on What’s the Best Juicer? How to Choose a Juicer
More on Juicing and Smoothies:


Follow Jennifer