Does the Squatty Potty Really work?
If you’ve never heard of a Squatty Potty, then you are definitely not up-to-date with the latest trend in bathroom accessories (and yes, there are bathroom trends!). This simple yet practical toilet stool has taken the digestively-challenged world by storm, literally! Times have certainly changed since I started working in the field of detox nearly 20 years ago. Back then, I couldn’t talk about poo without everyone running as fast and as far away as they could. Now, I can write and share a full article about something that is helping people have better bowel movements! In this blog post, I’m going to share my results in using the Squatty Potty at home. Does it really work, or it is just hype?
Disclaimer: I was provided with a free product in return for my honest review and experience with the product.
All thoughts and opinion expressed herein are my own and not influenced by the developing company and/or its affiliates, in any way.

The Squatty Potty 2.0 model fully extended to the 9 inch position
Why I wanted to try the Squatty Potty
Admittedly, my husband wasn’t so thrilled to be part of this experiment, but in reality he was the one who needed help in the a-hem..toilet department. Having suffered with constipation his entire life, he understands more than anyone how frustrating it is when you don’t “go” every day. When I first met him, he was literally amazed that I could be in and out of the bathroom in less than 3 minutes, for a Number 2! Often, he would sit on that porcelain throne for 30 minutes or more, praying to the heavens above for any miracle cure. Many times, we would have to wait all morning before going out because he still “had to go.” In some cases, he wouldn’t have any bowel movement for 3 or 4 days at a time. I was in shock! When he first told me this, I immediately scheduled a colonic for him. And can you believe – he actually went through with it? His first colonic ever (but not his last!) Now… that’s true love!
Fast forward several years and many detoxes later, and things has vastly improved for my husband’s gut health. If he eats well with green smoothies, fresh fruit, a daily probiotic and plenty of water throughout the day, he generally does exceptionally well and is actually quite regular these days. But, if any of that gets off track, his colon will be the first to let him know. It’s awful to see someone you care about not be able to go to the toilet and really feel miserable as a result. Naturally, I kept thinking – what else can I do to help him improve this situation? Having heard of Squatty Potty and having used many squat toilets myself over the years while living in SE Asia, I thought that using a stool and changing the position of his sitting could help. The only way to know for sure was to give it a try!
We received our new Squatty Potties by mail in an unmarked box with no exterior labels, which was reassuring since I can imagine that some people would prefer complete privacy with this type of purchase. My first impression was that the company has done really well to put a fun and cute spin on a topic that was formerly more on the taboo side and for many still is not so easy to discuss. Even I was accused of giving #TMI when I texted a good friend to tell her we just received our Squatty Potty! Anyway, the packaging and branding of Squatty Potty is great. The stools were wrapped in turquoise blue tissue paper, with a paper unicorn crown (for the new King of Poop) and a button that proudly states “I Pooped Today.” Classic! All of this made me even more excited to give the Squatty Potty a try.
Squatty Potty: What is it and who needs one?
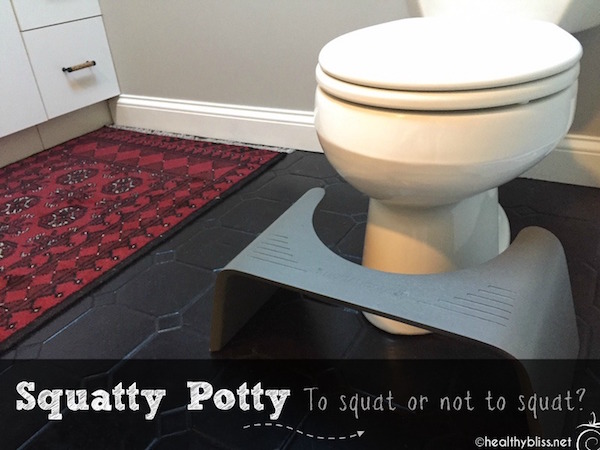
A Squatty Potty is a modern-day version of the squat toilet, brought to you with all the comfort of your Western-style porcelain throne. The Squatty Potty is a step stool designed to fit easily around the base of your toilet seat. It works like this: Sit on your toilet as you normally would, gently lift your legs, rest your feet on the stool and let the bowel movement begin. By lifting your legs slightly, the transverse colon gently rises thus preventing any “kinks” in the colon and allowing the pipes to flow, so to speak.
All information in this article is for educational purposes only.
It is not for the diagnosis, treatment, prescription or cure of any disease or health condition.
Squatty Potty Slim Driftwood Teak Model in 7 inch height
If you have a history of constipation, inflammation in the colon, or a feeling of not fully evacuating then the Squatty Potty is worth a try. In terms of how many people could actually benefit from something like this, just look at the statistics. Approximately 70 MILLION Americans have digestive disorders, prompting in nearly 60 MILLION visits to doctors’ offices and hospitals each year.
Clearly, what goes in doesn’t always come out.
Low stomach enzymes, an unhealthy “microbiome” or bacterial balance in the gut, an over acid environment, toxicity, and/or inflammation are warning signs that the body is not eliminating well. (Remember, any bowel disease ending with the word “itis” is a disease on inflammation, like ulcerative colitis, gastritis and diverticulitis.) What’s worse is that more health problems can arise from all this internal stress. As Hippocrates said, “All disease begins in the gut.” I agree!
Our results: Using a Squatty Potty
In theory, I knew that the Squatty Potty should work. But still, I wondered – could a toilet stool really mimic the true Asian squat and offer improved evacuation? The answer is: YES! I am actually impressed at how well it works!
On the day the Squatty Potty arrived, my husband tried the 2.0 model set at the standard 7″ height. Within 10 minutes, he was out of the bathroom (that alone is amazing!). Without getting too graphic, he said, “More just kept coming out! Every time I thought I was done, there was more!” Well, that never happens. Usually it’s the opposite and more in lines of, “I kept pushing and nothing came out” OR “I pushed and pushed and only got a rabbit turd.” If you’ve been in that situation, I am sure you can relate.
I can only guess that my husband has some prolapse of the colon, which can definitely keep the large intestine in a more kinked position. Changing the position of the colon created an immediate positive effect. Every time he uses the Squatty Potty, he has a release and it’s always more than he thought he was going to have. That’s simply amazing!
For me, the results were also good. In my case, I am very regular and have a large bowel movement every morning. Could the Squatty Potty help someone like me, who doesn’t have any digestive problems and goes to the loo every day? Yes! When I’ve used the Squatty Potty, I have my normal release, and then I have another almost full poo immediately after. Almost like two poo’s at once. Definitely I feel improved evacuation and I feel flatter in my stomach after. I can only surmise that more is getting through even my clean and healthy pipes, just from the change in position of the colon.
Asian Squat Toilet vs. Western Sit Toilet – What’s the poop?
An Asian squat toilet is a simple style of toilet design that consists of a hole in the floor and 2 porcelain treads for your feet on either side. You stand in position, squat and then go. This design is used in many parts of the world but is mostly found in Asia, hence the name “Asian-style” toilet.
Who would want to squat like a dog to go to the toilet?! Well, imagine the days before real toilets existed. What would have been the easiest and most natural position to a-hem..fertilize a tree? There’s no way you would stand and bend at the knees (muscles shaking) as if sitting on the loo. Naturally, you would squat in a low position, close to the ground. Squatting is easier on the joints and less tiring on the muscles, but more importantly it puts the transverse colon in the correct position and lifts any prolapse in the colon. Kinks in the colon are lifted naturally, especially where the ascending and descending colon turn. All of this allows you to “go” quickly and easily, standing up after to check for any predators and be on your way.
The first man-made toilets copied the style of squatting and in many parts of the world, squat toilets were the norm. This made perfect sense until more modern day folks decided that sitting was the preferred position of defecating. That’s when the Western toilet arrived, and along with the Western diet (refined sugar, wheat and dairy), came many new digestive ailments.
I used many squat toilets over the course of several years while living in SE Asia. In my experience, public squat toilets are way cleaner than public Western toilets. It’s a relief to not have to sit on a dirty seat splashed with who-knows-what. Using a squat toilet also helps strengthen your leg muscles and gives the body a good stretch. It just feels more natural. I also think that I had more volume evacuated whenever using a squat toilet.
Is it better to squat on the toilet? That’s kind-of a trick question because believe it or not, a lot of Asians who have never used a Western toilet will actually stand on the seat of a Western toilet and squat!
Is a squat toilet better? In my opinion, yes. I wish we had the option to build an Asian style toilet in our home here in the United States – I would definitely do that!
What Squatty Potty model is best?
I had a hard time deciding which Squatty Potty model to try. I didn’t really like the medical look of the traditional Squatty potty. I just recently painted one of our bathrooms and I wanted to maintain a sleek, modern style there.
Also, my husband is 6’8″ tall and weighs 220 pounds. I was worried that the slim teak style might actually break from his weight. At the same time, I didn’t know which height would work best for him. I read a few reviews from tall people who said that the 9″ was too high for them, and their knees were in their face. I was leaning towards the new 2.0 model which allows for 2 positions and adjusts between 7″ and 9″ heights. But, I didn’t like the medical-looking style. So, what to do?!
In the end, I chose the Squatty Potty 2.0 for one bathroom and the slim teak model for the other one. We’ve been very happy with both. Initially, my husband was happy using the 2.0 at the 7″ height. After 2 weeks, he decided that he wanted to adjust it up to 9 inches. Starting at 9″ probably would have been too uncomfortable for him, and may have discouraged him from trying. Definitely, having the flexibility to change the height is really nice. The driftwood teak slim design in the other bathroom satisfies my desire to have a nicer look. I tend to use that bathroom more than my husband, and the 7″ height of that stool feels more comfortable for me. The slim stool is sturdy in design, even with the weight of a 220-pound man.
I also LOVE the idea of the Porta-Squatty, which folds up easily for travel. Since traveling is always more challenging for my hubby in terms of staying regular, I could see where this could really come in handy.
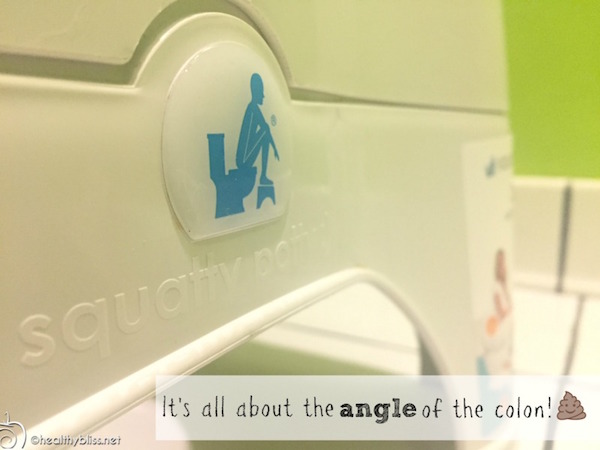
In the case of optimizing one’s poo, position does matter!
How to Improve Gut Health
In addition to getting the squat position right, there are other natural remedies that also help to keep things “moving”.
To improve gut health, you can:
- Increase fiber. Add 2 Tbsp. ground flaxseed to a green smoothie daily
- Take a daily probiotic, one at night before bed.
- Don’t overeat. Set regular mealtimes.
- Add fermented foods to your diet.
- Detox and/or colon cleanse once a year (at a minimum).
Finally…don’t forget to Listen to your Gut! Your body is giving you signals when things aren’t right. Stay in tune with how you feel. Heartburn, acid reflux, indigestion, gas, pain, bloating, constipation, diarrhea, and/or abdominal pain are all signs of imbalance. Pay attention when things aren’t working. The faster you make changes, the sooner you can feel better.
Read more on natural health and healing here:
What your Poop and Pee can tell you about Your Health
How to Do a Castor Oil Pack for Liver Cleansing
How to Do Onion Socks for Healing


For more on how to do a detox at home or how to navigate through your detox symptoms and start feeling great, book a personalized health consult with me via Skype.
How to Book Your Health & Nutritional Consultation:
1. Take photos of your eyes with a smart phone or digital camera.
2. Email the photos to me for approval.
3. We schedule a time to meet via phone or Skype!
More on Skin Cleansing:
- Food Containing Ribonucleotides – The Ribo Rash from Food Additives 635, 627 and 631
- 10 Detox Tips
- What’s the best detox retreat for raw food, yoga, juice & meditation in Thailand?
- Top 10 Tips for the Best Healthy Sunscreen
- Recipe for Raw Food Detox Salad: Cucumber & Onion with Tangy Dressing
More on Liver Cleansing:
- Recipe: Raw Food Healing ‘Jamu’ or ‘Love’ Juice from Indonesia
- What’s the best detox retreat for raw food, yoga, juice & meditation in Thailand?
- How to make a Castor Oil Pack for Healing, Pain Relief or Detox
- Feature Detoxification Organ: The Liver
- Healing Power of Onions: Can Onions absorb Bacteria, Viruses and Flu?


 Having what you need to heal naturally can save you a lot of unnecessary suffering. Don’t let your next business trip, holiday, romantic dinner, salad bar night or long-haul flight be ruined. Prepare yourself for travel or unexpected belly bugs by knowing what to do for food poisoning.


Follow Jennifer