Easy Recipe: Make organic pickles at home!

Are you ready to make your own fermented foods at home? (Answer: Yes!) Pickling cucumbers is a great start to build up your confidence with fermentation. And who doesn’t love a crisp tasty pickle on a hot summer day? You can have your pickles ready to eat in as little as 7 days with the easy recipe below.
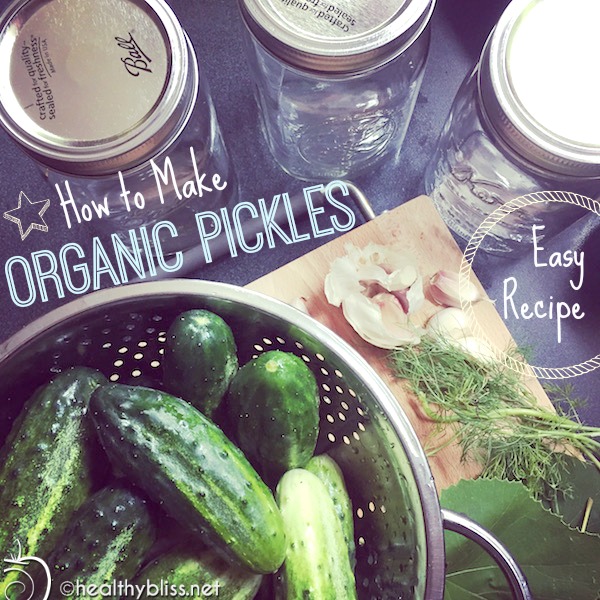
Use this fast and easy recipe to make delicious pickles at home

Health benefits of Fermented Foods

For optimal digestive health, we need to get good bacteria in the gut on a regular basis. Antibiotics destroy all the bacteria in our system, both good and bad. Over time, this can lead to more imbalance in digestion function, absorption and elimination. Some experts even say that food allergies, autism and ADHD may be related to an imbalance of bacteria in the colon. Certainly many digestive diseases like colitis, diverticulitis and Crohn’s disease are caused in part by lack of good bacteria in the gut. Having the right balance of good bacteria helps to strengthen immune system, improve digestive health and long-term, can even prevent dis-ease. Probiotic, or good bacteria, literally means “for life.”

You may think that fermented foods are only made with yeast (like beer or wine), but there are other cultures used for fermentation. Other types of natural bacteria are used as well as SCOBY’s (Symbiotic Culture of Bacteria and Yeast). With pickles, the natural bacteria on the skin of the cucumber itself is what’s used to start the “lacto fermentation” process.

Pickles are perfect to try if you’ve never done any type of fermentation before. You get relatively fast results (in 7 days), unlike kombucha, for example, that can take a few weeks. And there isn’t a lot of hard work involved or checking required, like in making raw sauerkraut. You should see bubbles rising in the pickle jars when you flip them every day, and when you eventually open the jar to eat them, the jar should make a “pop.” Then you know you’ve done everything correctly and can enjoy the fruits of your fermentation labor. Scroll down to get the recipe below.

Homemade pickles have no food additives!

There are other great reasons to eat homemade pickles instead of store-bought, besides the obvious better taste. Commercially sold pickles are pasteurized, which means all those beneficial natural probiotics are destroyed. Homemade pickles keep all the good bacteria intact, making for good gut health when eaten. A healthy microbiome is the basis for a strong and healthy immune system.

Store-bought pickles can also contain nasty food additives, the worst offender being Yellow #5. Banned in many countries (including all of Europe) since it was shown to be a carcinogen, Yellow #5, or tartrazine, is a coal-tar derivative. It is currently still allowed in foods in the USA. Yellow #5 is frequently used in your favorite brands of pickles for added color to make the pickles look brighter and fresher. Most store-bought pickles also contain preservatives, the most common one being sodium benzoate (not good).

Examples of Yellow #5 in pickles:

Vlasic: Hamburger Dill Chips Pickles – Cucumbers, Water, Distilled Vinegar, Salt, Sodium Benzoate (Preservatives), Calcium Chloride, Natural Flavor, Polysorbate 80, Yellow 5. “Great taste & crunch. Classic dill taste.” (No thanks!)

Vlasic Bread & Butter Spears No Sugar Added Pickles – Cucumbers, Water, Distilled Vinegar, Salt, Spice, Calcium Chloride, Sucralose, Yellow 5. “No sugar added!” (But you kept the carcinogens, great work.)

Mt. Olive Sweet Gherkins No Sugar Added Pickles – Cucumbers, Water, Vinegar, Salt, Calcium Chloride, 0.1% Sodium Benzoate (Preservative), Alum, Sucralose (Splenda Brand), Natural Flavors, Xanthan Gum, Polysorbate 80, & Yellow 5. “Mt. Olive Pickles are Picklicious!” (Don’t think so…)

Heinz Dill Spear Pickles – Fresh cucumbers, water, distilled white vinegar, salt, sodium benzoate, garlic extract, gum acacia, calcium chloride, natural flavoring, polysorbate 80, fd&c yellow 5. “Classic dill taste and crunch Heinz pickles are 100% fat free, Gluten free.” (But they contain chemical crap, hmmm…)

Organic brands of pickles are often no better. I’ve seen xantham gum, natural flavors, spices and agave syrup…all of which are suspect ingredients that I avoid as much as possible.

The bottom line is this: YOU deserve the very best in life and you are worth having only the very best ingredients in your food. Taking the time to make your own food is one of the best investments in yourself, your health and your family’s health.

High-five some hashtags to health!! #homemade #homegrown #farmtotable #organic #cleanfood #cleaneating

Choosing organic ingredients

The best part about making cucumbers at home is that you can use all 100% certified organic and whole food ingredients. Look for smaller sized pickling cucumbers at your local farmer’s market. You can also grow your own pickling cucumbers in your backyard garden at home – they’re actually very easy to grow! Choose fresh organic dill. And definitely use organic garlic. (Non-organic garlic is mostly all grown in China, so the quality is a big unknown. But I find that non-organic garlic has a too strong and overpowering taste; whereas organic garlic has a soft yet flavorful and more delicate taste. Organic garlic also doesn’t leave a bad taste in your mouth or a bad smell on your skin.)

The water you add to your pickle jars should not contain any chlorine, because chlorine can stop the natural fermentation process. The best option is to use natural spring water or clean well water. If you are using tap water, then be sure to pour your water into a big pot or glass bowl and let it sit out on the counter overnight before using. This should off-gas the chlorine so it’s no longer in the water by the next morning. (If you’ve ever had pet fish, then you’re familiar with doing this when changing their tank water.)

Remember to cut off the blossom ends!

When you’re pickling cucumbers yourself, you must cut off the blossom ends. There’s an enzyme in the blossom that can make the pickle soft and unsafe to eat. The blossom end also tastes bitter when you eat a raw cucumber. That bitter taste can make an entire juice or smoothie taste bitter too, so it’s generally just a good practice to always cut off about 1/16-inch on the blossom end of all your cucumbers. In fermentation, cutting the blossom ends will help your pickles get more crisp and crunchy.
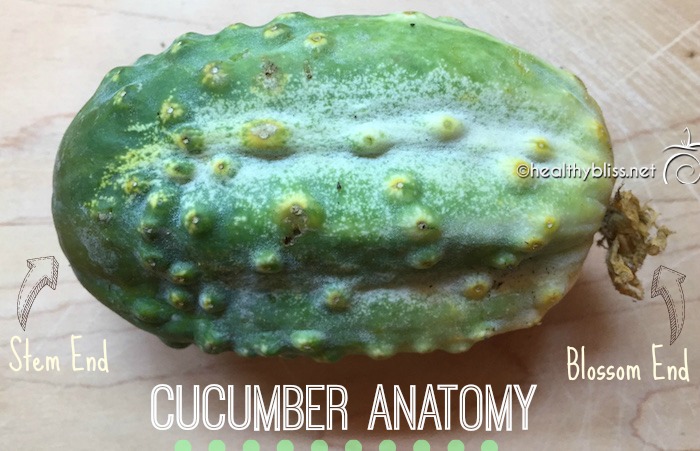
Every cucumber has 2 ends: A Blossom end and a Stem end

The blossom end of the cucumber is the end that grew the flower. The opposite side is where you will find the stem that connected the cucumber to the vine. Sometimes it’s easier to identify the stem end first. Then, you know that the other side is the blossom end.

Which end is the blossom end of the cucumber? To identify the blossom end, check both sides of your cucumber.

The picture below shows the stem end of the cucumbers. Do you see the smooth, indented dot? That’s where the cucumber was picked off the stem.
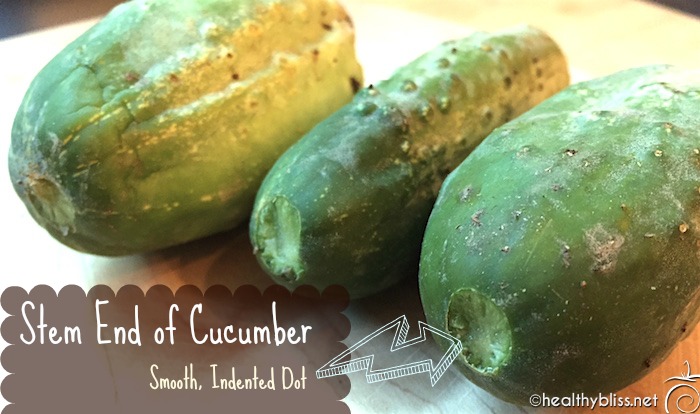
The stem end has a smooth, indented dot

The next picture shows the blossom end of the cucumbers. Even though the flower is gone, you can see that there is no indentation. This is the side that you want to cut about 1/16-inch off.

Note there is no indentation in the Blossom end of the cucumber
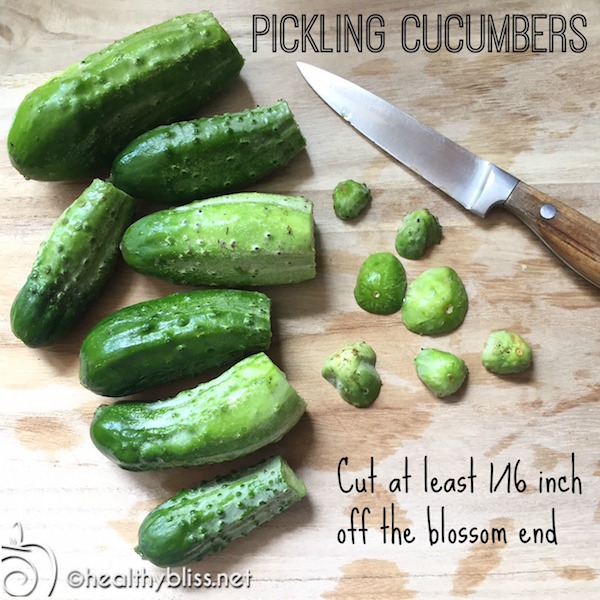
Don’t forget to cut those blossom ends for a crunchy, crispy pickle

Recipe for Organic Pickles

With this recipe, the pickles take 7 days to ferment and then you’ve got the best tastiest pickles ever! No sugar, no honey, no preservatives and no cancer-causing Yellow #5. Oh yeah, and these are 100% organic farm-to-table and made with love!

Pickling Ingredients

  • Pickling cucumbers (approx. 6-8 small cucumbers needed for each jar)
  • 1 1/2 cups (or 360ml) filtered water
  • 1/2 cup (or 120ml) organic raw apple cider vinegar
  • 1 tsp. – 1 Tbsp. fine Himalayan salt (as desired)
  • 1/2 tsp. organic crushed red pepper flakes
  • 1/4 tsp. organic mustard seeds
  • 1/2 tsp. organic back peppercorns
  • 1 sprig fresh organic dill
  • 2 organic garlic cloves (peeled)
  • 2 organic fresh grape leaves* (optional)
    You can buy the organic dried ingredients listed above on iherb.comAlso will need:- Wide mouth clean Mason jars with canning lids
    – 1 permanent marker
    You can buy Mason jars plus organic raw apple cider vinegar on amazon.com

Pickling Instructions

1. In a glass bowl, mix 1/2 cup organic raw apple cider vinegar + 1.5 cups water.
Add peppercorns, red pepper flakes, mustard seed, and up to 1T Himalayan salt.

2. Rinse your cucumbers but don’t scrub them. You want them to ferment from natural bacteria in the skins. Make sure you cut 1/16-inch from the blossom ends of each cucumber, then slice the cucumbers in spears. You want to keep the skins intact (do NOT peel the cucumbers), so the good bacteria in the skins can kick off the lacto-fermentation process.

3. Add 2 organic garlic cloves, fresh dill, and 1 grape leaf to the bottom of the Mason jar. Stack in chopped cucs and pack tightly. Add liquid and spices. Add another grape leaf to the top before closing. Secure the lid tight by hand. Write the date on the lid with a permanent marker.

4. Place the jar on a tray or plate on a shelf or counter-top. Flip the jar once daily for 7 days. Sometimes liquid may seep out of the jar, which is why having a tray or plate underneath is a good idea. You should see small bubbles rising in the pickle juice when you flip the jar. And that’s the fermentation happening right there!

5. After one week, put the jar in the fridge. Now, you can open, eat and enjoy!
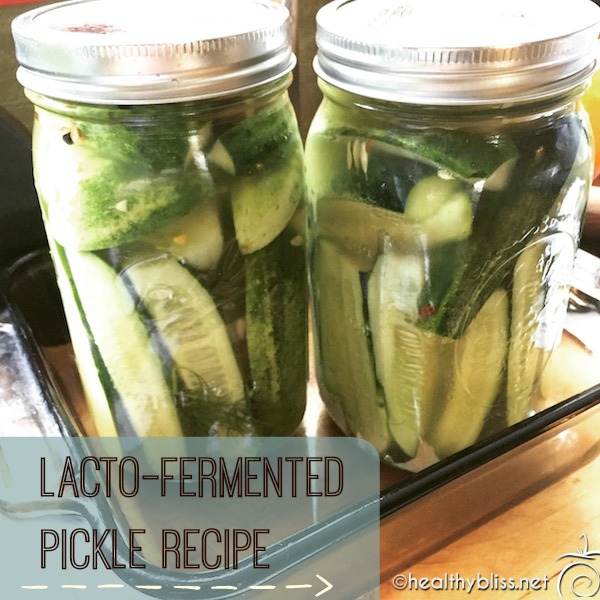
Store pickles in a tray or glass container to prevent spillage during 7 days of flipping once daily

*Fresh grapes leaves are recommended because they’re supposed to help keep the pickles more crisp and crunchy. I don’t know if they are totally necessary or not, but because we have plenty of wild organic muscadine grape vines growing all over our land, it’s no problem for me to pick a few leaves and add them to each jar. Sometimes in summer, you can find fresh grapes leaves for sale at local farmer markets. If you don’t have access to fresh grape leaves, don’t be discouraged. You can still make this recipe without them!

Homemade Pickle Eat-by Date

Using the above recipe, there is no canning or heating required. That’s nice because it keeps the cucs as a raw food, with all the enzymes intact. But, because they are not totally sealed the way canning or heating will do, these pickles should be eaten with 3 months of making them. Just keep that in mind if you give them to family or friends. After 3 months the pickles may turn soft or watery. If you see that, then it’s best to toss them in the compost bin. Writing the date on the lid of each jar helps to know how long to keep them.

My Pickle Detox/Cleanse

Last summer, we had so many cucumbers from our organic veggie garden that I was making 2 jars of pickles per day! By mid-August, we were up to our ears in pickles and the fridge was almost full. I had been planning to do a 7-10 day green juice fast as a nice transition from the end of summer into fall. But when I looked at all the pickles, I said to my husband, “Why don’t we just do a pickle detox and eat only organic pickles for 10 days?” So we did!

On average, we each ate about 1.5 jars of pickles per day and we drank all the pickle juice too. We also drank plenty of water in between. It was totally unplanned and un-researched. But it turned out great. We both felt energized. Our guts got a major boost of probiotics from the lacto fermentation and the organic raw apple cider vinegar. We had a mini-parasite cleanse from eating so many fermented garlic cloves. The pickles were cold and refreshing during the hot summer days. We had high energy and slept great. The was no juicer to clean! And we used organic clean food fresh from our garden. This year, we may do a 3-day pickle cleanse and go into green juices after that. I’ve got plenty of organic dandelion, celery and parsley that I’d love to use in juices or smoothies so we’ll see….!


For more on how to do a detox at home or how to navigate through your detox symptoms and start feeling great, book a personalized health consult with me via Skype.

How to Book Your Health & Nutritional Consultation:

1. Take photos of your eyes with a smart phone or digital camera.
2. Email the photos to me for approval.
3. We schedule a time to meet via phone or Skype!

The last time I got sick was…

Wait, really?! Is it actually possible to still get sick when you are eating high organic raw food and doing regular detox? If you thought that was Mission Impossible, then I welcome you to the land of being human! 🙂

All information in this article is for educational purposes only.
It is not for the diagnosis, treatment, prescription or cure of any disease or health condition.

Truth be told, I almost never get sick. In fact, I am seriously amazed to hear how often our “normal” meat, processed and/or fast-food eating friends or family members get side-lined with fevers, colds, coughs, and flus. (Those are the same people who make fun of my “extreme” diet and (wheat)grass-eating habits by the way.)

Without a doubt, eating an alkaline plant-based diet is a natural way to boost your immune system and the best way to prevent illness. But, it doesn’t mean that you will never, ever, ever get sick again.

The last time I got sick was…

A few months ago. We had just had several days of winter rain in Tel Aviv, and my boyfriend caught a cold from a co-worker at the office. He managed to keep it at the status of a cold for a few days, but then it turned to a high-mucous flu-like illness with fever. I felt so bad for him! I gave him Grapefruit Seed Extract (GSE) and made fresh orange juice with organic turmeric and green smoothies with lots of fresh fruits to high-boost his Vitamin C. We slept in separate bedrooms so he could rest and I would lower my chance of getting sick. By the 6th day, he was back to normal and I remember saying, “Wow, I am amazed that I didn’t catch it!” That night, we slept together again and he kissed me goodnight for the first time in 6 days.

The next day, I woke up sick!! It happened that fast. I felt stuffy, exhausted and slightly feverish and I thought….man, I can’t even remember the last time I had the flu! In my case, it lasted only 3 days. I basically just surrendered myself and rested. I took GSE and drank lots of fresh ginger tea. I envisioned my immune system getting stronger by the day. 3 days later, I was up and running again.

Are you a failure if you get sick?

Is doing all this detox, immune boosting and healthy eating a waste of time if you’re just going to get sick like everybody else? First, I would say…don’t throw all sickness into one basket. There’s a big difference between someone who gets sick every 3-5 YEARS (or more) and someone who get sick 3-5 times PER YEAR.

And most definitely, there is no such thing as a failure in my book. In fact, every illness can be a gift…a chance to slow down, rest and let your immune system get stronger. It’s also an opportunity to truly appreciate your health. You also may actually need an occasional cold, cough or flu to upgrade your gut health and immune-boosting capabilities.

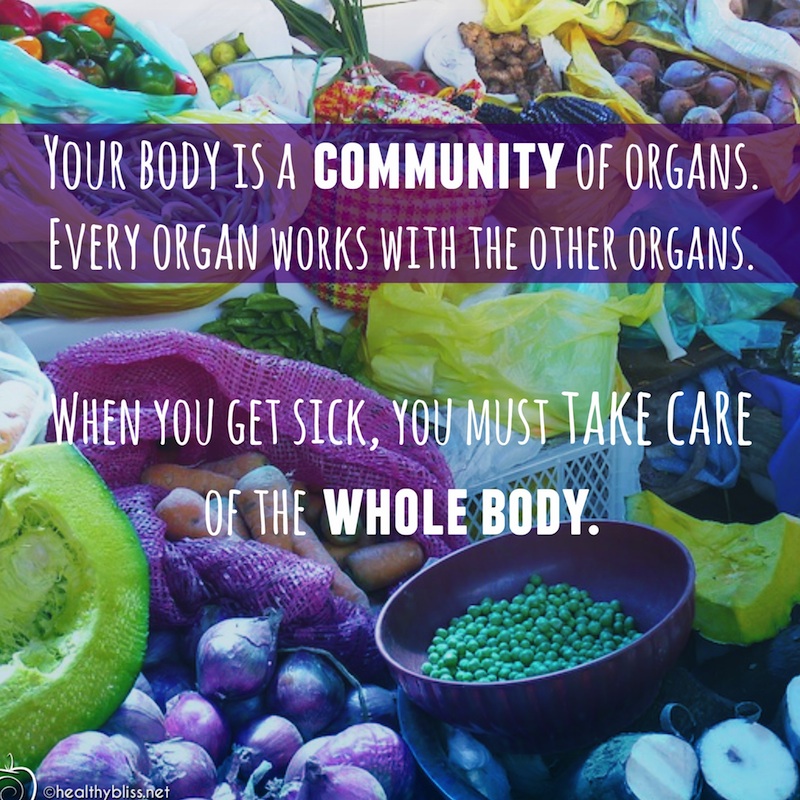
Your body is a community!

What did I do wrong?

I guess I could say that kissing my boyfriend while he was still sick was a mistake…but in reality, I think the real cause of me getting sick was simply being run-down after months of a lot of deadlines and excess work. Stress alone can make your entire body acidic, even when eating an alkaline diet! I’m definitely a believer in the power of positive thinking and how important that is for your physical health! In that time, I also stopped making fermented foods such as kombucha and raw sauerkraut, which I feel are even more important for boosting your immune system than anything else!

Within 1 week of feeling better, I was back to making batches of kombucha and raw sauerkraut at home. I also drank more lemon and/or raw apple cider vinegar in water, at least twice daily. I started taking 1.5 days off a week and made more effort to stay offline for that time, giving my body and mind time to rest. De-stressing is very important for me (and for you too!).

Combining that with my normal routine of green smoothies, green juice, fresh wheatgrass shots for chlorophyll and minerals and lots of variety in my organic fruits and veggies and I now feel like a superstar again 🙂 Seriously though, I have high energy: I feel balanced; and I like who I see in the mirror every day!

When I look to my body for healing, I understand that I need to strengthen and heal my body as a whole.

How to Boost Your Immune System

Here are some foods/supplements that can help your immune system stay strong:

1. Manuka Honey (great to have on-hand in winter months, note this is not vegan)

2. Echinacea and Goldenseal (a powerful combo for breaking up stagnant lymph, i.e. mucous)

3. Grapefruit Seed Extract (my go-to remedy with the first sign of cold, cough or flu)

4. Pomegranate (can add to a green smoothie in powder form)

5. Raw apple cider vinegar (a healing food since the time of Hippocrates)

Looking to buy an immune-boosting bundle? You can find all of the above items on iherb.com, and yes they ship internationally!

Whole Body Healing


More on Motivation:

More on Fermented Foods:

More on Healthy Living:

Raw Detox Salad Recipe

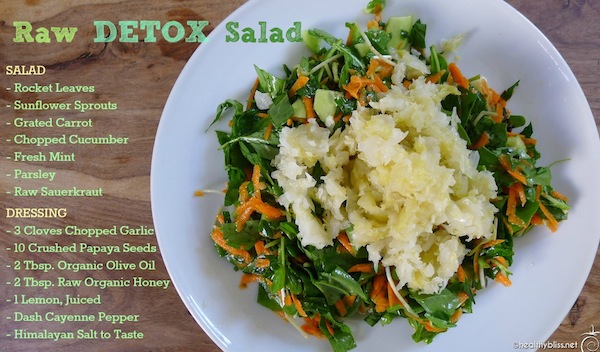
Eating raw organic food can be so much fun! Check out this gorgeous salad that took only a few minutes to prepare…and it’s full of detox foods to make it a mini-cleansing meal!

Use the healing power of raw foods to create a fantastic detox salad

For the salad add: Chopped rocket leaves, grated carrot, chopped cucumber, fresh mint, parsley, sunflower seeds and top with homemade raw sauerkraut. If you can’t find rocket leaves, then just use fresh chopped spinach or romaine lettuce.

Make the dressing with: Chopped garlic, crushed papaya seeds, extra virgin olive oil, raw organic honey (optional), fresh lemon, a dash of cayenne pepper and Himalayan salt to taste. The papaya seeds should be fresh, from a ripe papaya. I usually set aside some papaya seeds after eating the papaya. Store the seeds in a small jar in the fridge for up to one week. Use a few seeds each time you make this recipe.

What makes this a DETOX salad?

  • Fresh parsley: Kidney cleanse
  • Cayenne, olive oil & lemon: Liver cleanse
  • Garlic & papaya seeds: Anti-parasitic foods (kills germs)
  • Sauerkraut: Natural probiotic (good bacteria)
  • Rocket & cucumber: Skin cleanse
  • Sunflower seeds: Good for glandular system
  • Raw honey: Immune booster
  • Fiber: Colon cleanse

Let Your Food be Your Medicine…..Wow, it’s really true!

Click here to learn how to make fermented cabbage and raw sauerkraut. In a temperate climate, it takes as little as 4 days!

What is DETOX?

The highly refined foods that you eat every day, including sugar and white flour, make you susceptible to intestinal problems, and possible diseases. The average diet today is heavily loaded with chemical additives, flavorings, coloring agents, toxic pesticides, herbicides, fungicides, and other toxic chemicals which overburden our bodies. Add to that work and family-related stress, indigestion, illnesses, constipation and sedentary lifestyles, and you have a recipe for an unhealthy colon and an overweight and tired body. Many health conditions are caused by the combination of processed foods, low fiber diets and poor evacuation of waste.

Periods of abstinence from solid food – a ritual performed since ancient times – can allow the body to “cleanse and purify” or “detox”, that is, to remove toxins, excess fat and even parasites caused by years of ingesting processed food, excess food, refined sugar and wheat and even fast food that eventually impairs the normal functioning and our body’s elimination.

During fasting, large amounts of these accumulated metabolic wastes and poisons are eliminated through the cleansing ability of all the organs of elimination – the colon, liver, kidneys, lungs and skin.

Eating more detox foods in your regular diet is a way to have a “mini-cleanse” on a regular basis and that helps the elimination organs keep us with their daily housework. Eat a detox salad for lunch instead of pizza or Chinese food and you will have better digestion, less headaches or insomnia, improve your skin and increase energy levels, simply by choosing better fuel for your body. A raw food diet is a detox on its own. You can continue for 1, 3 or 7 days on a 100% low fat raw food diet as a way to really give the body a good natural cleanse from the inside-out.

For more on how to start a raw food diet, how to do a detox at home or what minerals you may specifically be deficient in, book a private health consult with me via Skype.

How to Book Your Health Coaching Session:

1. Take photos of your eyes with a digital camera.
2. Email the photos to me for approval.
3. We schedule a time to meet!

More on Raw Food:

How to Ferment Cabbage and Make Raw Sauerkraut

If you think that eating more fresh, natural raw food in your diet is too expensive, then this recipe is definitely for you! Making fermented foods at home is one of the most inexpensive ways to enjoy raw food. For optimal digestive health, we need to get good bacteria in gut on a regular basis. Antibiotics destroy all the bacteria in our system, both good and bad. Over time, this can lead to more imbalance in digestion function, absorption and elimination. Some experts even say that food allergies, autism and ADHD may be related to an imbalance of bacteria in the colon. Certainly many digestive diseases like colitis, diverticulitis and Crohn’s disease are caused in part by lack of good bacteria in the gut. Having the right balance of good bacteria helps to strengthen immune system, improve digestive health and long-term, can even prevent dis-ease. Probiotic, or good bacteria, literally means “for life.”

All information in this article is for educational purposes only.
It is not for the diagnosis, treatment, prescription or cure of any disease or health condition.

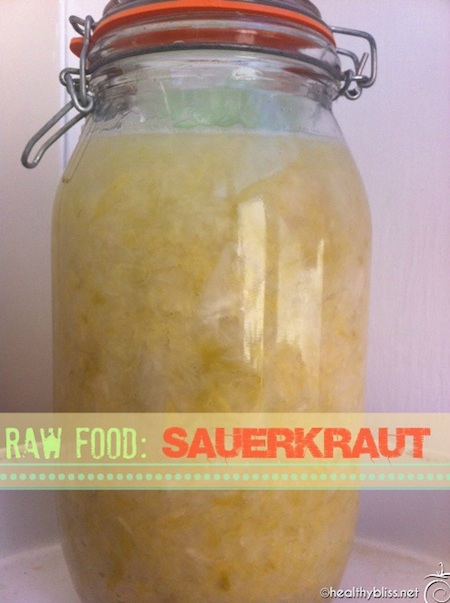
How to Make Raw Sauerkraut at home, a healthy naturally fermented food

How can we get good bacteria or “probiotics” back in the gut? The Western diet has virtually eliminated all traditionally fermented foods out of the diet, with the exception of yogurt. Store-bought yogurt is pasteurized, and usually contains added sugar, flavor and colorings. It’s also not a suitable option for vegans, and it’s expensive! Nowadays you will see Kombucha drink as a fermented raw food vegan option. Kombucha is fantastic, but it is also expensive at $6.00 per bottle. You may see sauerkraut for sale in supermarkets, but it’s already been pasteurized, so virtually all of the good bacteria has already been destroyed.

Not to worry! If you have just a few heads of cabbage, some salt and a few jars, you can easily make your own raw sauerkraut at home! It’s so easy to make that you will be wondering why you didn’t make it sooner! Cabbage is not expensive, and once the sauerkraut is made, you only need to add about 2 Tbsp. per day to your salad or veggies to get the good bacteria that your body needs. At that rate, 2 heads of cabbage could easily last up to 2 weeks for a family of 4. That’s some healthy savings!

What You Need: Raw cabbage, salt, a grater and jars

How to Make Homemade Raw Sauerkraut

Raw Sauerkraut: Ingredients

  • 2 medium-large organic green cabbage heads (or purple cabbage)
  • 1-1.5 Tablespoons Himalayan Salt or Pure Sea Salt
  • 1 Tablespoon caraway and/or mustard seeds (optional)
  • 2-3 sprigs fresh dill (optional)
  • 2 organic carrots (optional)

Raw Sauerkraut: Equipment

  • Grater or Mandolin
  • Cutting Board and Knife
  • Large Mixing bowl
  • Wooden Mallet (optional)
  • Large widemouth canning jar (or extra large mason jars)
  • Small glass baby-food jar or small glass cup to fit inside the larger jar
  • Clean rock or other weights to fit inside the small jar (to weigh down the cabbage)
  • Old t-shirt or towel for covering the jar
  • Large plate to catch any overspill

Instructions

Clean all materials before starting. Fermentation can be a sensitive process, and if there is any soap residue in your jars or hand cream chemicals on your hands, the fermenting might not work. I prefer to wash everything with a 50/50 mix of tap water and boiled water. For safety reasons, I do not recommend using 100% boiled water. Be careful not to rinse your jars with only boiling water because the glass can crack. Add tap water first, then some boiled water. Swish everything around and rinse. Wash your hands well with clean water and no soap.

Shred the Cabbage. Peel off the leaves of the cabbage and set them aside for later. Grate the cabbage on the large grate side of the grater or use a mandolin to shred the cabbage. Be sure to use the safety mechanism on the mandolin!

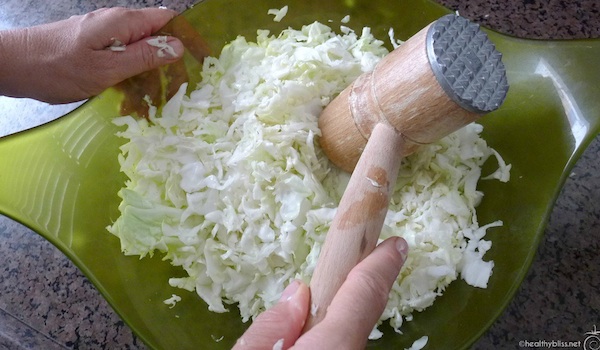
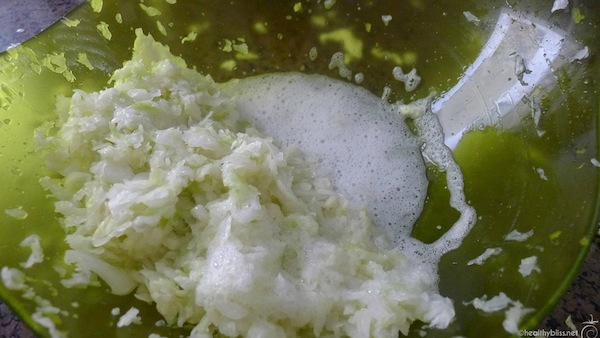
Combine Cabbage and Salt. Place the shredded cabbage to a large bowl and sprinkle some of the salt over top. If you have a wooden mallet, then start pounding the cabbage. If using only hands, then begin massaging and squeezing the cabbage with your hands. In just a few minutes, you should start to see the cabbage becoming watery and limp – this is a good sign! You can add some shredded carrot at this stage too (optional).

Making Raw Sauerkraut: Use a wooden mallet and pound away!

Add the salt. Then start squeezing by hand…

As you squeeze the cabbage, it will start to soften and you should see liquid/water. Put the liquid and cabbage in a glass jar for fermenting, pushing out any air bubbles. You can also add fresh dill, whole mustard seeds or caraway seeds for flavor.

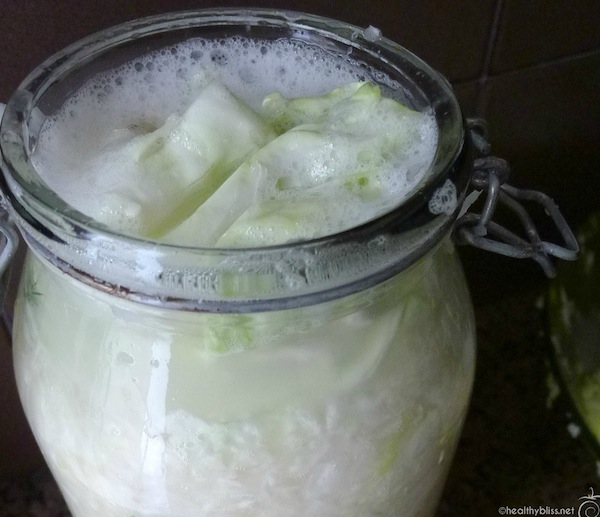
Pack Cabbage and Liquid into Jar. Use your hands to pack the cabbage into the jar, pressing out any air bubbles each time you add more. At this stage, you can add some fresh dill, caraway seeds or mustard seeds for flavor. Pour any excess liquid from the cabbage into the jar. When the jar is nearly full, place a few of the larger outer leaves to cover the surface of the sauerkraut. This helps keep the cabbage submerged.

Gently press out air bubbles. Place some large cabbage leaves on top and be sure that your cabbage is all covered by the liquid. If necessary, add a small amount of water to cover the cabbage.

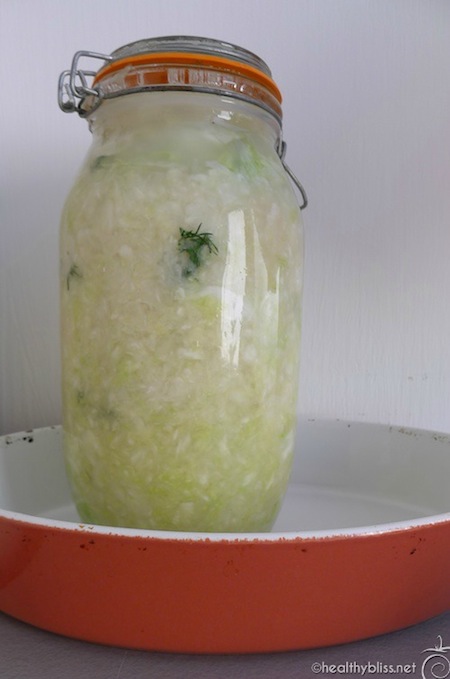
Cover the Jar. Place your filled jar on a dish, cover it with an old t-shirt or towel and put it in a quiet place to happily start fermenting. Ideally, your jar will be on top on a cabinet or on a table where it will not be disturbed. The best place is away from direct sunlight and at a cool room temperature — ideally 65°F to 75°F.

Place your sauerkraut on a dish or in a large bowl. Usually there will be liquid coming out of the jar as it ferments; this way any liquid escaping is caught and will not make a mess.

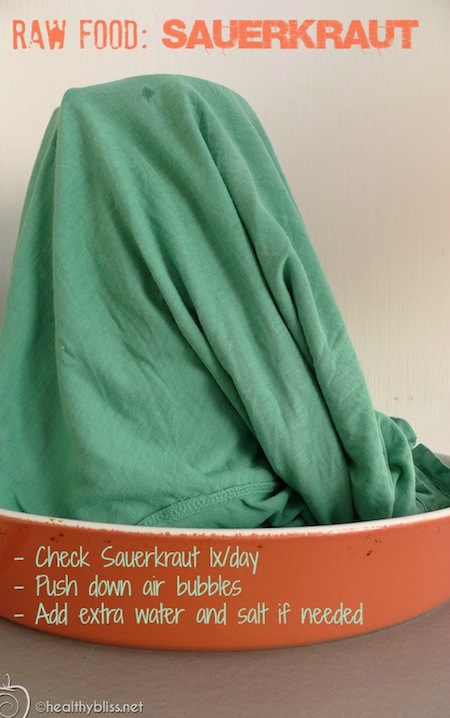
Finally, cover your sauerkraut with a towel or old t-shirt and keep it undisturbed. Check once a day, pushing out air bubbles and adding more water if needed. It should be ready in about 4 days.

Check Daily. Once a day, be sure to check your cabbage. Open the lid and push down the cabbage to release any air bubbles. If necessary, add a small amount of additional water and salt. By the 2nd day, the cabbage has usually been pressed down enough that there is some extra space in the jar. At that point, add the small baby-food jar or glass cup with rock inside to keep the cabbage submerged under water.

Taste after 4 days. Small batches of sauerkraut like this can be finished in as little as 4 days. On the 4th day, taste your cabbage. If you’re happy with the results, you can transfer your sauerkraut to the fridge where it will continue to ferment, although much more slowly. You can also keep it out to ferment for up to another 10 days, but you must check it every day, press out any air bubbles and add additional water and salt if necessary.

Note: It’s normal to see air bubbles coming through the cabbage during fermentation. When you press them down daily, you are eliminating the air space between the cabbage. In some cases if you forget a day, you may start to see mold, dark scum or smell a bad odor from the cabbage. If the scum can be skimmed off, then it’s ok to do so. If there is a bad smell or visible mold, I recommend to throw out the batch and start over.

When your sauerkraut is ready, put the large container in the fridge or transfer the sauerkraut to smaller jars and then refrigerate. Raw sauerkraut is a fermented product and will stay fresh for a few months. Once you open a jar and start eating it, it’s best to consume the sauerkraut within 30 days.

After 4 days, start tasting your batch. When you like the taste, you can transfer to smaller jars to put in fridge…or share with family and friends!

Making Large Batches of Sauerkraut

You can make much larger batches of sauerkraut in a ceramic fermentation crock, but the crocks are very expensive. It’s probably a good idea to try fermenting in glass mason jars first and see if you actually enjoy eating sauerkraut before making the investment in a crock. (One benefit of the large crock is that you don’t have to check it daily. The weights in the crock keep the air bubbles out.) Over time, if you find you want to make larger batches, then definitely consider making the leap.

How is Sauerkraut Fermented?

Raw sauerkraut is made by a process called lacto-fermentation. We can ferment cabbage thanks to the good bacteria that naturally exist on the surface of the cabbage leaves (and many other veggies too). Food becomes fermented when the “good” lactobacilli bacteria convert their sugars and starches into lactic acid. This is a natural preservative that inhibits the growth of harmful bacteria. The lactic acid also promotes the growth of healthy flora throughout the intestine. Sauerkraut contains high levels of glucosinolates. These compounds have been shown to have anti-cancer activity.

The diets of every traditional culture have included some kind of lacto-fermented food. Kimchi from Korea and cortido from Latin America are 2 examples of traditionally fermented vegetables made from lacto-fermentation. In Europe, people fermented sauerkraut, grape leaves, herbs, and root vegetables. Lacto-fermented veggies are nutrient-dense, enzyme rich, a raw food, vegan, vegetarian and gluten-free. And they taste yummy too! Fermented cabbage is one of my favorite foods for a mini-daily detox and a balanced raw food diet!

More on Fermented Foods:

Benefits of Raw Apple Cider Vinegar

Raw Apple Cider Vinegar (or ACV for short) is one of those amazing healing foods that has lived up to its health benefits for almost 2,000 years. I always say, look at the ‘tried and true’ if you are looking to add better staple foods to your diet. I’d say a 2,000 year success rate is pretty good, don’t you think?!

All information in this article is for educational purposes only.
It is not for the diagnosis, treatment, prescription or cure of any disease or health condition.

Raw Apple Cider Vinegar (ACV) is a Raw Food!

First of all raw ACV should be raw and that means unpasteurized. It should say on the label ‘raw’ or ‘from the Mother.’ Household brand names of ACV like Heinz are not raw. It’s the fermented or raw ACV that is so good for you so be sure to buy the right one. My favorite brand is the Bragg’s Raw Apple Cider Vinegar. Raw ACV is the only vinegar that is alkaline-forming to the body. All other vinegars (white, balsamic, red wine, etc) are acid-forming. For a health balanced pH, raw apple cider vinegar is one of the best things to add to your diet. To understand more about acid and alkaline pH, read this article: ‘Alkalize Your pH – How Alkaline Acid Balance affects your Health’.

According to Paul Bragg, Apple Cider Vinegar is a ‘perfect food’:

Natural (undistilled) organic, raw ACV can really be called one of Mother Nature’s most perfect foods, the worlds first natural medicine. It is made from fresh, crushed apples which are then allowed to mature naturally in wooden barrels, as wood tends to “boost” the natural fermentation. Research worldwide supports and commends what Hippocrates (the father of medicine) found and treated his patients with in 400 B.C. He discovered that natural, undistilled Apple Cider Vinegar (or ACV)* is a powerful cleansing and healing elixir – a naturally occurring antibiotic and antiseptic that fights germs, bacteria, mold and viruses – for a healthier, stronger, longer life!

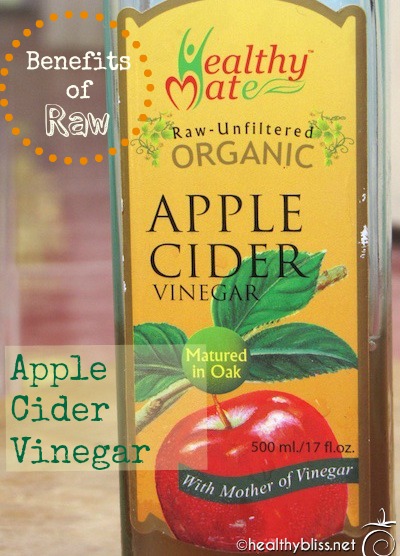
Label reads ‘With Mother of Vinegar’

One of the benefits of having raw ACV every day is it is a naturally high source of potassium and enzymes. Many people link potassium deficiency to dark circles under the eyes, early senility, chronic fatigue, high blood pressure, arterial and heart problems, arthritis, kidney stones, irritable bowel syndrome and Crohn’s disease. Signs of potassium deficiency include fatigue, achy bones and muscles, tired eyes, itchy eyes, dry scalp and brittle hair and lack of mental alertness.

Paul Bragg says, “But the truth is . . . you must have potassium to build and maintain youthful, healthy tissues! If you don’t get required amount of potassium daily, you soon acquire an old-age look and feel.This premature ageing is usually due to potassium deficiency and unhealthy living!”

Can you see how a healthy diet is really the key to feeling better?

With the standard diet of devitalized foods that clog the small intestine and ferment, leaving backup and buildup, most people have a much lower absorption rate than normal. The reason why raw apple cider vinegar is a good source of potassium is because, in liquid form, it is almost instantly and fully absorbed.

Available Online, Click Here

You can even gargle with raw ACV (1tsp. to 1/2 glass of water) to help clear a sore throat, naturally! It is also good for insect stings, bites, ear infections, acne, viruses, yeast (candida) and fungus problems. You can apply a watered-down solution directly to the infected area and also drink 2 Tbsp. of raw ACV in a glass of water both morning and night.

To improve digestion, gas, heartburn, burping and stomach bloating sip 3 tsp. of ACV before your meal. Hold in mouth for a minute before swallowing. This helps digestion to start in the mouth.

On a daily basis, try to have at least 2 Tbsp. of raw Apple Cider Vinegar to keep your body healthy and strong. You can mix 2 Tbsp. with water and drink upon rising, add the ACV to a juice or smoothie, or make a delicious salad dressing.

For a salad dressings try this recipe:

Mix 2 garlic cloves (chopped), 2 Tbsp. ACV, 2 Tbsp. extra virgin olive oil, 1 Tbsp. raw organic honey, 1 Tbsp. fresh lemon juice, 1/3 cup water, 1 tsp. dried basil leaves, dash cayenne pepper, dash cumin powder and Himalayan salt to taste.

For more information on the healing power of ACV, I highly recommend the book Apple Cider Vinegar Miracle Health System by Paul and Patricia Bragg.

A good brand of ACV to try for yourself is the Bragg’s Organic Raw Apple Cider Vinegar.

Read more information on the liver and liver cleansing here:

Gallstone Liver Flush – Recipe & Cleanse Info

How to Do a Coffee Enema at Home

How to Do a Castor Oil Pack for Liver Cleansing

How to Do Onion Socks for Healing

More on Skin Cleansing:

How to Make Kombucha, a Naturally Fermented Health Drink

Kombucha is considered to be a health drink because it contains natural bacterias that can help replenish the bacterial balance in the colon. The kombucha itself is the yeast/bacteria combination which is formed into what is called a ‘SCOBY’ or Symbiotic Colony of Yeast and Bacteria. The SCOBY looks like a slimy pancake; some people refer to it as the ‘mother.’

All information in this article is for educational purposes only.
It is not for the diagnosis, treatment, prescription or cure of any disease or health condition.

GT Kombucha

The ‘mother’ kombucha culture is what is used to make your own kombucha batches at home, in the same way that people brew their own beer. The kombucha drink will also become ‘fizzy’ when fermented, but the alcohol content is extremely minimal.

You can start your own kombucha culture by buying a container of GT Kombucha Drink from any WholeFoods store. Drink enough of the liquid to leave about 1/4 inside the glass; leave out at room temperature with the cap off but covered in cloth. In about one week, you will see your very own SCOBY pancake floating on top and you are ready to start fermenting!

All of the details on how to make your own Kombucha at home are detailed in the above video, filmed at my friend’s organic farm in Maui, Hawaii. Here is a brief set of directions which I received when I purchased my SCOBY online through Dom’s Kefir Grains:

Directions for Kombucha:

1. Prepare tea with 4 teaspoons of conventional loose tea or 4 teabags in 4 cups of boiling water. Steep for 5 minutes. (Green tea, black tea or a combination is suitable).

2. Strain tea in an 8-cup glass jar and dissolve 1/3 cups sugar (either raw sugar or organic refined white sugar).

3. Let sweetened tea cool to room temperature, then pour kombucha ‘mother’ with the solution in which she was stored.

4. Place a clean cloth or paper napkin over the mouth of the jar and secure in place with an elastic rubber band.

5. Ferment, leaving undisturbed, for 7-12 days at room temperature range of 19C – 25C (66F – 79F).

6. Strain kombucha tea and repeat the whole process.

As for how much kombucha to drink daily to enjoy it’s health benefits, I would recommend about 1-2 cups per day or 250ml- 500ml daily. It’s a nice refreshing drink to enjoy on a hot day, and the natural bacteria will help with digestion and even can help stimulate the bowels, thus avoiding constipation. Kombucha can help lessen any overgrowth of candida and is good for anyone suffering from intestinal parasites. If you are addicted to pop or soft drinks, and are looking for a fizzy drink that is still considered healthy, kombucha is the drink for you.

More Healthy Recipes:

SaveSave